User Management Guide: Add and Invite Users to Telemetry2U
Learn how to create and manage new users in Telemetry2U with this practical guide. We'll cover assigning user roles, restricting node access, and configuring alert group notifications for Email, SMS, and voice calls—everything you need to control platform access securely.
Managing User Access and Permissions in Telemetry2U
This example guides you through the process of inviting a new user to your existing Telemetry2U account. You'll learn how to configure their user role, restrict access to specific nodes, and add them to an alert group for notifications via Email, SMS, or voice call.
In this walkthrough, we’ll set up a user with standard permissions—meaning they cannot invite other users or make changes to system-critical settings such as alert rules, node configurations, or gateway details.
As a Company Administrator, you can customise each user’s access level and permissions based on your organisational needs.
What You’ll Need Before Getting Started
- An active Telemetry2U account (either a free trial or a paid subscription). For a quick setup, refer to the T2U Quick Guide.
- Company Administrator access. If you don’t currently have this role, contact your company administrator to request permission.
Creating and Inviting a New User to Your Telemetry2U Account
Step-by-Step Guide to Adding a New User
To begin, log in to Telemetry2U and navigate to Admin >> User Maintenance. Click the Create New button in the top left corner to open the user configuration page.
At a minimum, enter the following details for the new user:
- User Login Email
- First Name
- Last Name
- Date/Time Format
- Time Zone
Note:
Phone numbers should be entered in international format (e.g., +61xxxxxxxxx).
All other fields are optional.
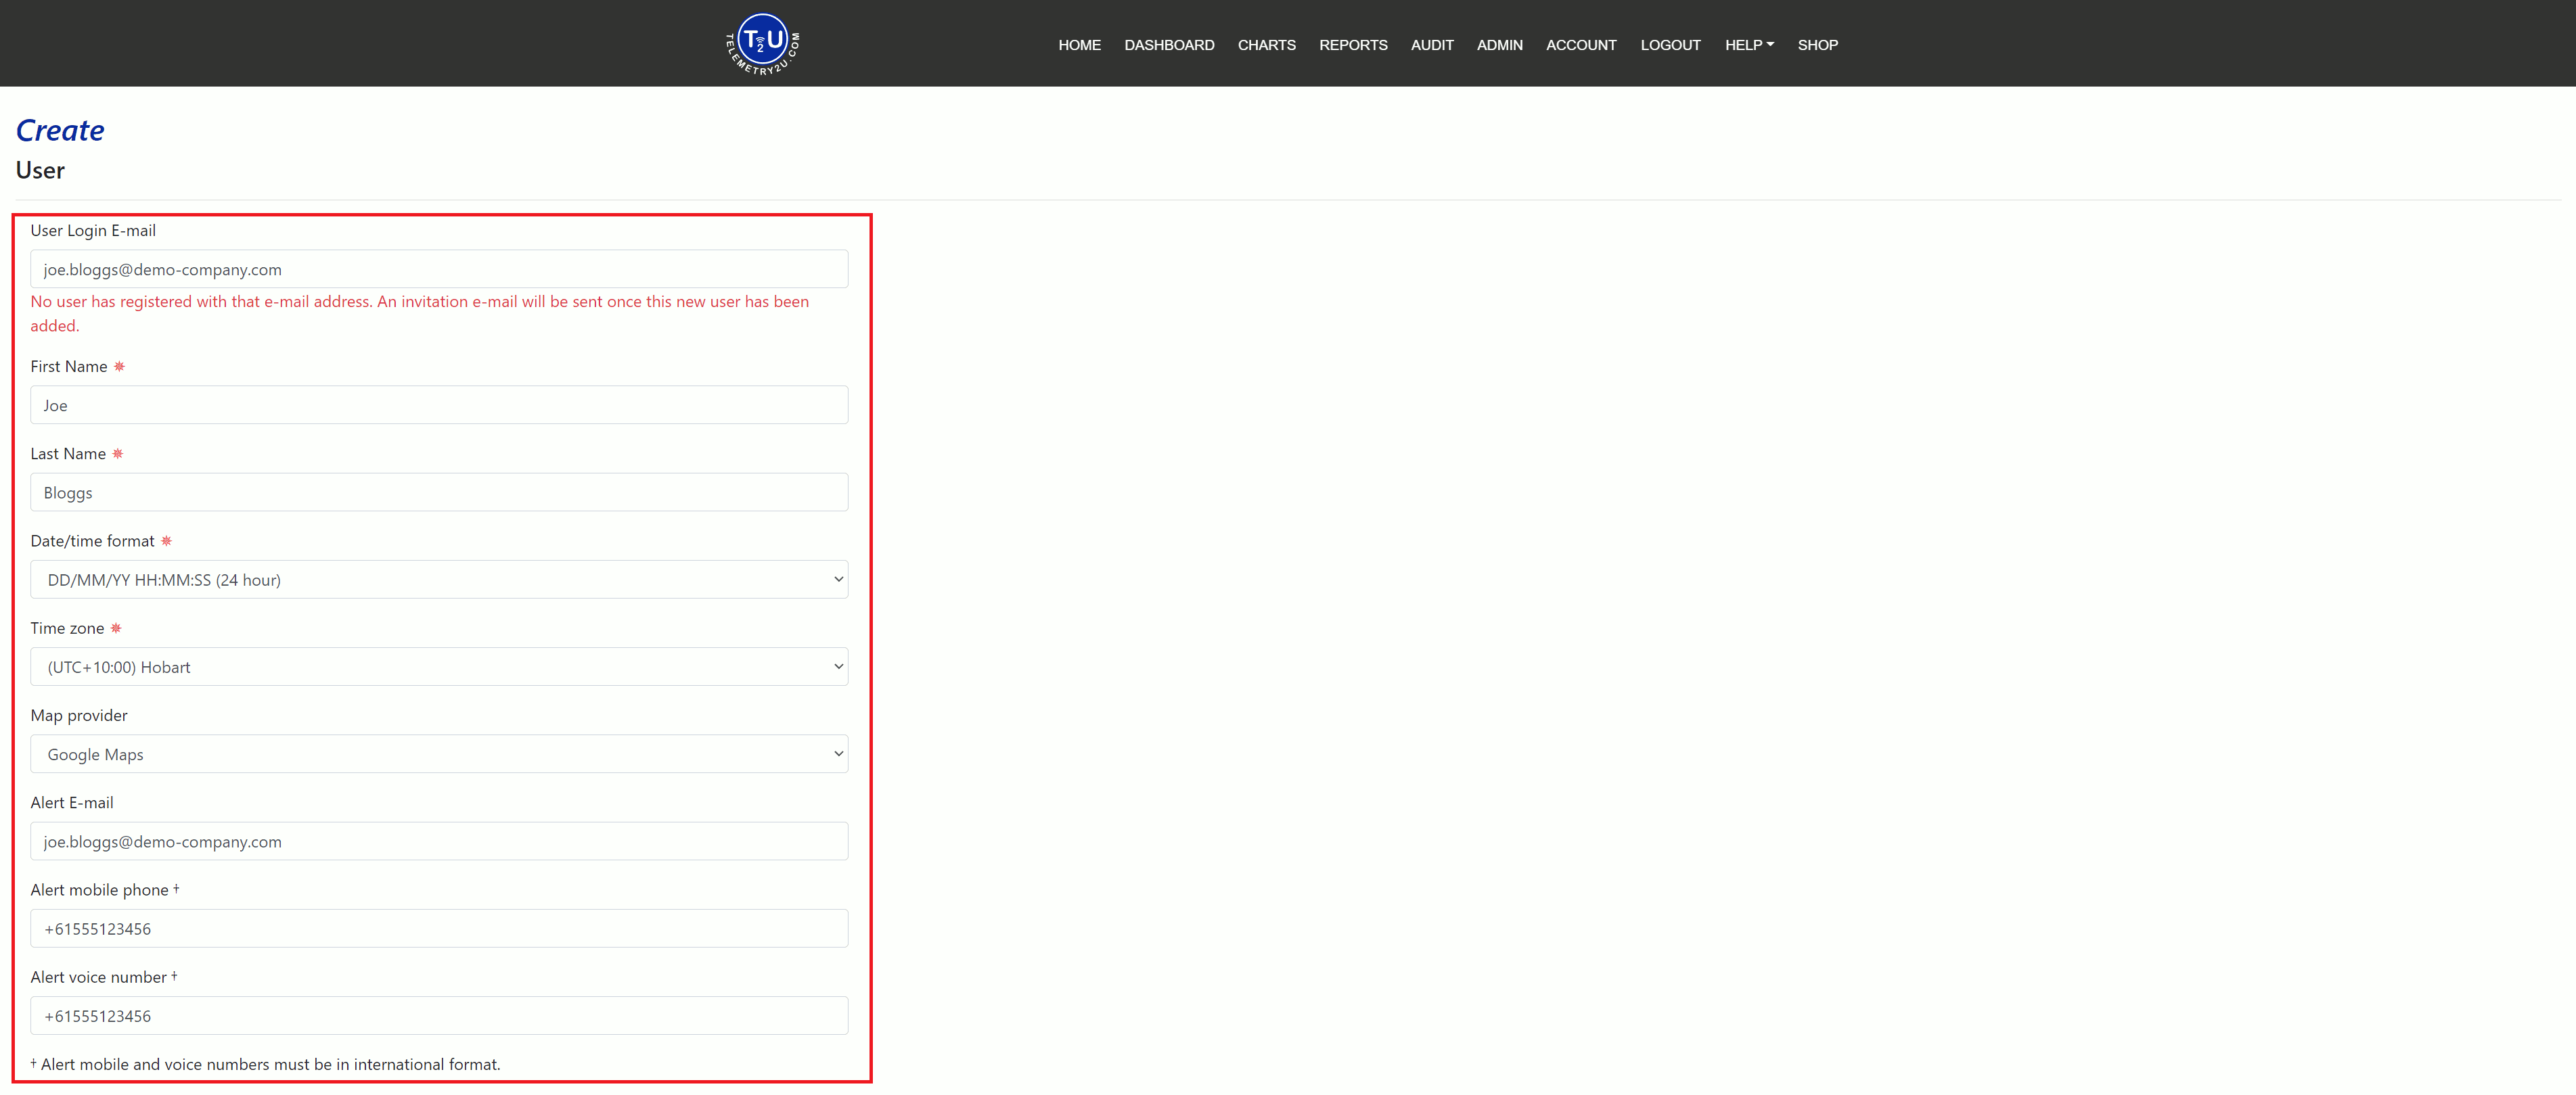
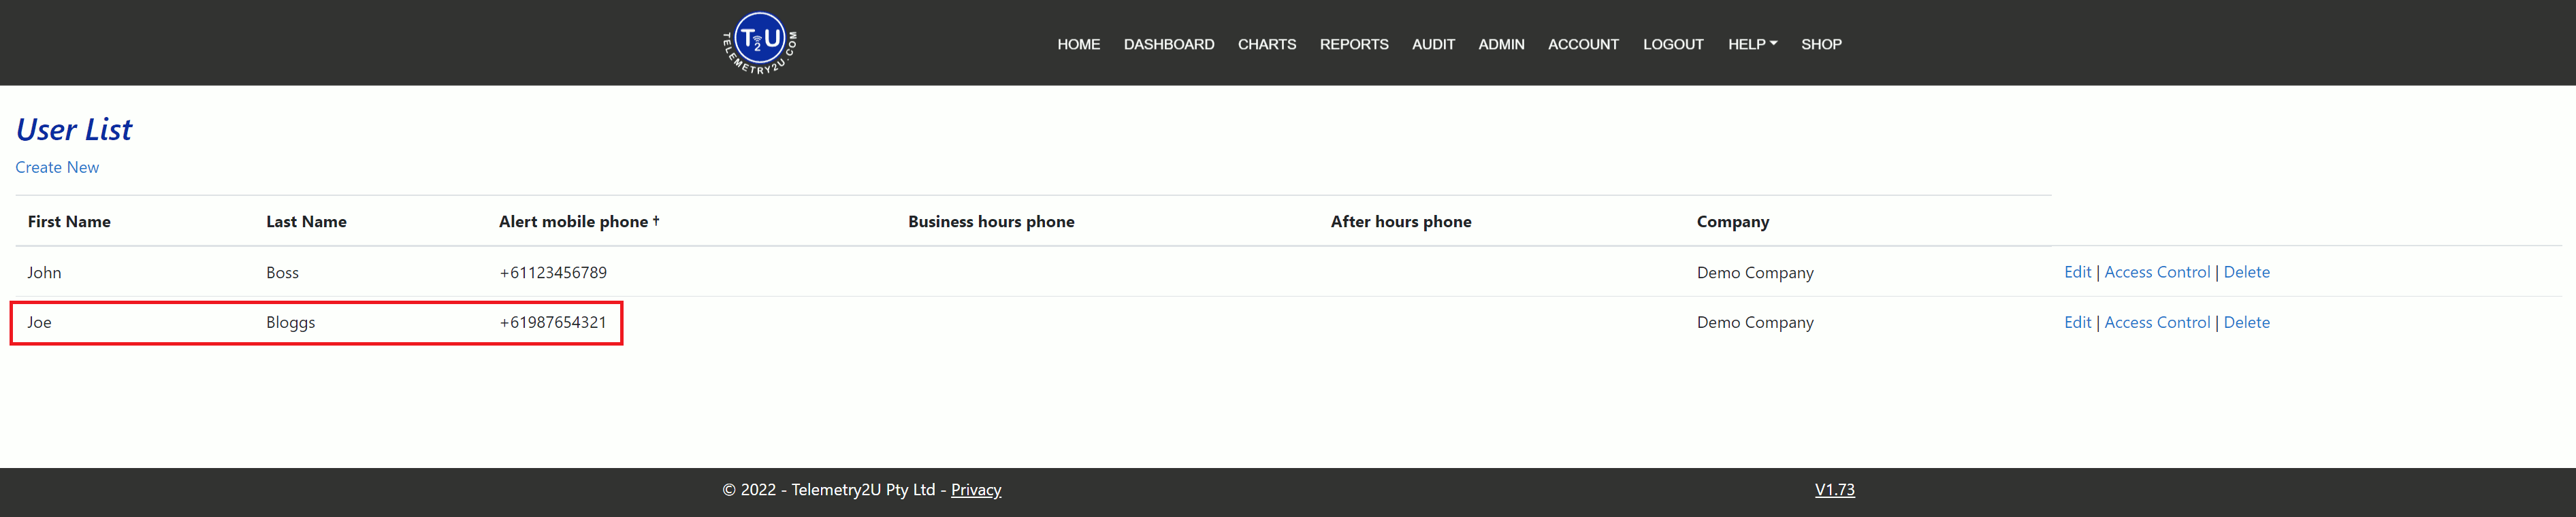
After entering the details, click the Create button at the bottom of the page. You will return to the User Maintenance page, where the new user will now be listed. A message will confirm that an invitation has been sent to their email address.
The invited user should receive an email like the example below:
Note:
In most cases, the email is received instantly. However, it may take up to 30 minutes depending on the recipient’s mail server and settings.
Example invitation email:
Dear Joe,
You have received an invitation from John Boss to sign up to Telemetry2U on behalf of the company Demo Company. To accept this invitation, please click the following link:
https://telemetry2u.com/Identity/Account/AcceptInvitation?email=joe-bloggs@demo-company.com&invitationId=WSwcr7BJo8AznoTsY51f14fTTbk44sJezYaRaLYC1
Once you accept the invitation and choose a password, you’ll have immediate access to the platform.
We look forward to seeing you soon,
The Telemetry2U Team
The new user must click the link in the email to proceed. They’ll be taken to a secure page on Telemetry2U where they must create and confirm a password.
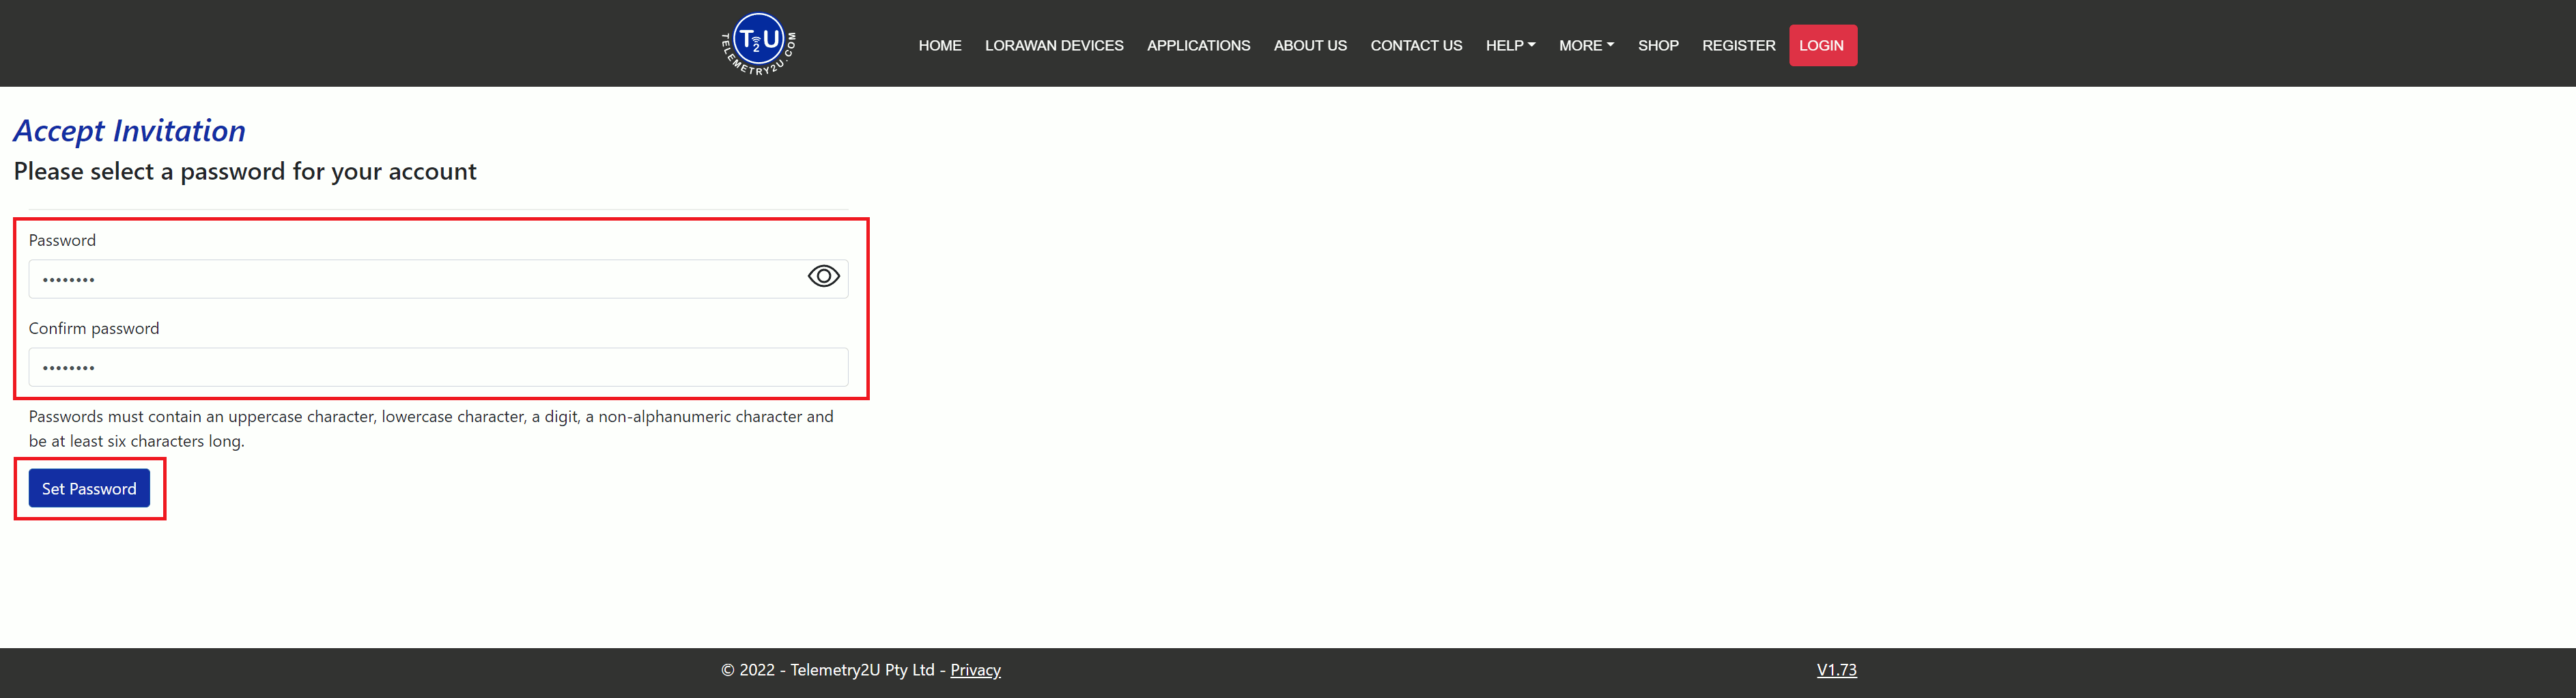
Note:
Passwords must contain at least one uppercase letter, one lowercase letter, one digit, one special character, and be a minimum of six characters in length.
Once the password is set, the user will be logged in automatically and redirected to the Reports page. At this point, they won’t be able to view any data until the Company Administrator assigns node access and other relevant permissions.
Set User Access Levels and Node Permissions in Telemetry2U
Customising Roles and Restrictions for a New User
As a Company Administrator, you have full control over the access levels of every user on your account. This is managed through the User Control section. In this example, we’ll configure a new user (Joe Bloggs) with limited access—granting only the ability to add annotations to alerts and view gateway status. We’ll also restrict access to specific devices so that only Temperature/Humidity Sensors are visible, while access to I/O Controllers is denied.
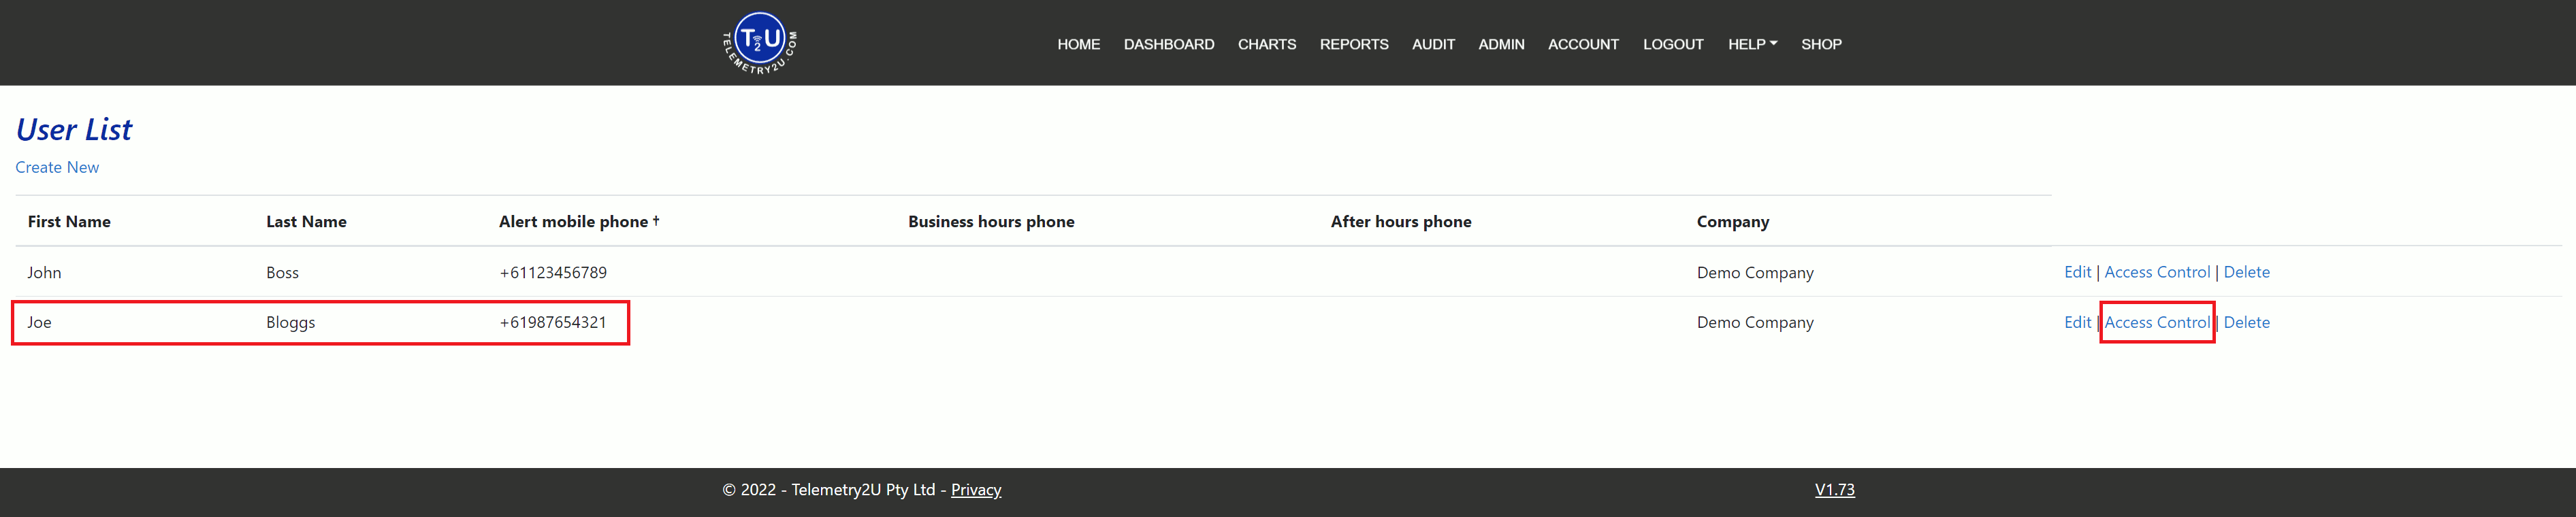
To begin, go to the User Maintenance page and find the new user in the list. Click the User Control link located on the right-hand side.
You will be taken to the User Control Configuration page, where you can set User Roles and Node Access. Under the User Roles section, tick the checkboxes for Add Annotations and View Gateway Status.
Note:
For a detailed explanation of each available User Role and Node Access option, refer to the User Maintenance section of the Telemetry2U Admin Guide.
At the bottom of the page, under the Node Description section, select the devices the user should be able to access. In this example, we’re assigning access only to Temperature and Humidity Sensors.
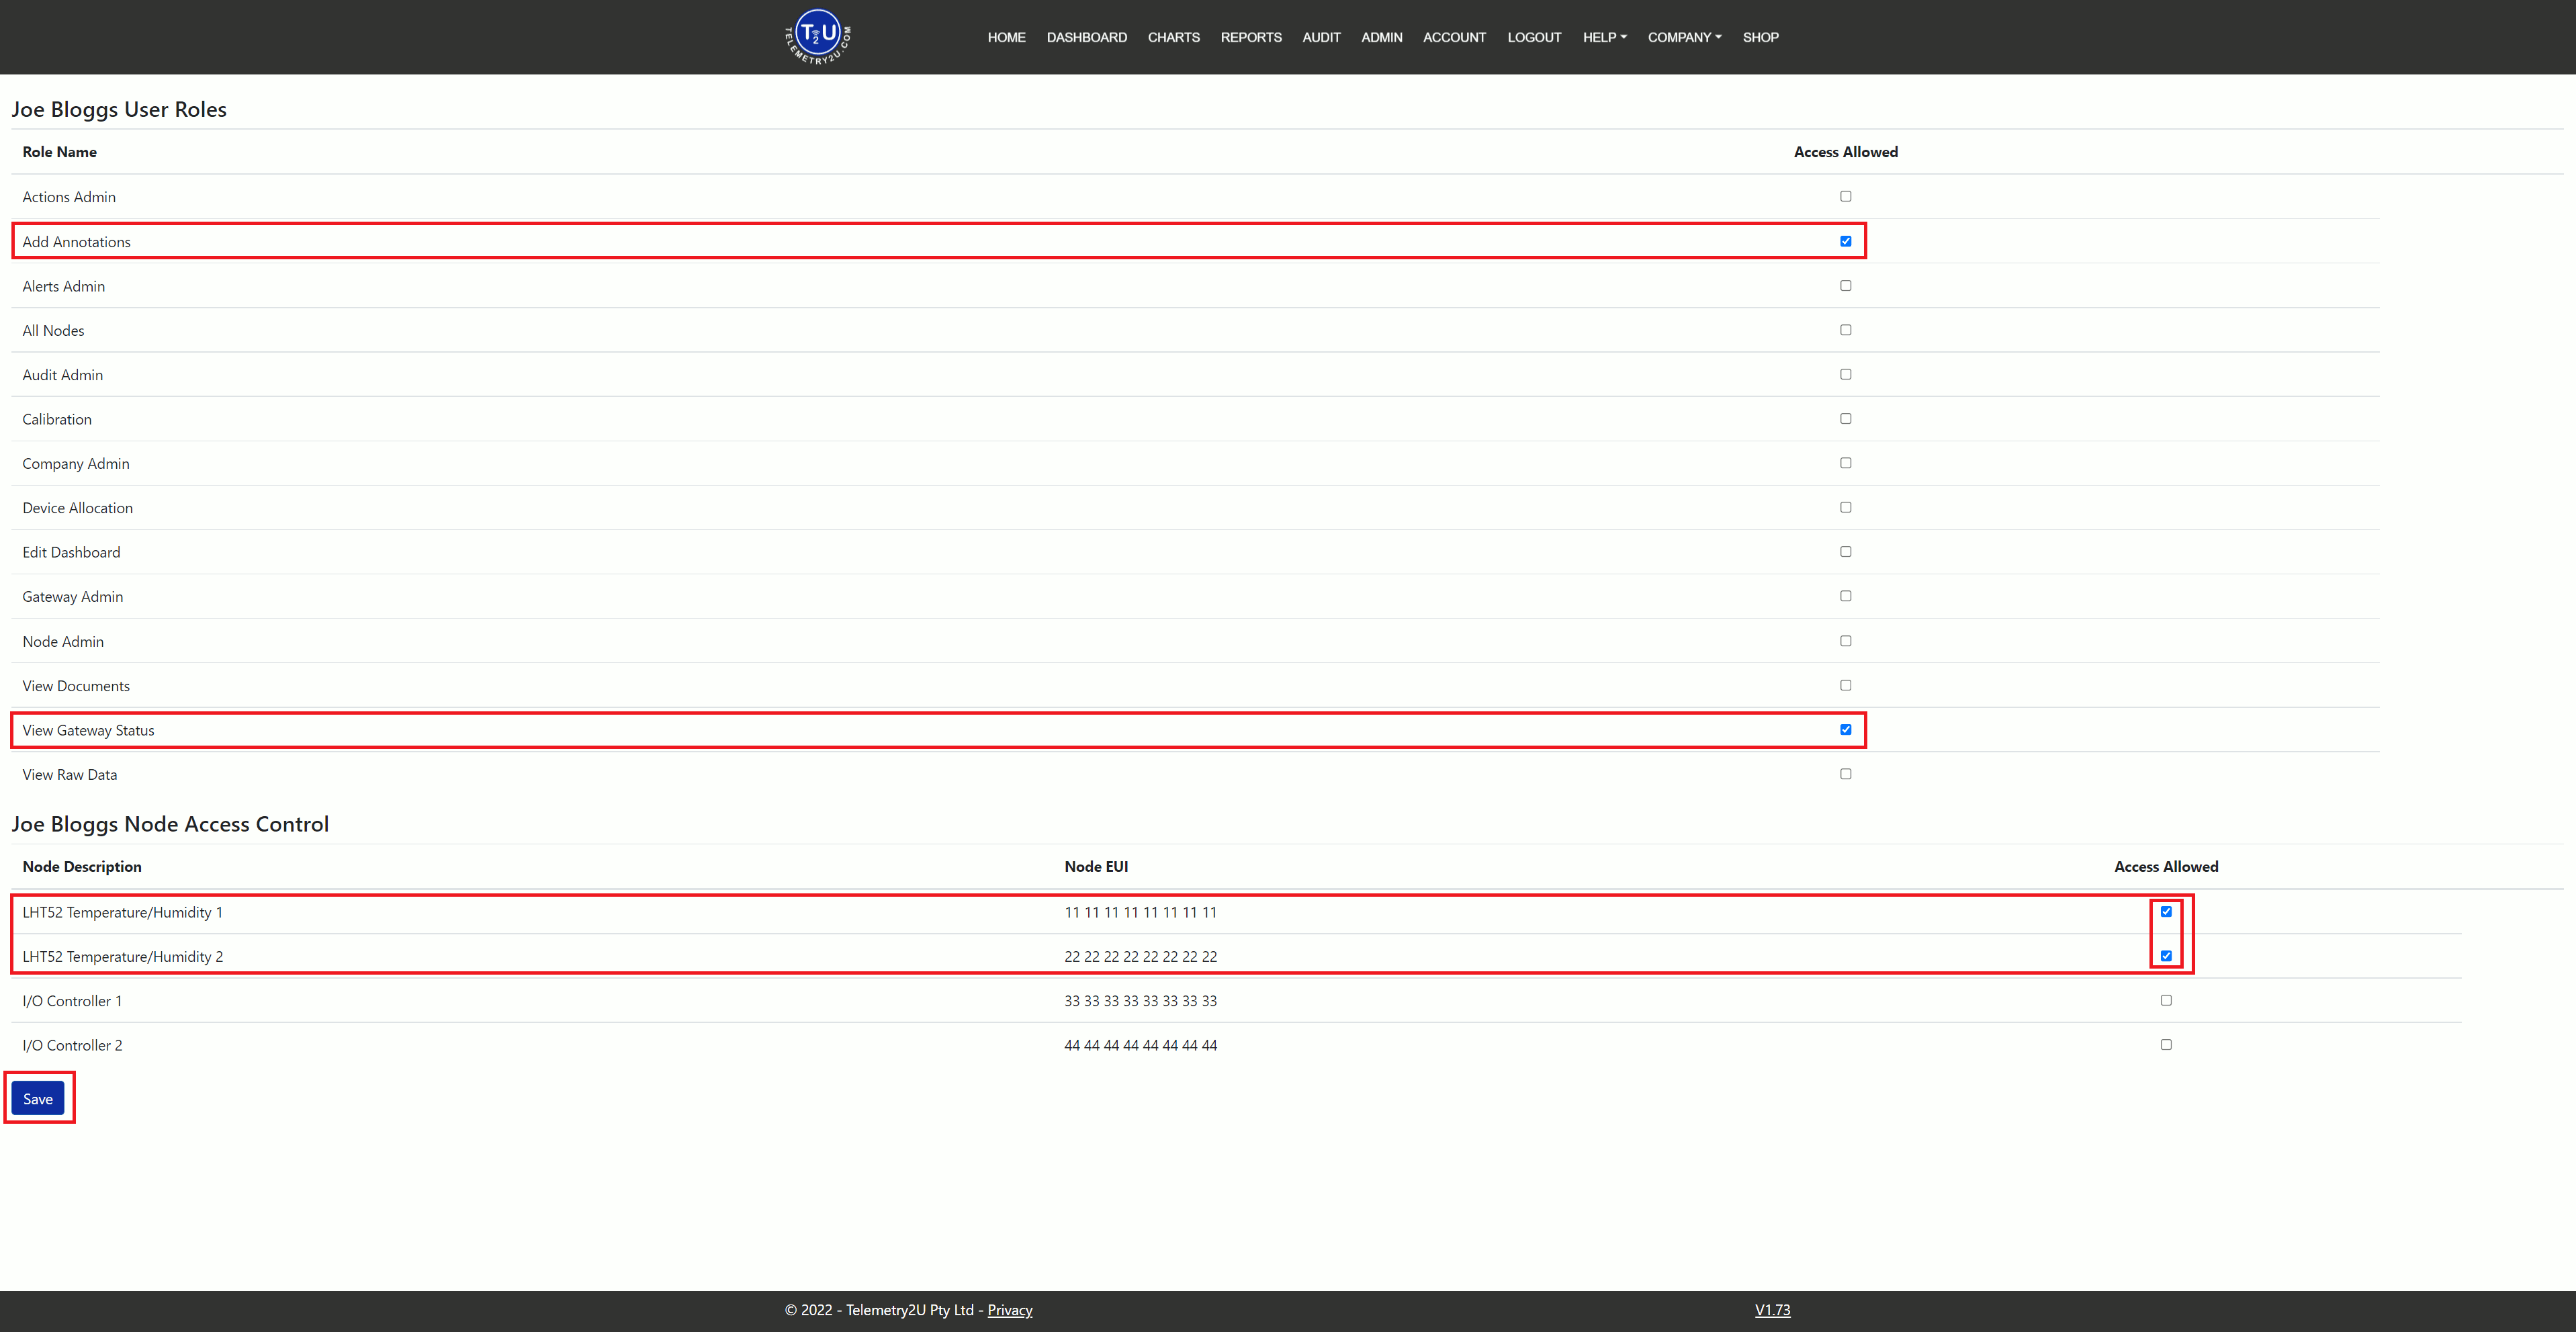
When finished, click the Save button to apply the changes.
Configure Alert Notifications for New Users in Telemetry2U
Adding a New User to a Notification Group
To ensure the new user receives alerts, navigate to Admin >> Notification Groups and click on the group you want to update. In this example, we’ll configure the user Joe Bloggs to receive Email, SMS, and Voice Call alerts 24/7.
Joe will be placed as the second contact in the priority list for voice call notifications.
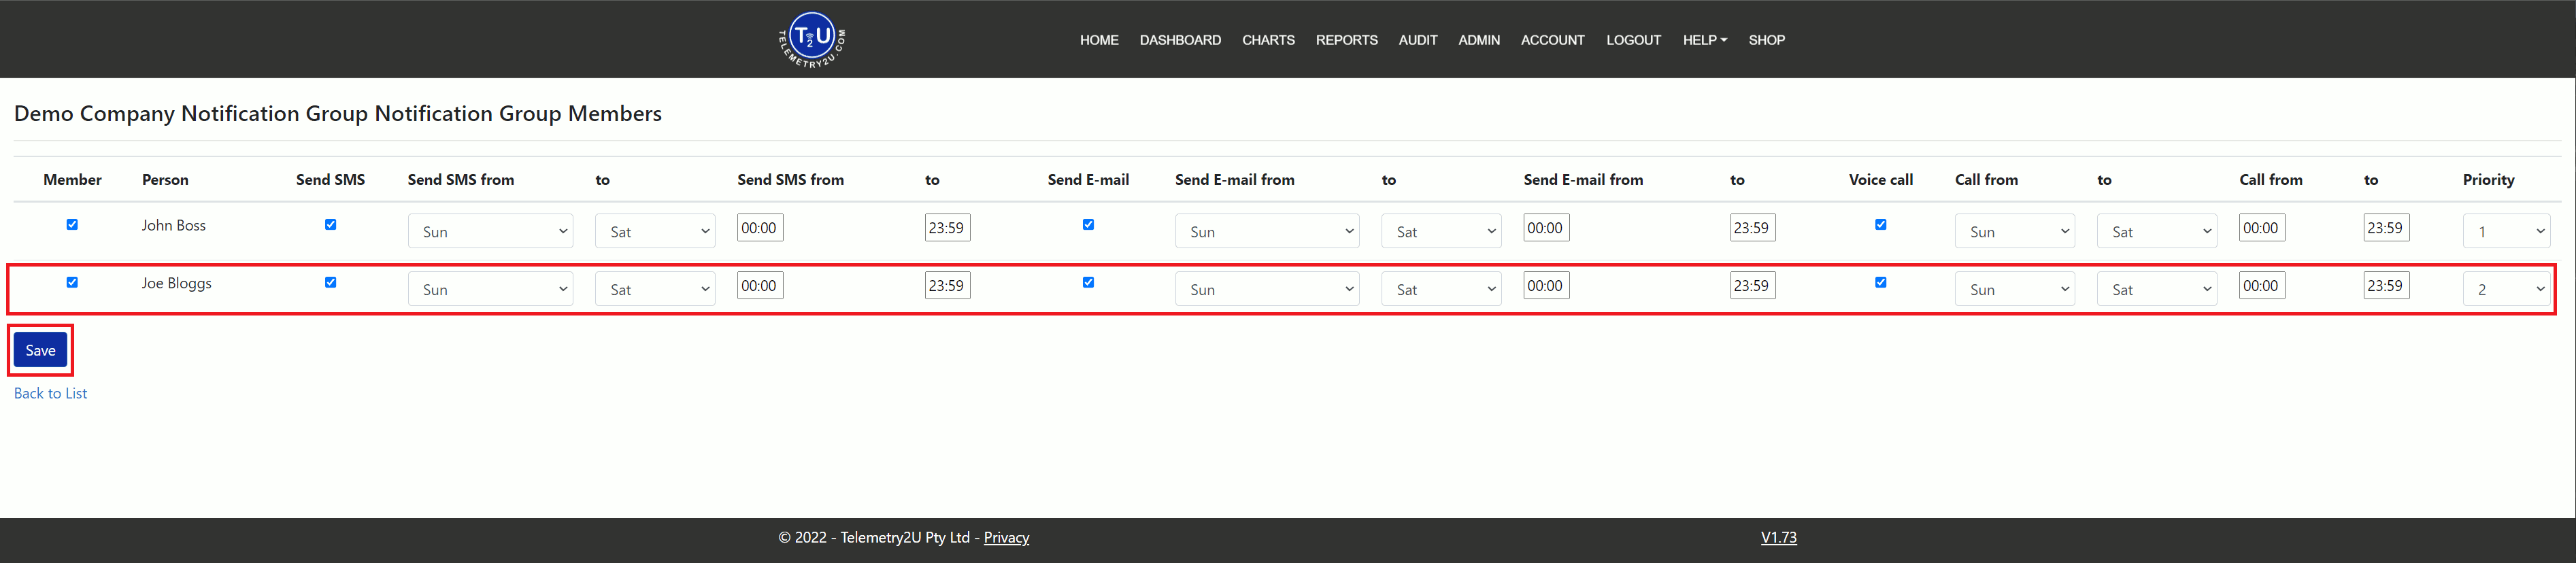
Once complete, click the Save button to apply the changes.
Make Dashboards Viewable to New Users
Sharing Dashboards with a New User
In this example, the new user has not been granted permission to create or edit dashboards. To allow them to view dashboards, a Company Administrator (or any user with the Edit Dashboards permission under User Controls) must make the desired dashboard visible by enabling the Company Wide option in the dashboard settings menu.
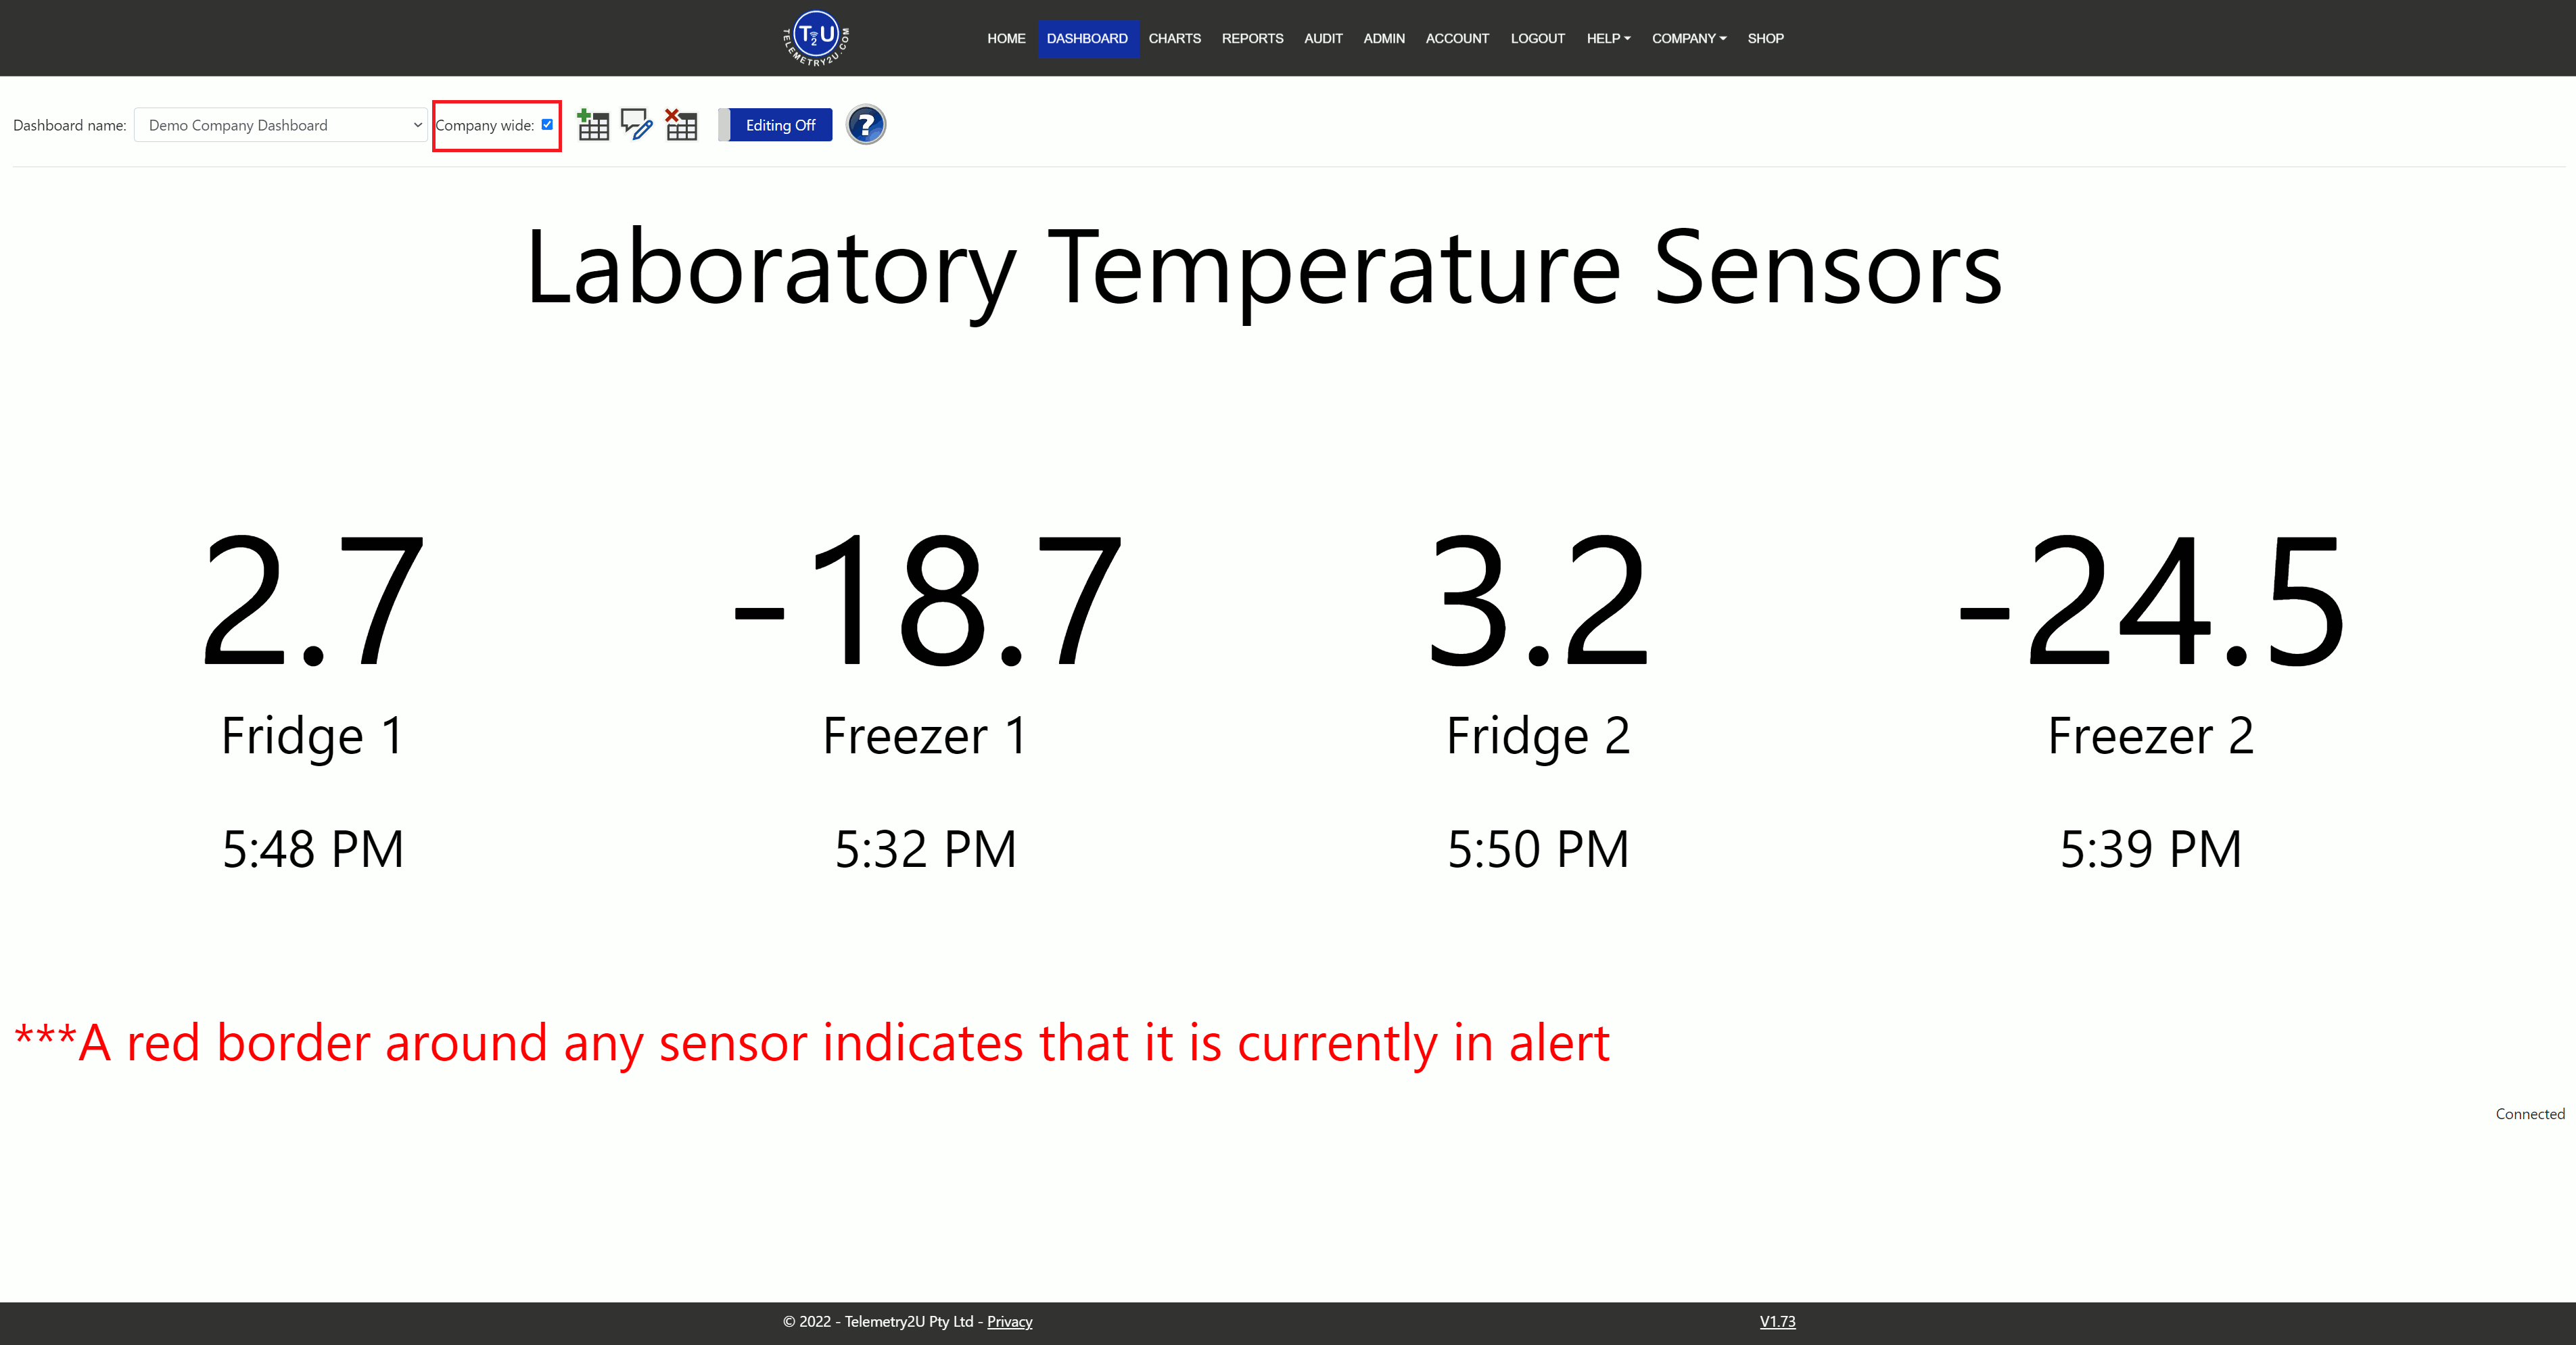
After this step, the new user will be able to log in and view the shared dashboard, along with sensor data from the permitted nodes on the Charts and Reports pages. They’ll also be able to download audit reports but not create new ones. Alerts via Email, SMS, and Voice Call will be active, and the user will be able to add annotations to alert events.
You can change the user’s access levels at any time by going to Admin >> User Maintenance and clicking the User Control link next to the user.