Step-by-Step Guide to Installing Temperature Sensors in Fridges and Freezers
Installing temperature sensors in fridges and freezers is quick and straightforward with Telemetry2U. We’ve done all the hard work to ensure seamless setup, providing preconfigured, plug-and-play hardware that works straight out of the box. Our step-by-step guide will walk you through powering up your gateway and sensors, installing a temperature buffer for more accurate readings, and securing cables properly to prevent cold air leaks. With these best practices, you’ll get reliable, real-time temperature monitoring with minimal effort, ensuring optimal performance and peace of mind.
Installation Preperation: Powering up Hardware
If your hardware was supplied in plug-and-play format by Telemetry2U, your devices are already preconfigured and added to your account, ready to use straight out of the box. Follow these steps to power up and install your sensors.
Setting Up the Gateway
If you purchased your gateway with a 4G SIM card, we would have installed it and configured it for you. Otherwise, you will need to connect your gateway to the an Ethernet port or configue the gateway with your Wi-Fi details. Learn how to configure a Dragino gateway with a smartphone.
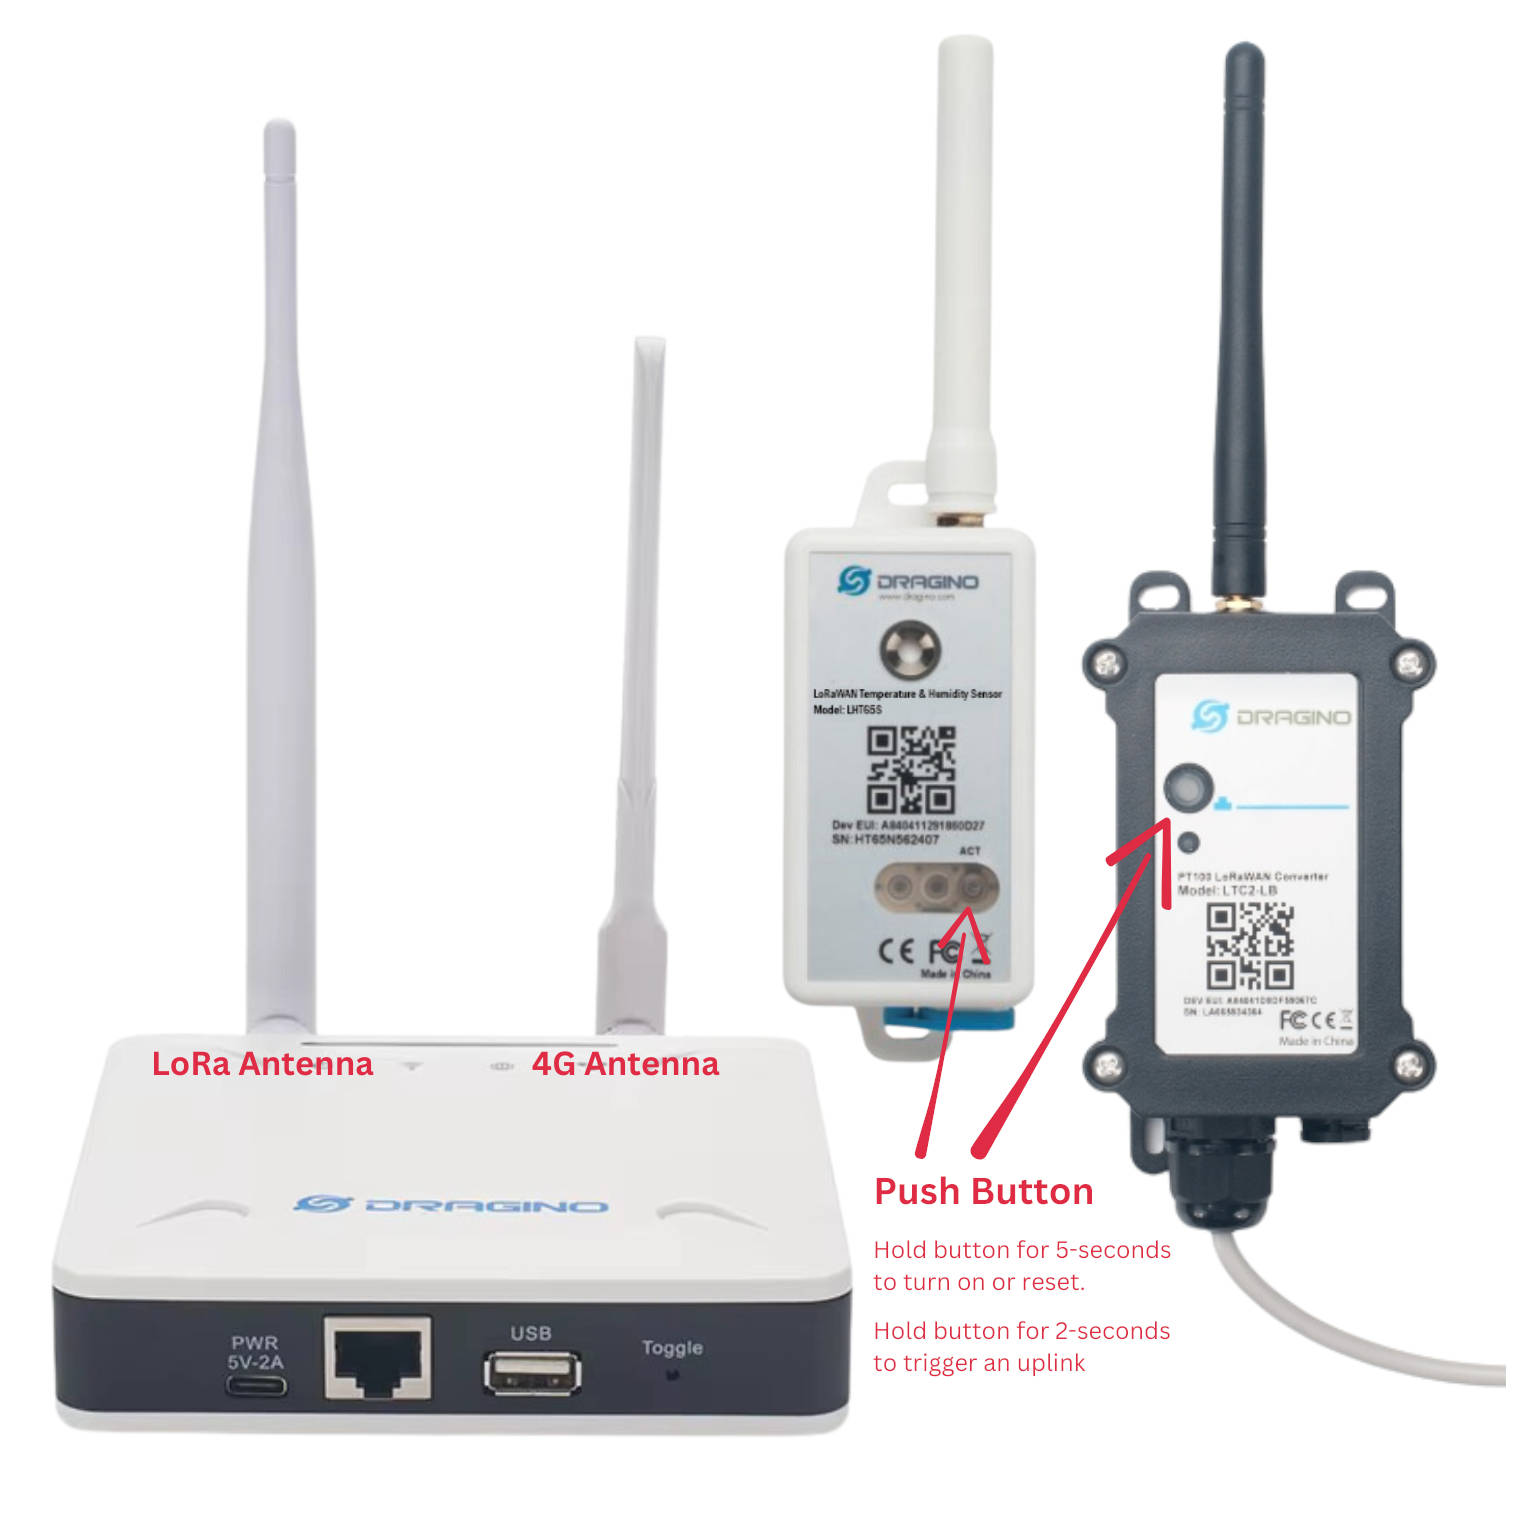
- Attach the gateway antennas. If your gateway has two antennas, connect the round one to the LoRa port and the flat one to the 4G port.
- Power on the gateway. After a few minutes, check its connection status in Telemetry2U by navigating to Gateways and Networks >> View Gateway Status. It should display “Less than 1 minute ago.”
Preparing the Node
- Attach the antenna, if applicable.
- Turn on the sensor by holding the button for 5 seconds. The LED will stay green while pressed and begin flashing once powered on successfully.
- Log into Telemetry2U and verify that the sensor is connected and sending data. If you don’t have a dashboard set up, use the reports page to confirm data transmission.
Installing the Temperature Buffer in a Fridge / Freezer
A temperature buffer improves the accuracy of temperature monitoring by stabilising readings and preventing false alerts caused by short-term air temperature fluctuations, such as those from defrost cycles or door openings.
Telemetry2U's aluminium temperature buffers are designed to replicate the thermal properties of 30ml of water, providing a more accurate representation of stored samples. Each buffer includes multiple thermowells to securely hold sensors, with additional holes available for reference sensors. Placing a reference sensor in the same medium significantly reduces stabilisation time and improves accuracy by eliminating guesswork. Read more about our aluminium temperature buffers.
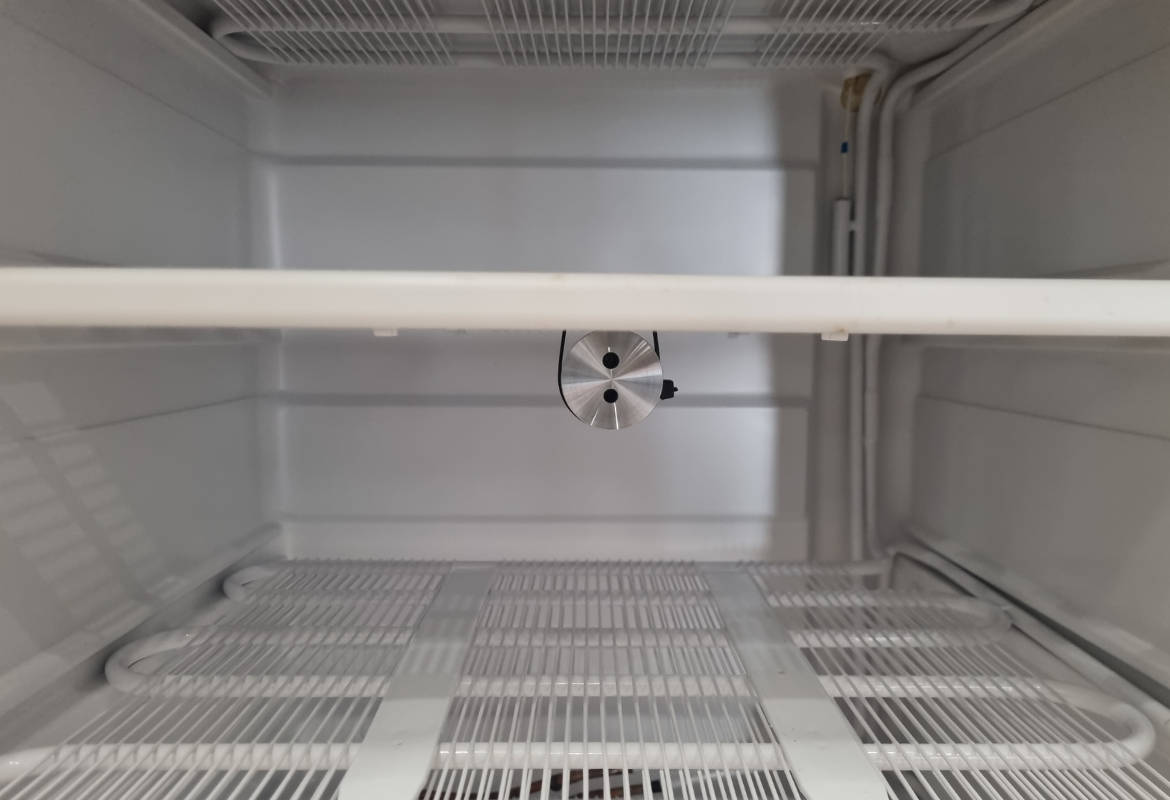
For optimal performance, position the temperature buffer as close to the stored samples as possible. Avoid placing it near walls, the top shelf, or close to the evaporator coil or defrost element, as these areas may experience greater temperature fluctuations. Whenever possible, mount the aluminium buffer to the underside of the middle shelf, centrally located. This placement ensures minimal impact on storage space while keeping the buffer stable and secure. Maintaining a fixed location is essential, as cold storage units often have temperature variations in different areas.
Fridge and Freezer Sensor Installation with Minimal Downtime

Proper installation of your temperature sensor and accessories is crucial for accurate monitoring and long-term reliability. This section provides step-by-step guidance on installing the temperature sensor in the buffer, securing the sensor cable with a dedicated seal, and finalising the setup to ensure optimal performance. Following these instructions will help maintain a stable temperature reading, prevent cold air leaks, and ensure seamless data transmission to your Telemetry2U platform.

Install the Temperature Sensor in the Buffer
After securing the temperature buffer to the middle shelf with cable ties, you can install the temperature sensor. If your fridge or freezer has a cable entry port, feed the sensor through it. Otherwise, you will need to pass the cable through the door seal. Follow these steps for proper installation:
- Insert the temperature sensor into the thermowell that provides the best fit.
- Use a cable tie to secure the sensor cable to the shelf wire as close to the buffer as possible, leaving a little slack to prevent accidental dislodging.
- Secure the remaining sensor cable along the shelf using cable ties. Route the cable toward the side where the door closes and attach a cable tie near the end to keep it in place.
- Ensure the cable is straight and level where it passes between the door face and seal to maintain a proper seal and prevent damage.
Installing the Temperature Sensor Cable Seal
The Telemetry2U temperature sensor cable seal is designed to securely route sensor cables into fridges and freezers while preventing cold air leaks and ice build-up. It provides a snug fit around the cable, protecting the door seal from damage. Follow these steps for installation:
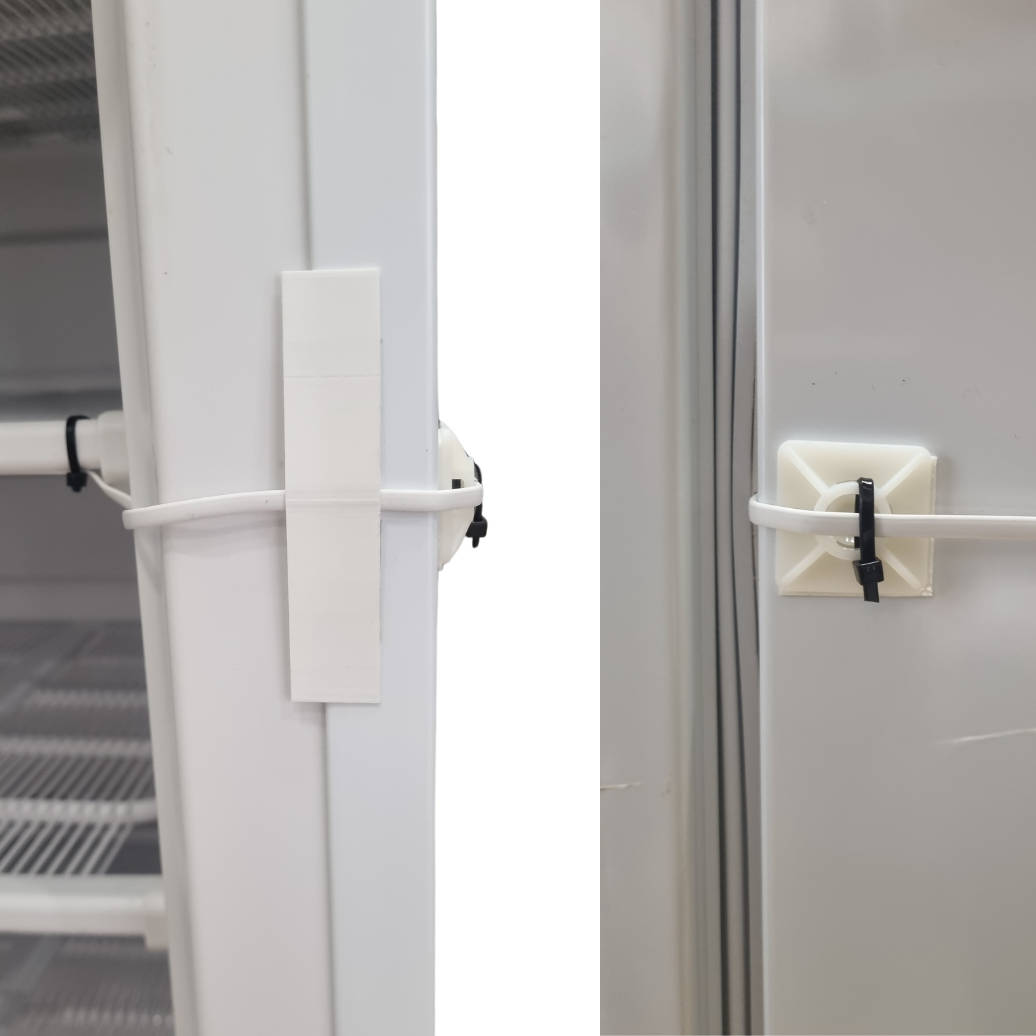
- Position the cable seal over the sensor cable, ensuring it fills as much of the gap as possible when the door is closed. Mark the location with a pencil.
- Peel off the protective backing from the double-sided tape on the seal and firmly attach it to the front of the fridge or freezer at the marked position.
- Bend the cable around the side of the fridge or freezer and attach a self-adhesive cable tie mount as close to the edge as possible. Secure the sensor cable to the mount using a small cable tie.
Finalising the Installation
With the temperature sensor securely in place, the final steps ensure that your setup is neat, secure, and optimised for reliable data transmission. Properly positioning the node and managing cables will help maintain signal strength and prevent accidental damage. Follow these steps to complete the installation:
- If applicable, connect the temperature sensor to the LoRaWAN or NB-IoT node.
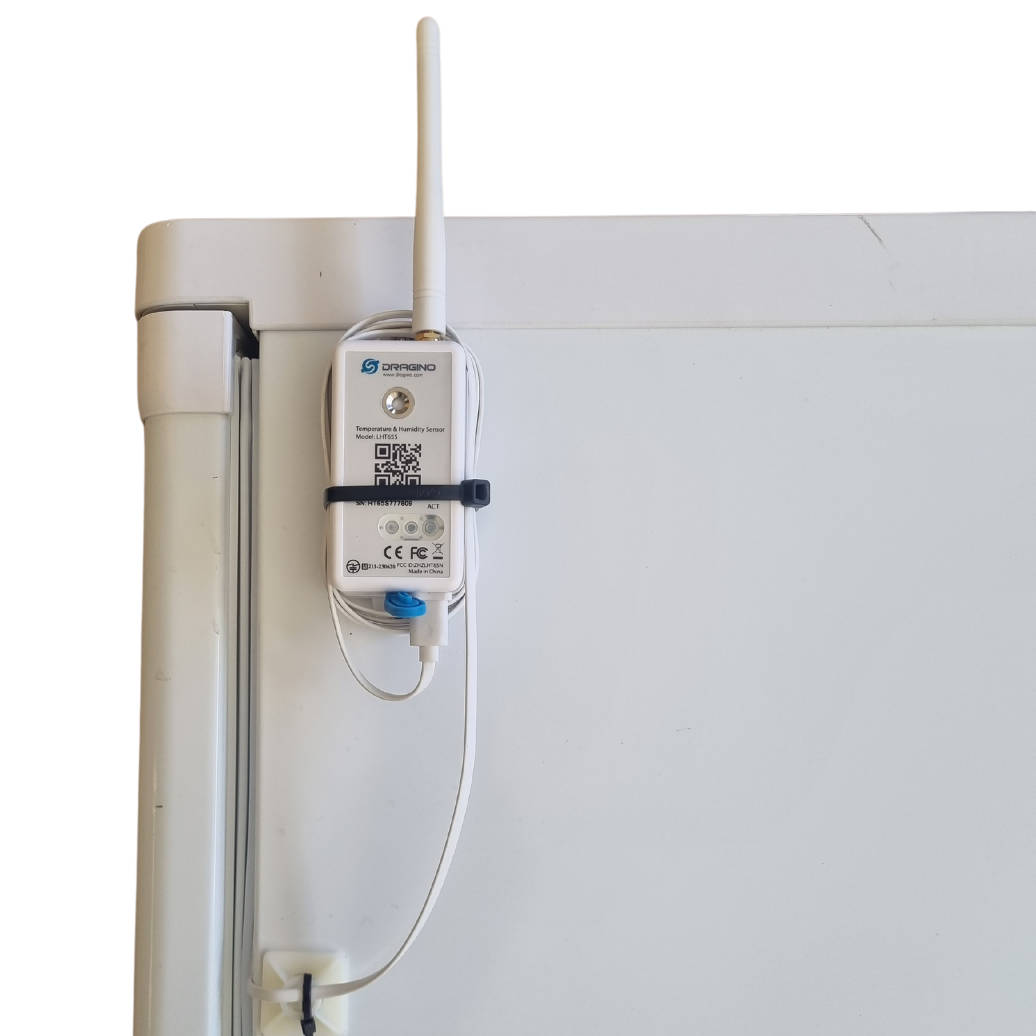
- Mount the node high on the fridge or freezer using its built-in magnets. If the node has an external antenna, position it so that it extends above the unit to avoid signal obstruction.
- Use self-adhesive cable tie mounts as needed to organise the cable and keep it out of the way.
- Neatly wrap any excess cable around the node and secure it with a cable tie. Ensure the cable is not bent too sharply and that there is some slack to prevent strain on the connector.
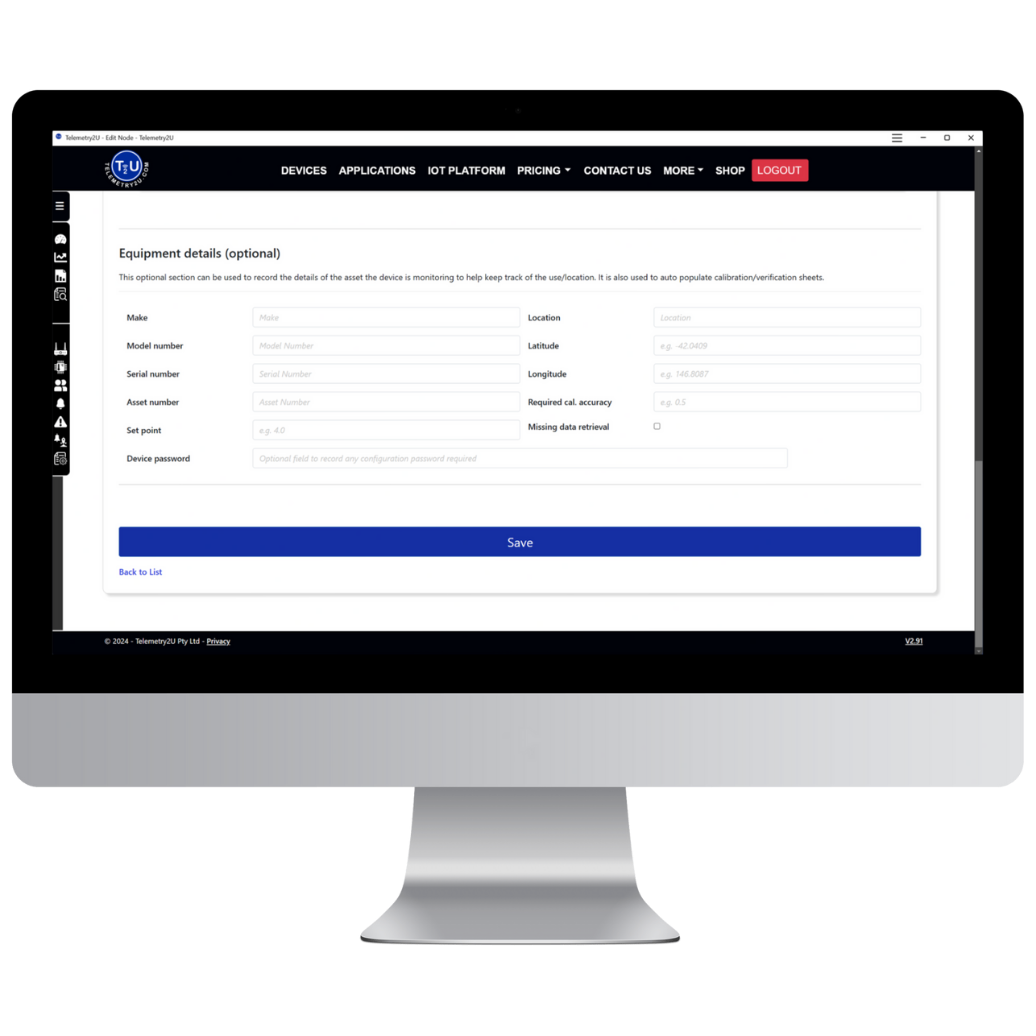
Optional - Enter the asset details
For temperature monitoring in NATA-accredited laboratories and facilities, annual or bi-annual NATA traceable temperature verifications are often required. Telemetry2U has streamlined this process by automating key steps, reducing manual effort, and ensuring compliance.
When a technician conducts an on-site verification, all details are recorded directly within the Telemetry2U platform. A calibration certificate is then automatically generated and made available for download by all users. If equipment details have been entered correctly, the system will populate them on the certificate automatically.
To add or update equipment details, log in to Telemetry2U and navigate to Nodes Maintenance >> Add / Edit Nodes and Devices from the sidebar. Click the Edit link next to the relevant device, scroll to the bottom of the page, and complete the Optional – Equipment Details section.

That’s it! To verify everything is working correctly, press the button on the node for about 2 seconds to trigger an uplink. Then, log in to Telemetry2U and check that the data is being received.
Allow some time for the temperature to stabilise—this process can take up to an hour, especially if the fridge or freezer door was open for an extended period during installation. Once stabilised, your system will be ready for accurate and reliable temperature monitoring.
Real-Time Temperature Monitoring Dashboard
Discover how our interactive dashboards provide real-time and historical data from temperature and humidity sensors as well as energy monitoring solutions. Gain valuable insights to optimise performance, track trends, and enhance operational efficiency.