How to Configure a Dragino LoRaWAN Gateway via Wi-Fi
Connect a smartphone or laptop to the gateway's built-in access point, enter the local Wi-Fi details and confirm that the gateway is communicating with Telemetry2U.
Configure Gateway Internet Access Without Ethernet
Telemetry2U normally supplies Dragino gateways pre-configured and linked to the required account. The remaining site task is to provide power and an internet connection. Ethernet is preferred where a permanent cable is practical, but the gateway can also connect through a local Wi-Fi network.
This procedure uses the gateway's temporary Wi-Fi access point to reach its web interface. The access point is then disabled as the Wi-Fi WAN client is enabled. Menu labels may vary slightly between Dragino models and firmware versions.
Connect the Dragino gateway to its approved power supply and allow several minutes for startup.
Have the network name, security or encryption type and Wi-Fi password available.
Use a smartphone, tablet or laptop with Wi-Fi and a current web browser.
Account access is required for the final platform connection check.
Before changing anything: record the existing settings. If the
dragino-xxxxxx access point is not visible, its settings may have
already been changed or disabled. Connect by Ethernet or use the access method
provided for that gateway rather than resetting it unnecessarily.
1. Connect to the Gateway Access Point
Open the Wi-Fi settings on your smartphone or laptop after the gateway has finished booting. Complete the following three actions while remaining close to the gateway.
Find the Access Point
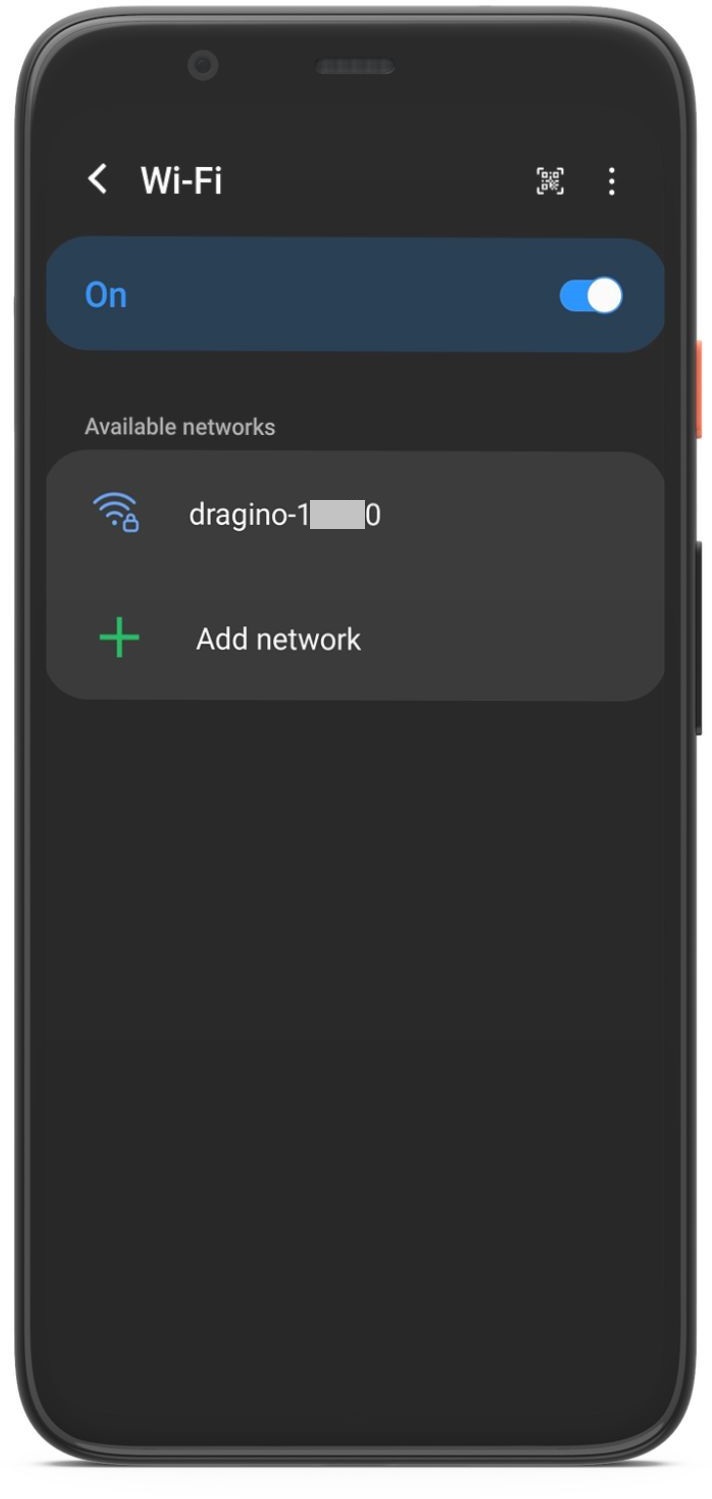
dragino-xxxxxx.The final six characters normally correspond to the last three bytes of the gateway EUI. Confirm the network against the gateway label where possible.
Connect to Gateway
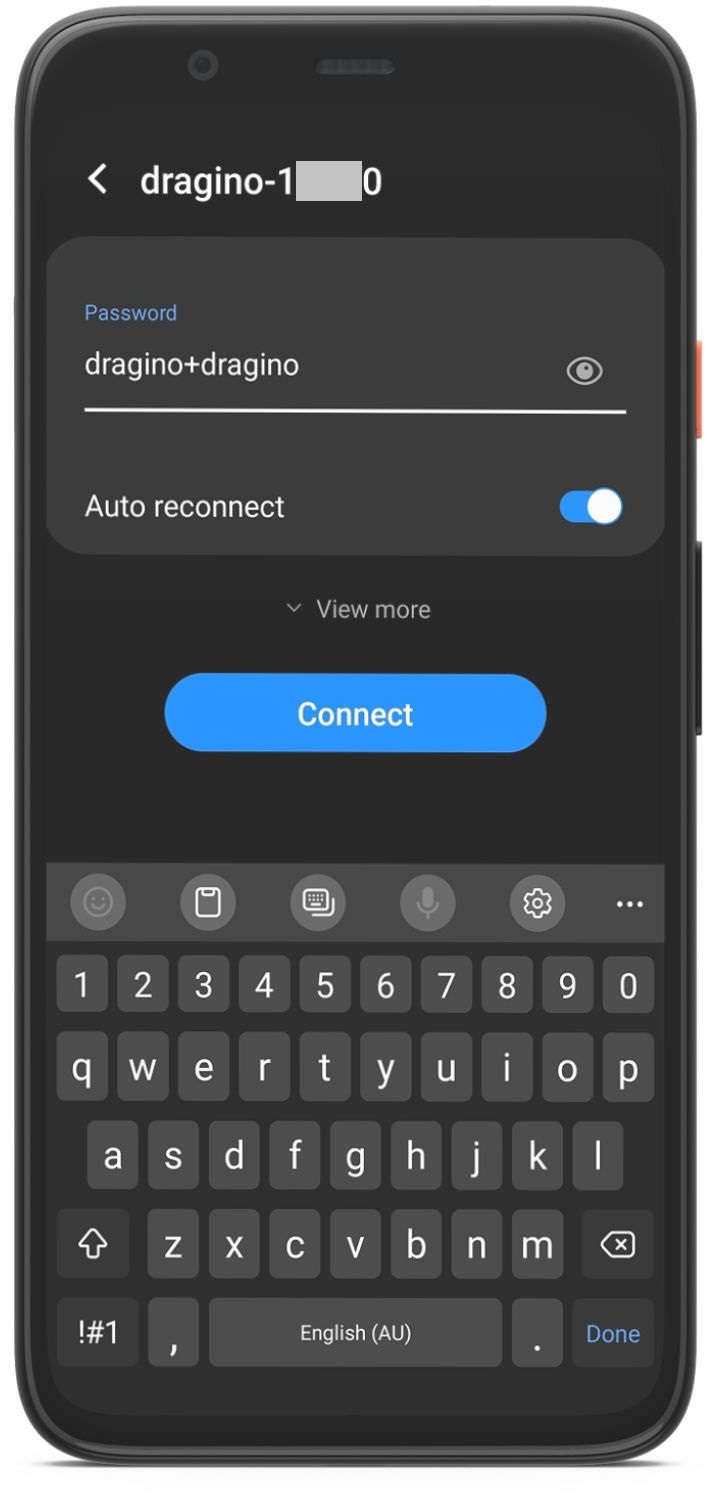
For an unchanged gateway, the default access point password is .
Open the Gateway UI
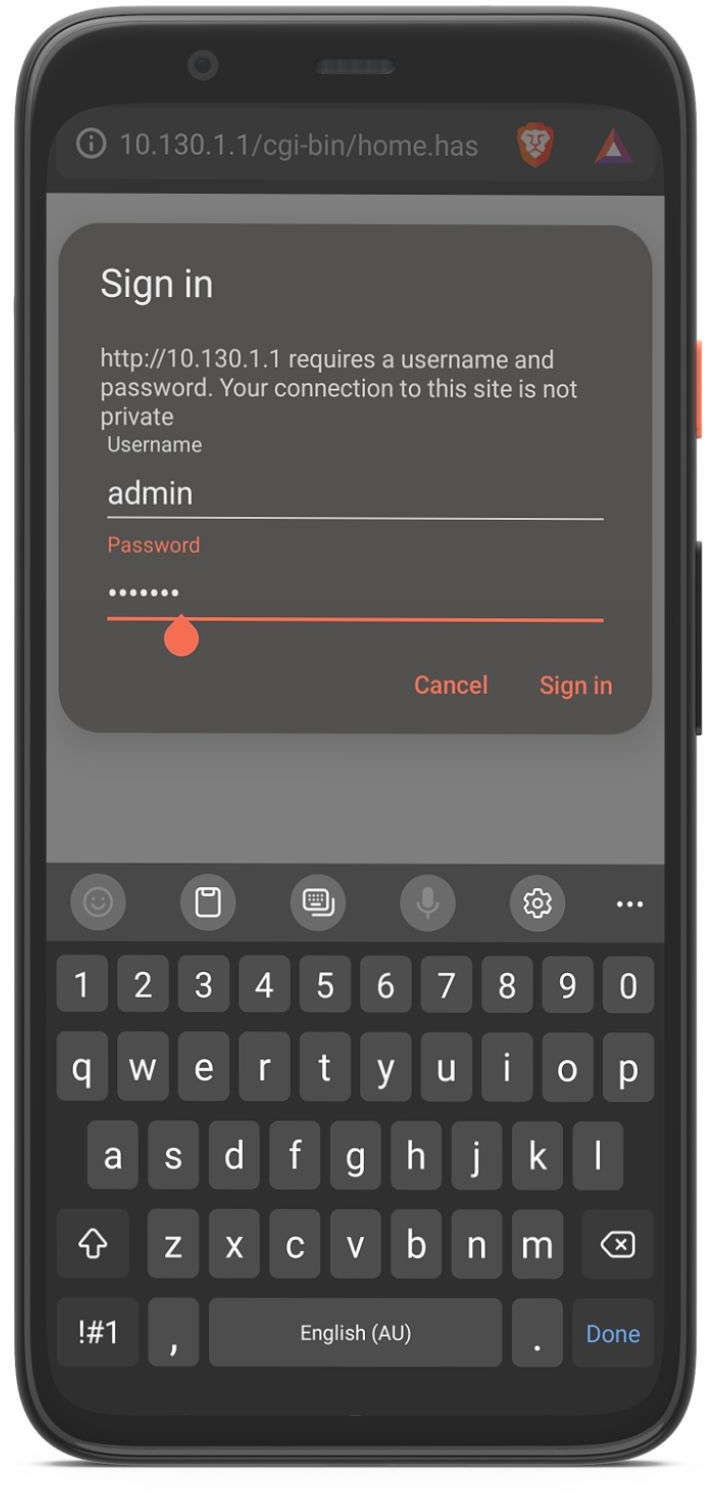
Browse to
.
Use admin and dragino if the default login has not been changed.
Security: use the credentials supplied with the gateway if the defaults have already been changed. After commissioning, change any remaining default administrative password and store the replacement securely.
2. Configure the Wi-Fi WAN Client
Use the gateway menu to open its Wi-Fi page, then replace the temporary access point connection with the site's normal Wi-Fi network.
Open Wi-Fi Settings
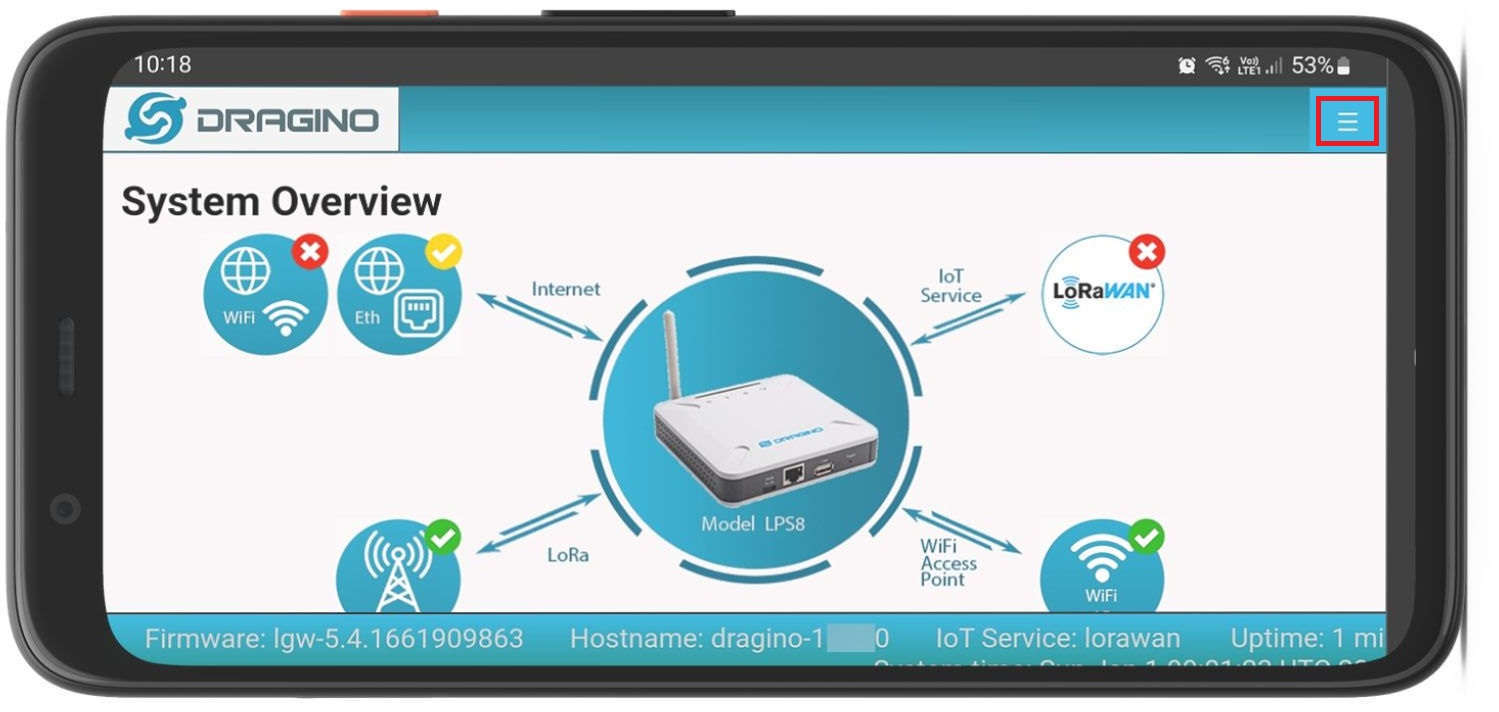
Open the menu and select Network > Wi-Fi. On a small phone screen, zoom out if the menu button or page controls are not visible.
Enter WAN Client Details
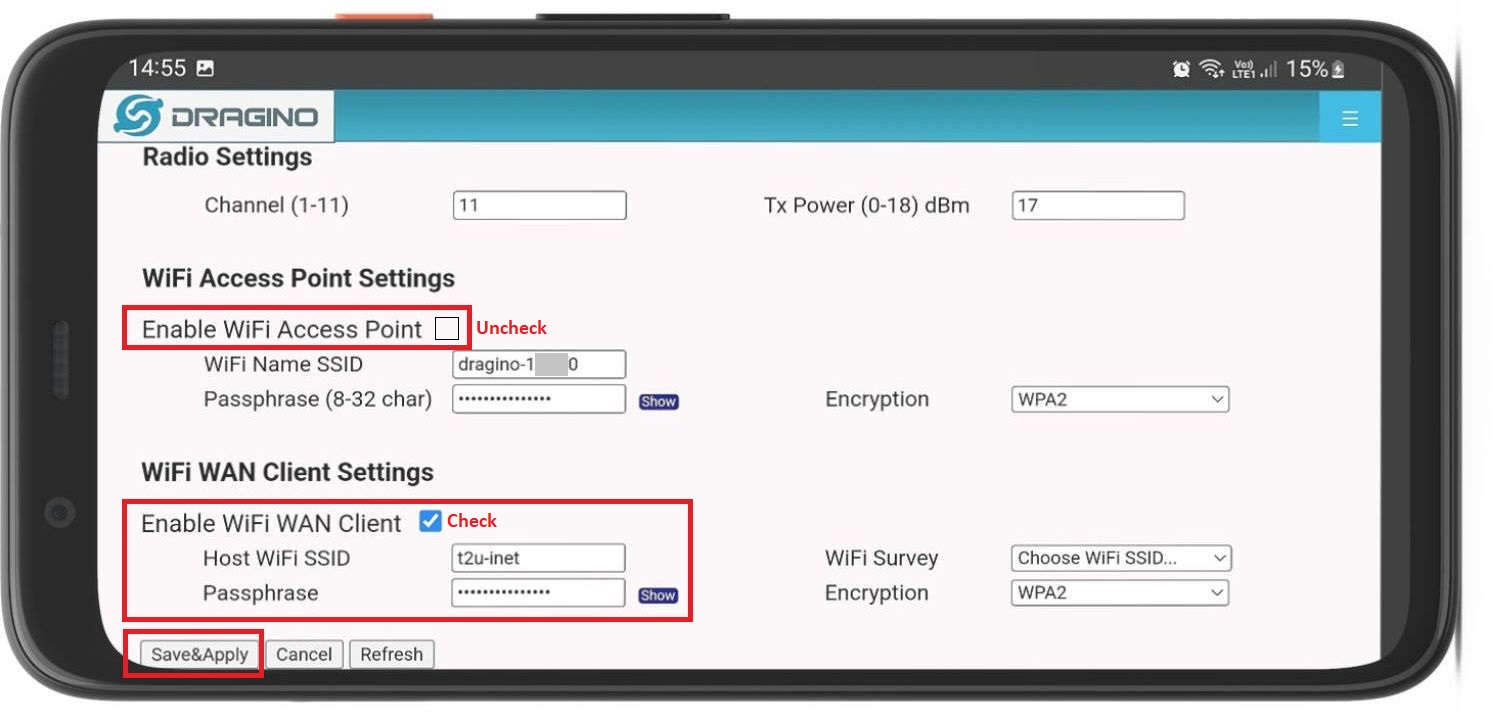
- Select Enable WiFi WAN Client.
- Use WiFi Survey to select the required local network.
- Select the matching encryption method and enter the Wi-Fi passphrase.
- Clear Enable WiFi Access Point.
- Select Save & Apply.
Check the SSID and passphrase before saving. On the firmware shown in
this guide, the access point must be disabled for the Wi-Fi WAN client to
operate correctly. Your setup device will disconnect from
dragino-xxxxxx after the settings are applied. If the gateway does
not join the local Wi-Fi network, use Ethernet or the documented recovery
method for that gateway to regain access.
3. Confirm the Gateway is Online
Reconnect your smartphone or laptop to the site's normal Wi-Fi network. Return to the Dragino Home page using the gateway's local network address when it becomes available, then review the connection indicators.
The gateway has joined the selected Wi-Fi network and can reach the internet.
The gateway's LoRaWAN service is connected to the configured network server.
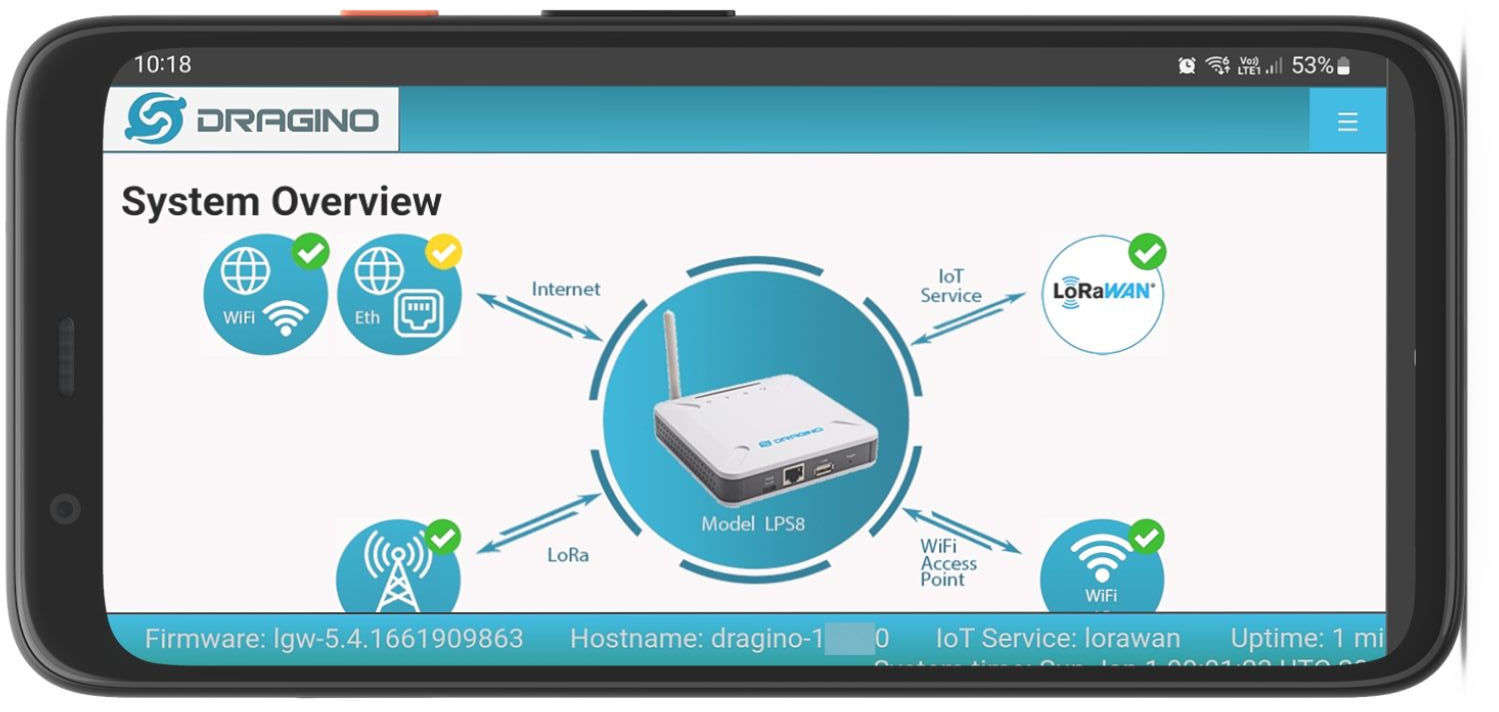
If WiFi remains offline, recheck the network name, encryption type and passphrase. If Wi-Fi is online but LoRaWAN remains offline, review the Dragino gateway network and firewall guide.
4. Confirm the Connection in Telemetry2U
The gateway's local status is only the first check. Confirm that Telemetry2U is also receiving the gateway keep-alive messages.
- Sign in to the Telemetry2U platform.
- Open Admin > Gateway Status.
- Find the gateway and review its Relative Time.
- Confirm that the value is recent, such as less than a minute ago.
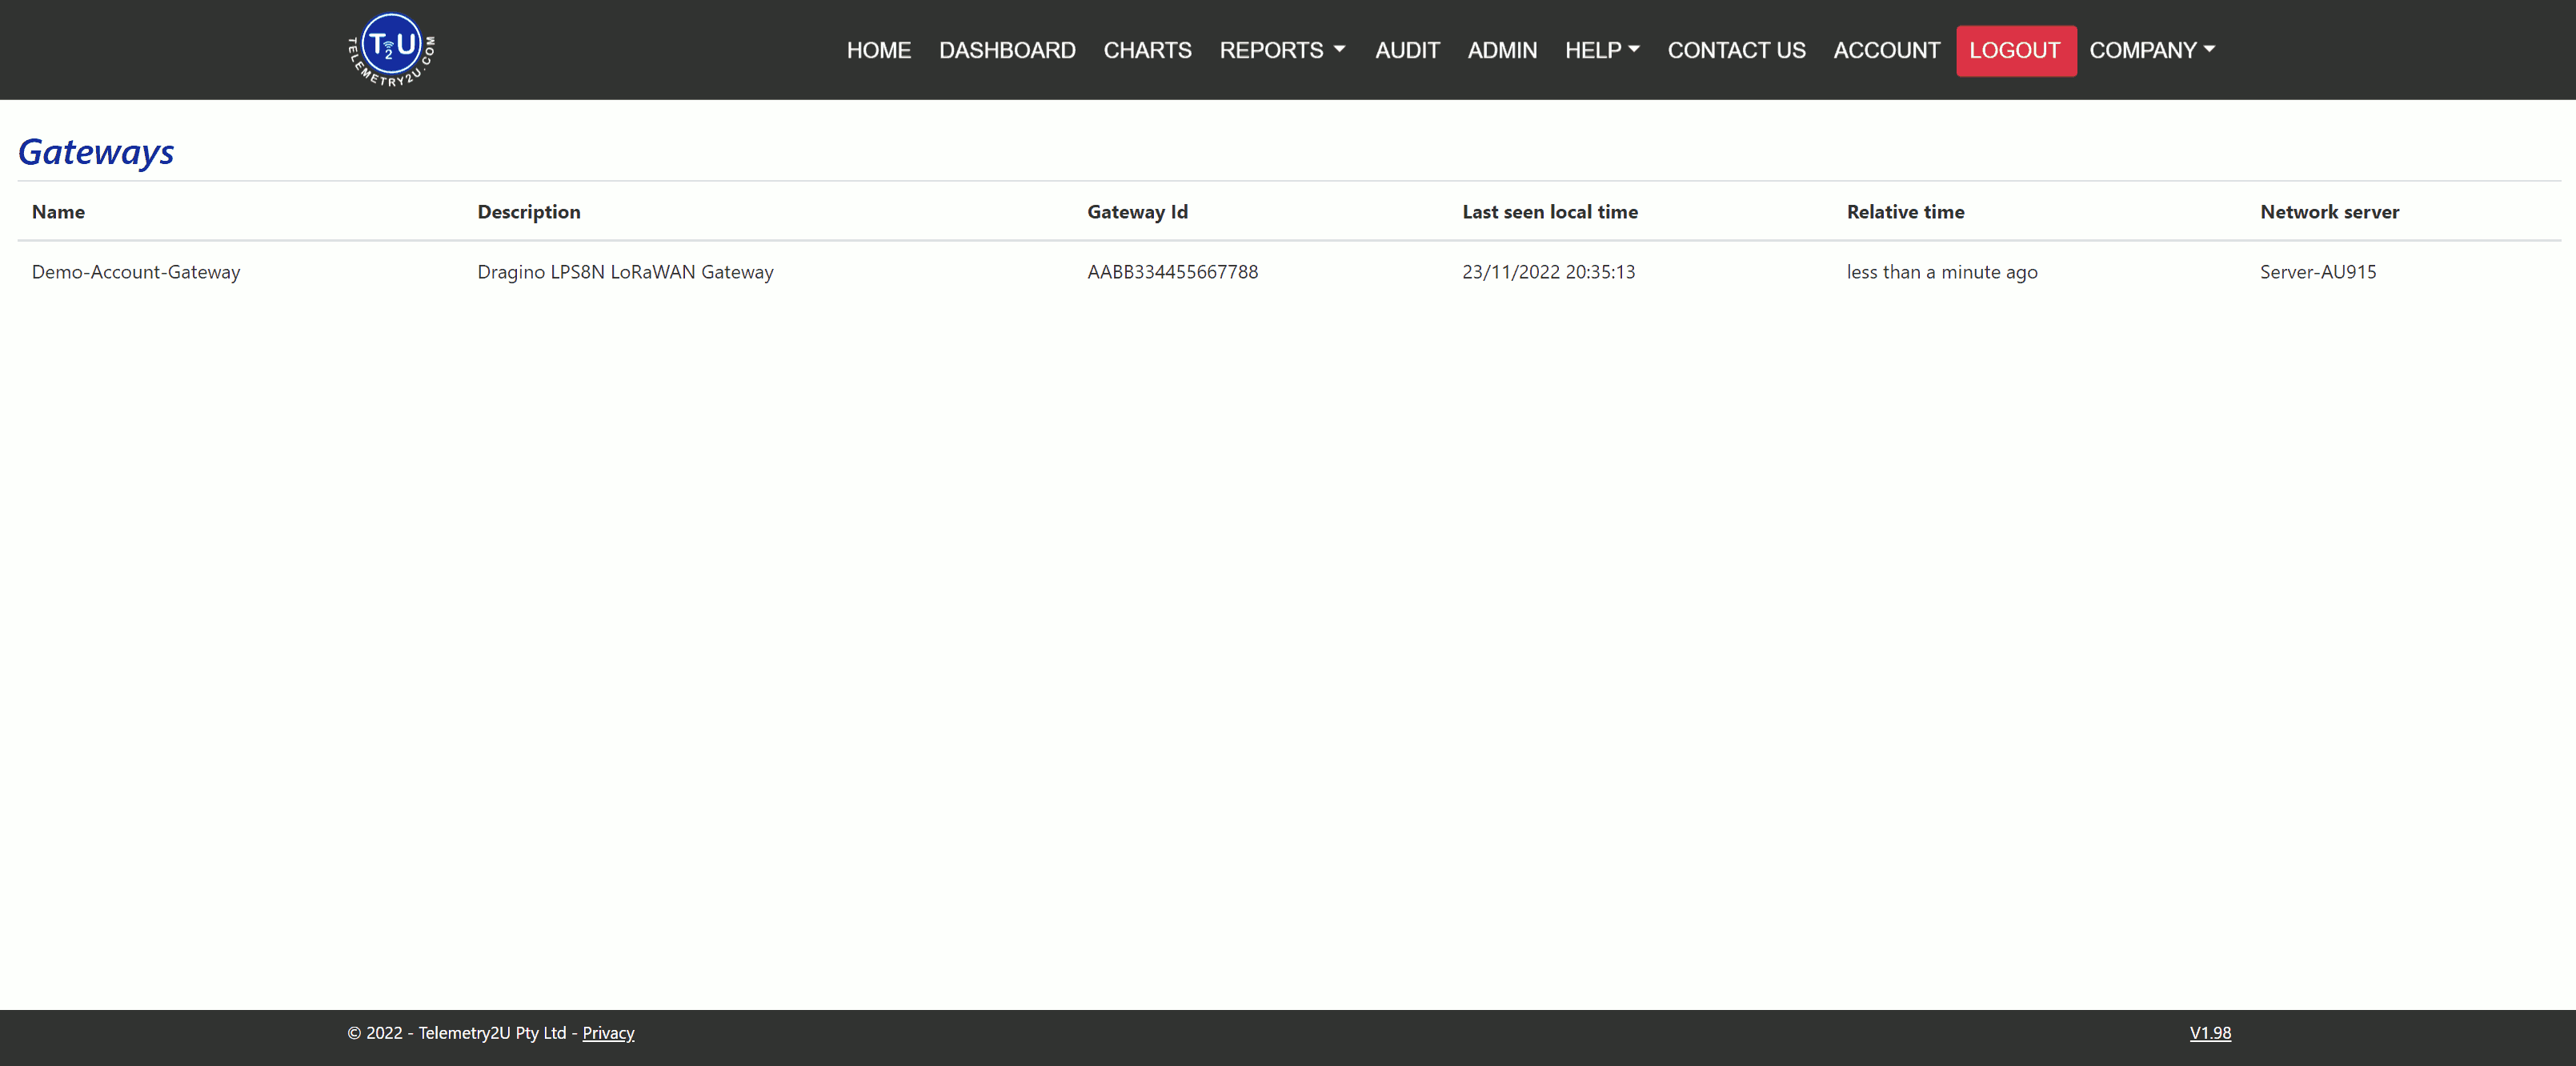
If a pre-configured gateway is not listed in the account, or its Relative Time does not update after the local indicators are green, contact Telemetry2U support with the gateway ID or device EUI.
5. Access the Gateway After Wi-Fi Setup
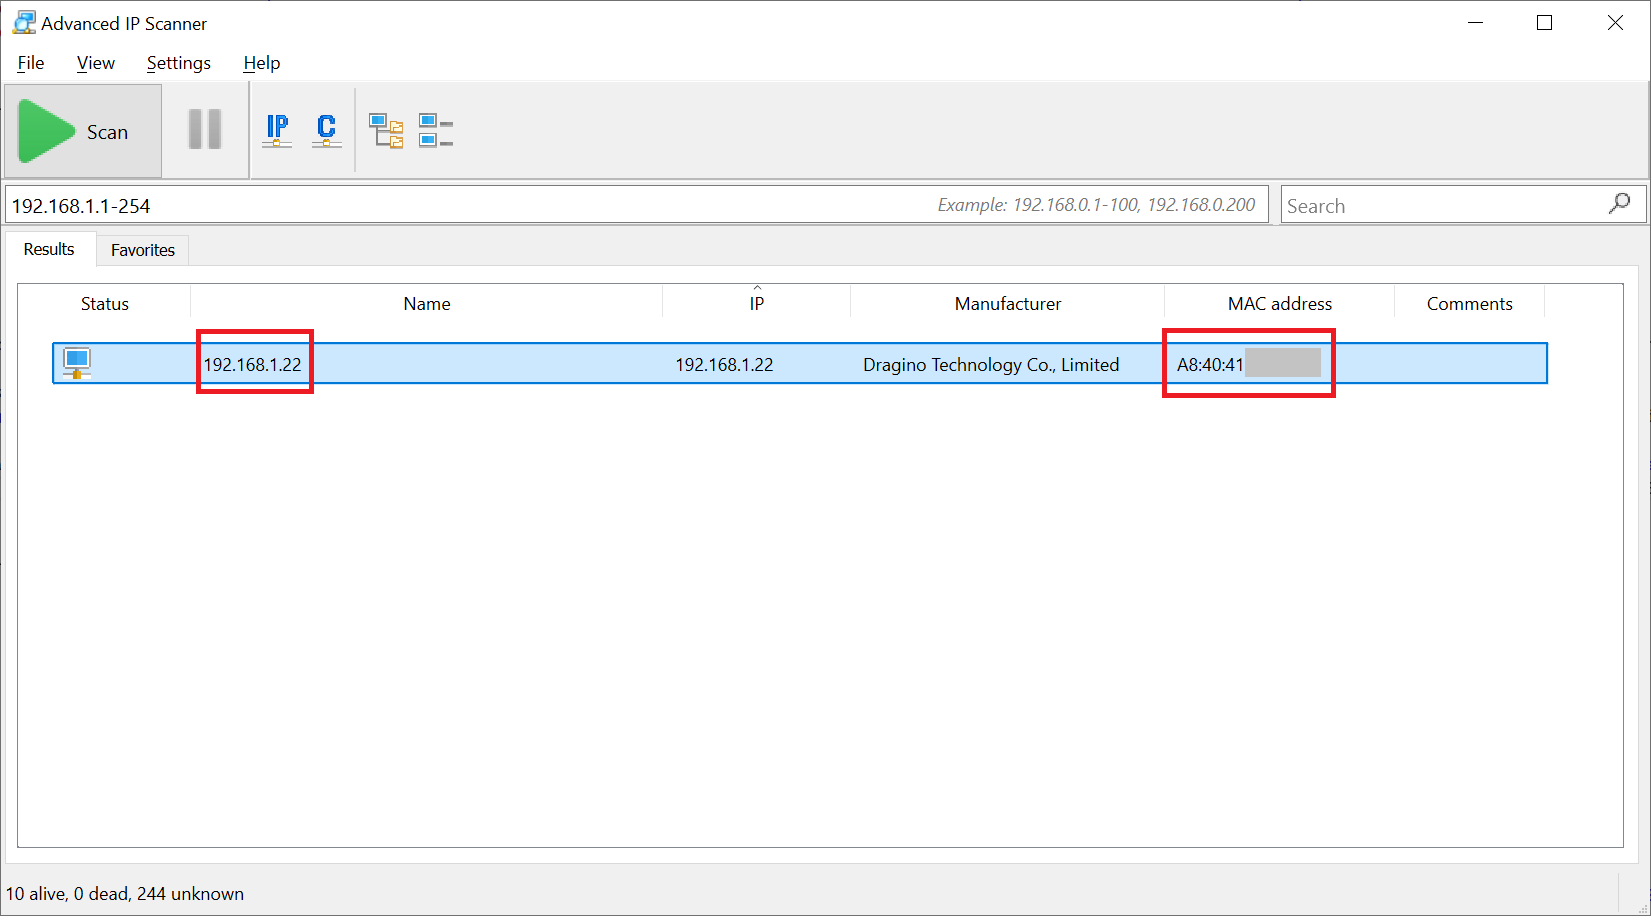
Once the built-in access point is disabled, manage the gateway through the local IP address assigned by the site's router. The computer or phone used for access must be connected to the same local network.
- Open the router's administration page and look for the gateway in its DHCP or connected-device list. Match the entry to the MAC address printed on the gateway.
- Alternatively, on a Windows computer, use Advanced IP Scanner to scan the local subnet and match the detected MAC address to the gateway label.
-
Open the detected address on port
8000. For example: . -
Sign in with the current gateway credentials. Use
adminanddraginoonly if the default login has not been changed.
Optional: create a DHCP reservation in the router if technicians need a predictable local address for future gateway maintenance. Coordinate this with the site's IT administrator.