Connect to a Dragino Device Using Serial Bluetooth Terminal
Connect an Android phone to a compatible Dragino device over Bluetooth Low Energy, verify terminal communication and save reusable LTE-M or NB-IoT configuration macros.
Before You Connect
Serial Bluetooth Terminal provides direct access to supported Dragino devices from an Android phone. It is useful for checking the current configuration and applying field changes without a USB or serial cable.
Use a model that supports configuration through Bluetooth Low Energy.
Bluetooth must be enabled and the app must have the permissions required to scan.
Install Serial Bluetooth Terminal from Google Play.
Have the PIN and the device IMEI or Device EUI available before starting.
1. Connect to the Dragino Device over Bluetooth LE
Start the device before scanning. Bluetooth may become available before the Dragino device has completed its full startup sequence.
- Power on the Dragino device. Press and hold its button for approximately five seconds, then allow up to one minute for startup.
- Open Serial Bluetooth Terminal on the Android phone or tablet.
- Open the menu in the upper-left corner and select Devices.
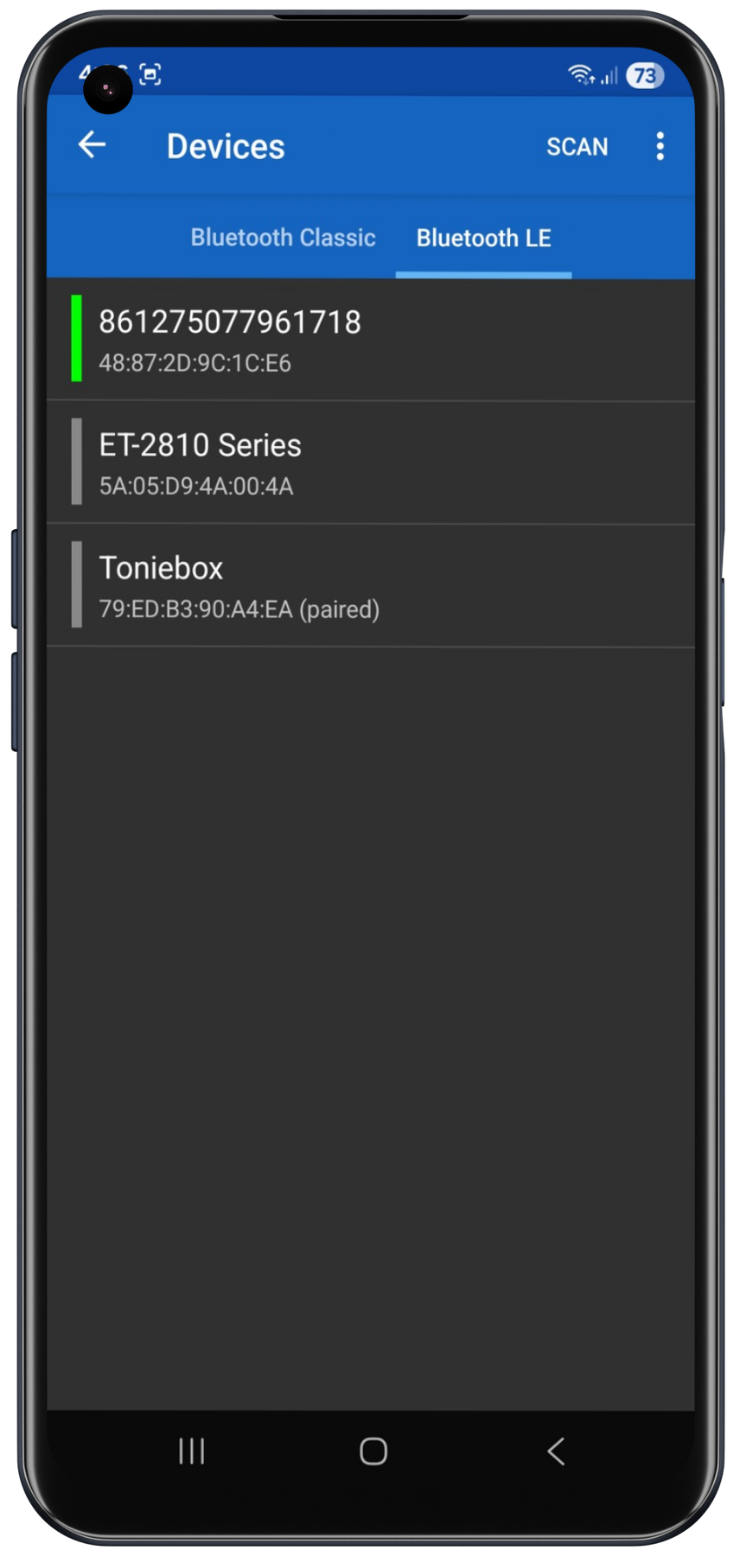
- Open the Bluetooth LE tab.
- Select Scan to search for nearby devices.
- Select the correct Dragino device. Match the displayed identifier with the final digits of the IMEI or Device EUI printed on the device label or packaging.
- Wait for the terminal screen to open.
Connection tip: if the terminal opens and immediately disconnects, wait approximately 10 seconds and reconnect. The device may still be completing its startup process.
2. Unlock and Test the Terminal Connection
Wait until the Dragino device finishes starting. A message normally indicates that the device has entered sleep mode. Enter the PIN and test the connection before changing any configuration values.
- Enter the device-specific PIN in the text field at the bottom of the terminal.
- Select the send arrow in the lower-right corner.
- Send to request the current device configuration.
- Confirm that the device returns its configuration and an expected response.
Bluetooth timeout: send the PIN and required commands promptly after connecting. If the Bluetooth session closes, reconnect and wait for startup to finish before trying again.
3. Create a Multiline Configuration Macro
The shortcut tabs above the terminal input can store a single command or a multiline macro. Use a multiline macro when several modem commands must be sent in a fixed order.
- Press and hold an available shortcut tab above the terminal text field.
- Enter a short descriptive name for the macro.
- Add the required commands in the Value field, with one command on each line.
- Select Multiline Text as the edit mode.
- Set Line delay [ms] to 10000.
- Leave the action set to Send, then save the macro.
Use the correct network profile: the LTE-M and NB-IoT examples below contain different APNs, modem modes and band settings. Apply only the profile that matches the SIM and mobile network used by the device.
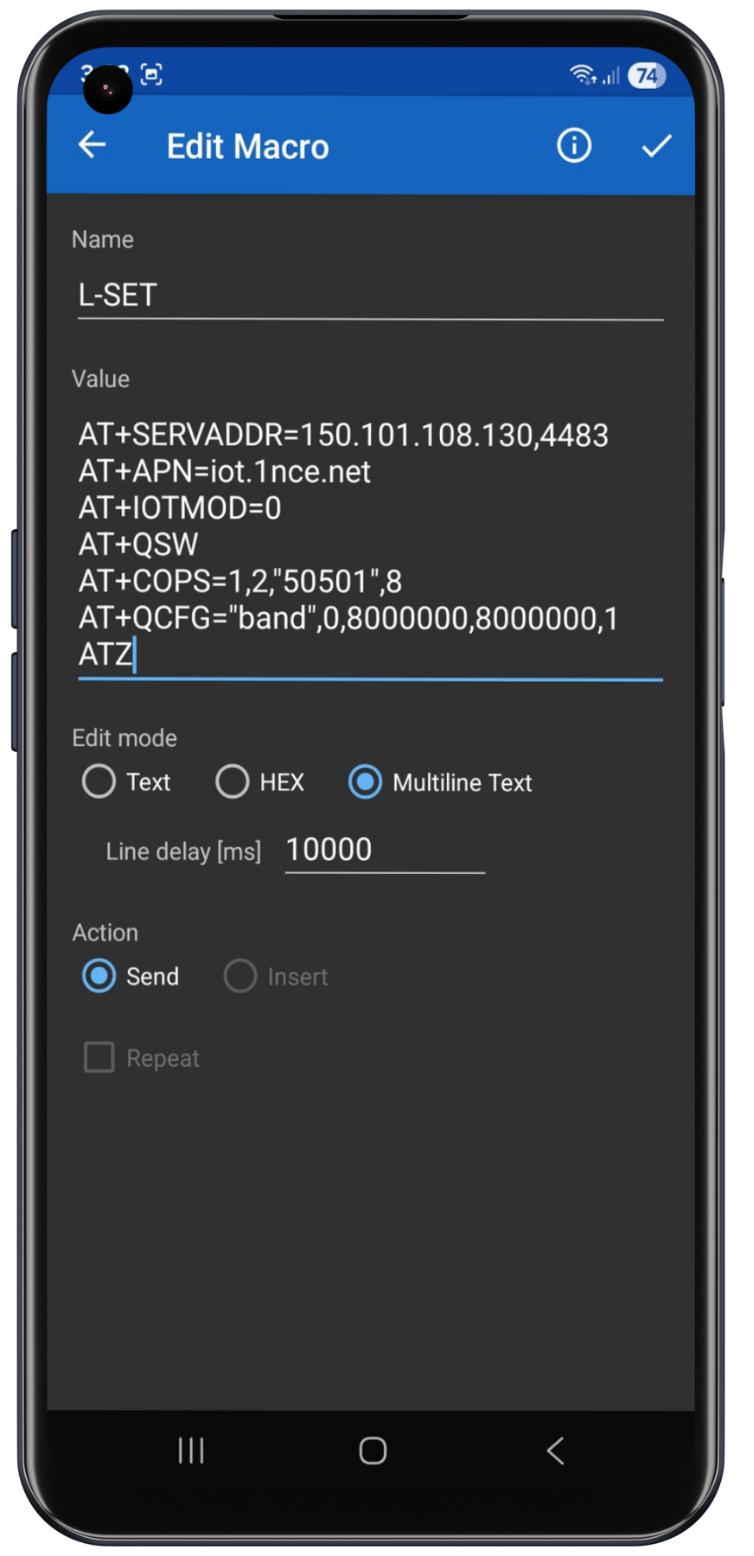
LTE-M Macro for Telemetry2U via 1NCE
Add the following commands to the macro in the order shown. Select each command to copy its exact value to the clipboard.
- — sets the Telemetry2U server address and port.
- — sets the 1NCE access point name.
- — selects LTE-M mode.
- — switches the cellular modem so the following modem-level commands can be applied.
- — selects the specified Australian mobile network and access technology.
- — restricts the modem to the selected frequency-band configuration.
- — restarts the device so the settings can take effect.
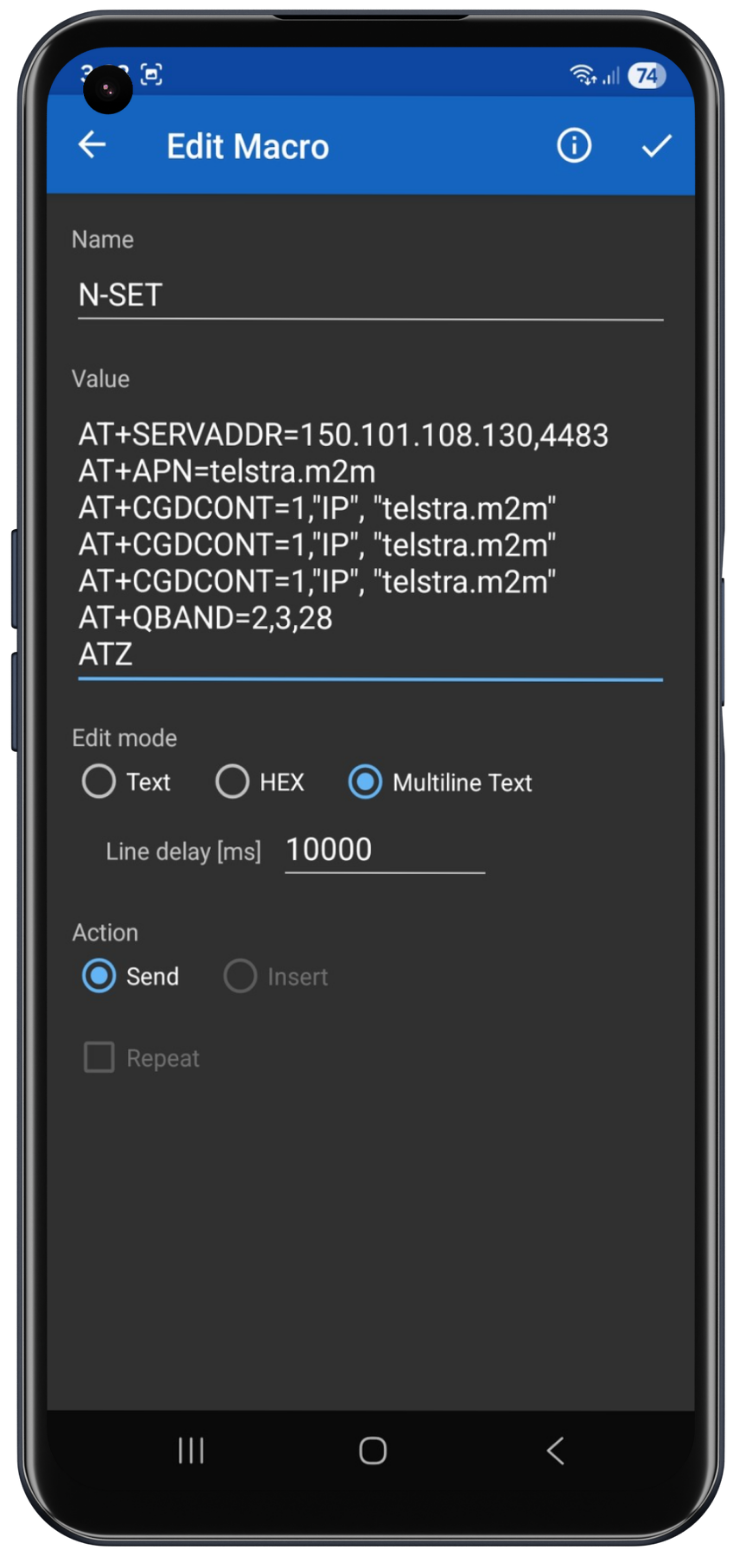
NB-IoT Macro for Telemetry2U via Telstra
Add the following commands to the macro in the order shown. The PDP-context command is entered on three consecutive lines in this example.
- — sets the Telemetry2U server address and port.
- — sets the Telstra NB-IoT access point name.
- — sets the PDP context. Add this same command on three consecutive macro lines.
- — restricts the modem to the selected NB-IoT bands.
- — restarts the device so the settings can take effect.