How to Add Annotations to Alert Events
Add a clear record of what happened, how an alert was handled and when the monitored condition recovered. Saved annotations remain available in Reports, Charts and configured Audit Reports.
Record the Response to an Alert or Recovery Event
Telemetry2U annotations attach a written note to a specific alert record. They are useful for recording the cause, inspection result, corrective action and recovery outcome without changing the original sensor data.
Annotations can support traceability in healthcare, laboratory, cold-chain and other quality-controlled monitoring applications. Keep each entry factual and specific to the event being documented.
Sign in to the account that contains the node and alert event.
An administrator can enable this role under User Maintenance > User Access.
1. Open Reports and Find the Event
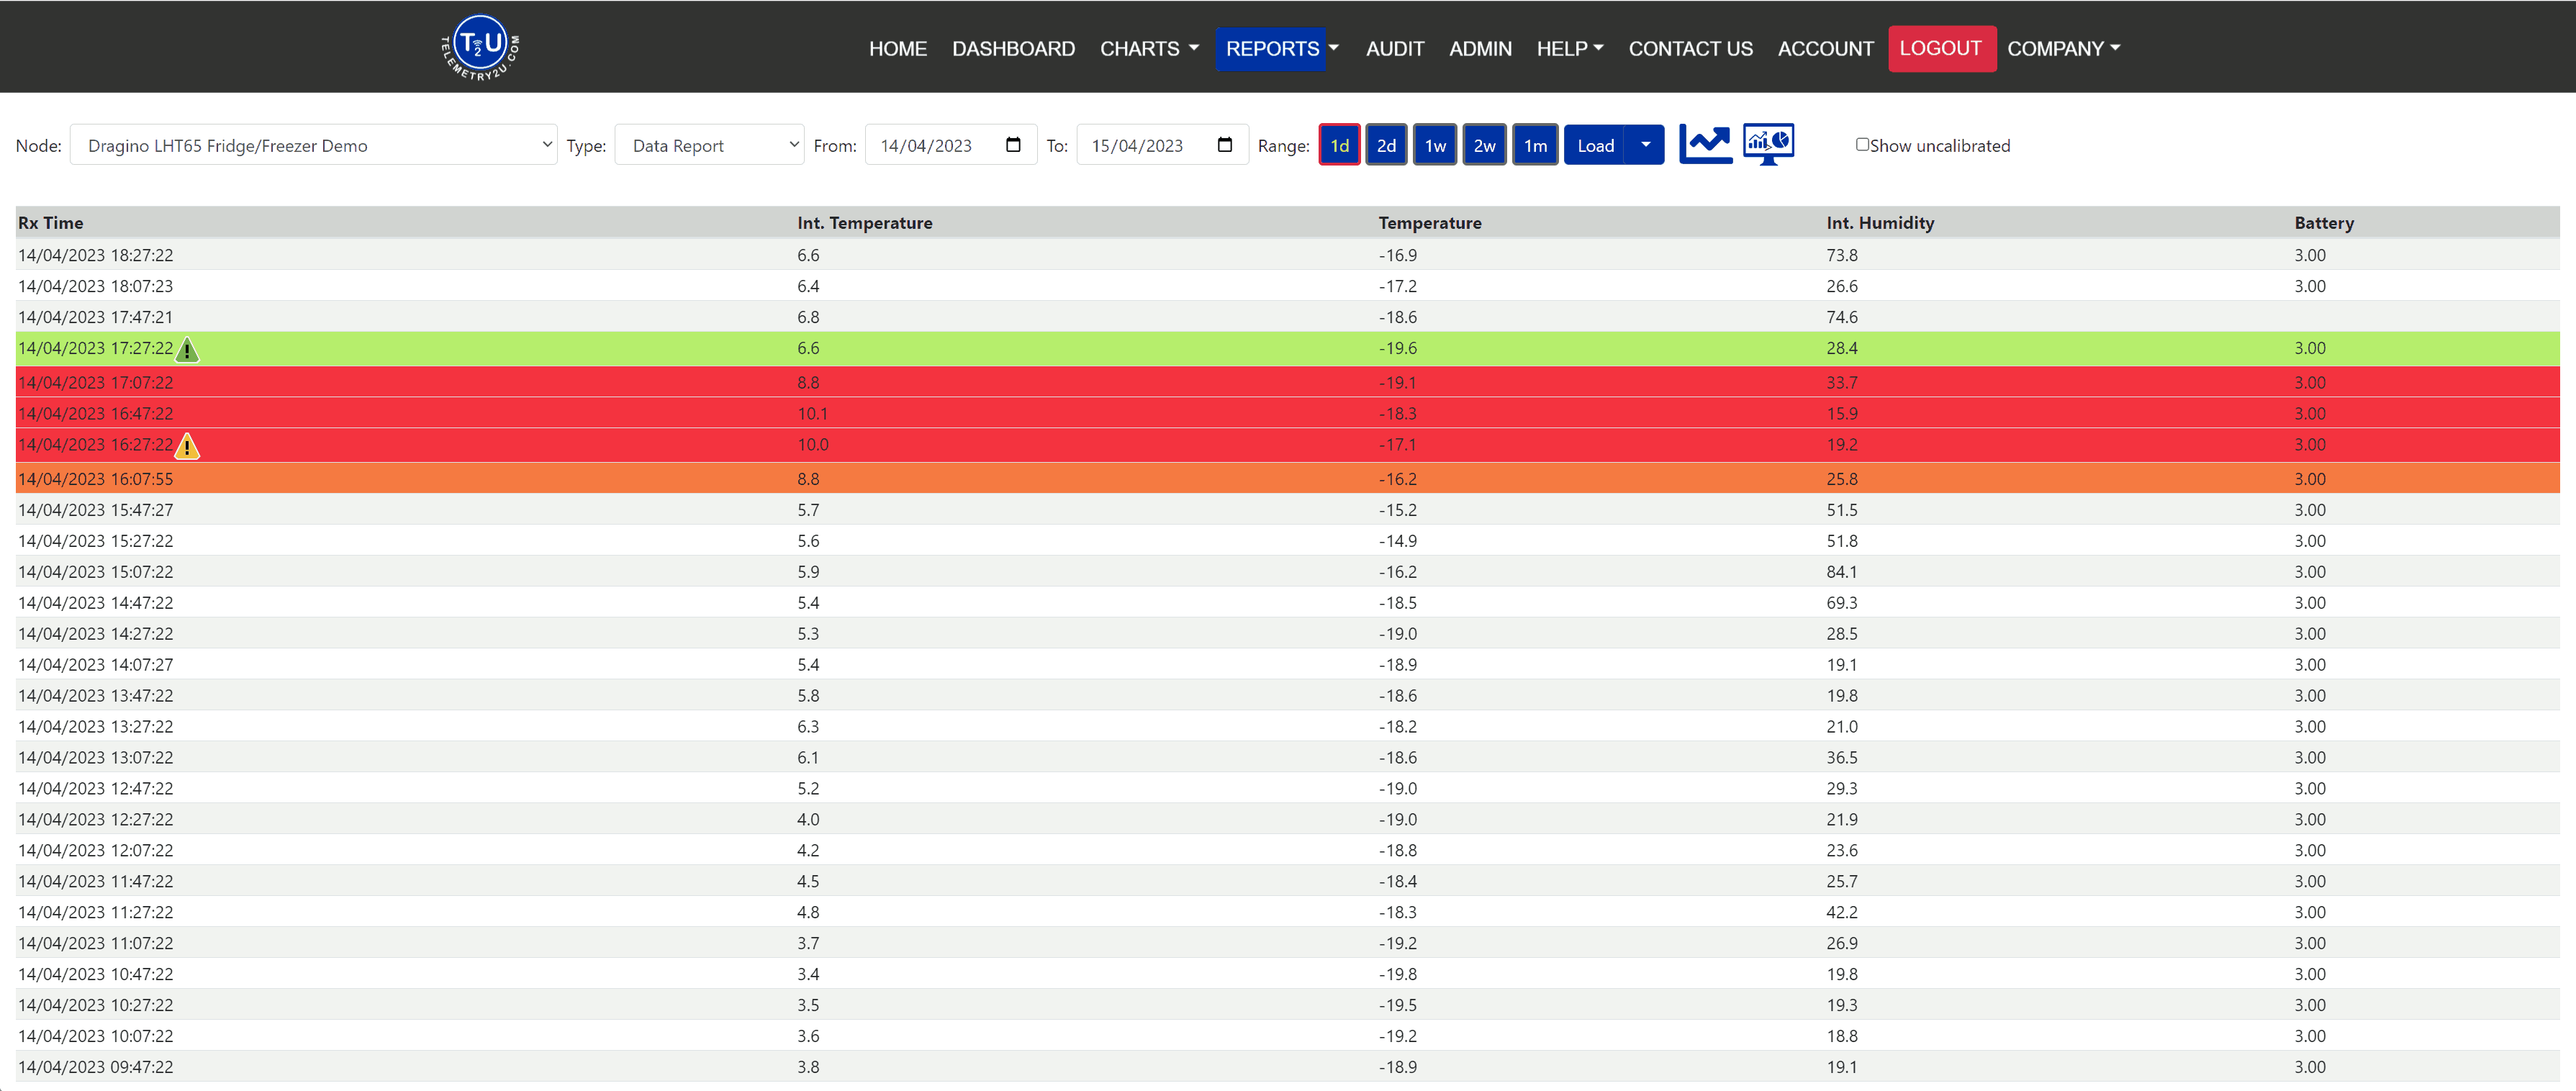
Open Reports, select the required node and date range, then locate the alert or recovery row that needs an explanation. Annotations are added from Reports even though the same event may also appear on the Dashboard and Charts pages.
The input has crossed its threshold but has not yet met the configured consecutive-reading requirement.
The alert condition has been confirmed and the configured notifications have been triggered.
The input has returned to its normal state after the alert condition.
2. Add the Annotation
Select the annotation icon beside the relevant event. Use the active-alert entry to document the initial response and the recovery entry to record how the issue was resolved or confirmed as normal.

Select the yellow warning icon on a red row to annotate the active alert event.

Select the green recovery icon to document the return to normal conditions.
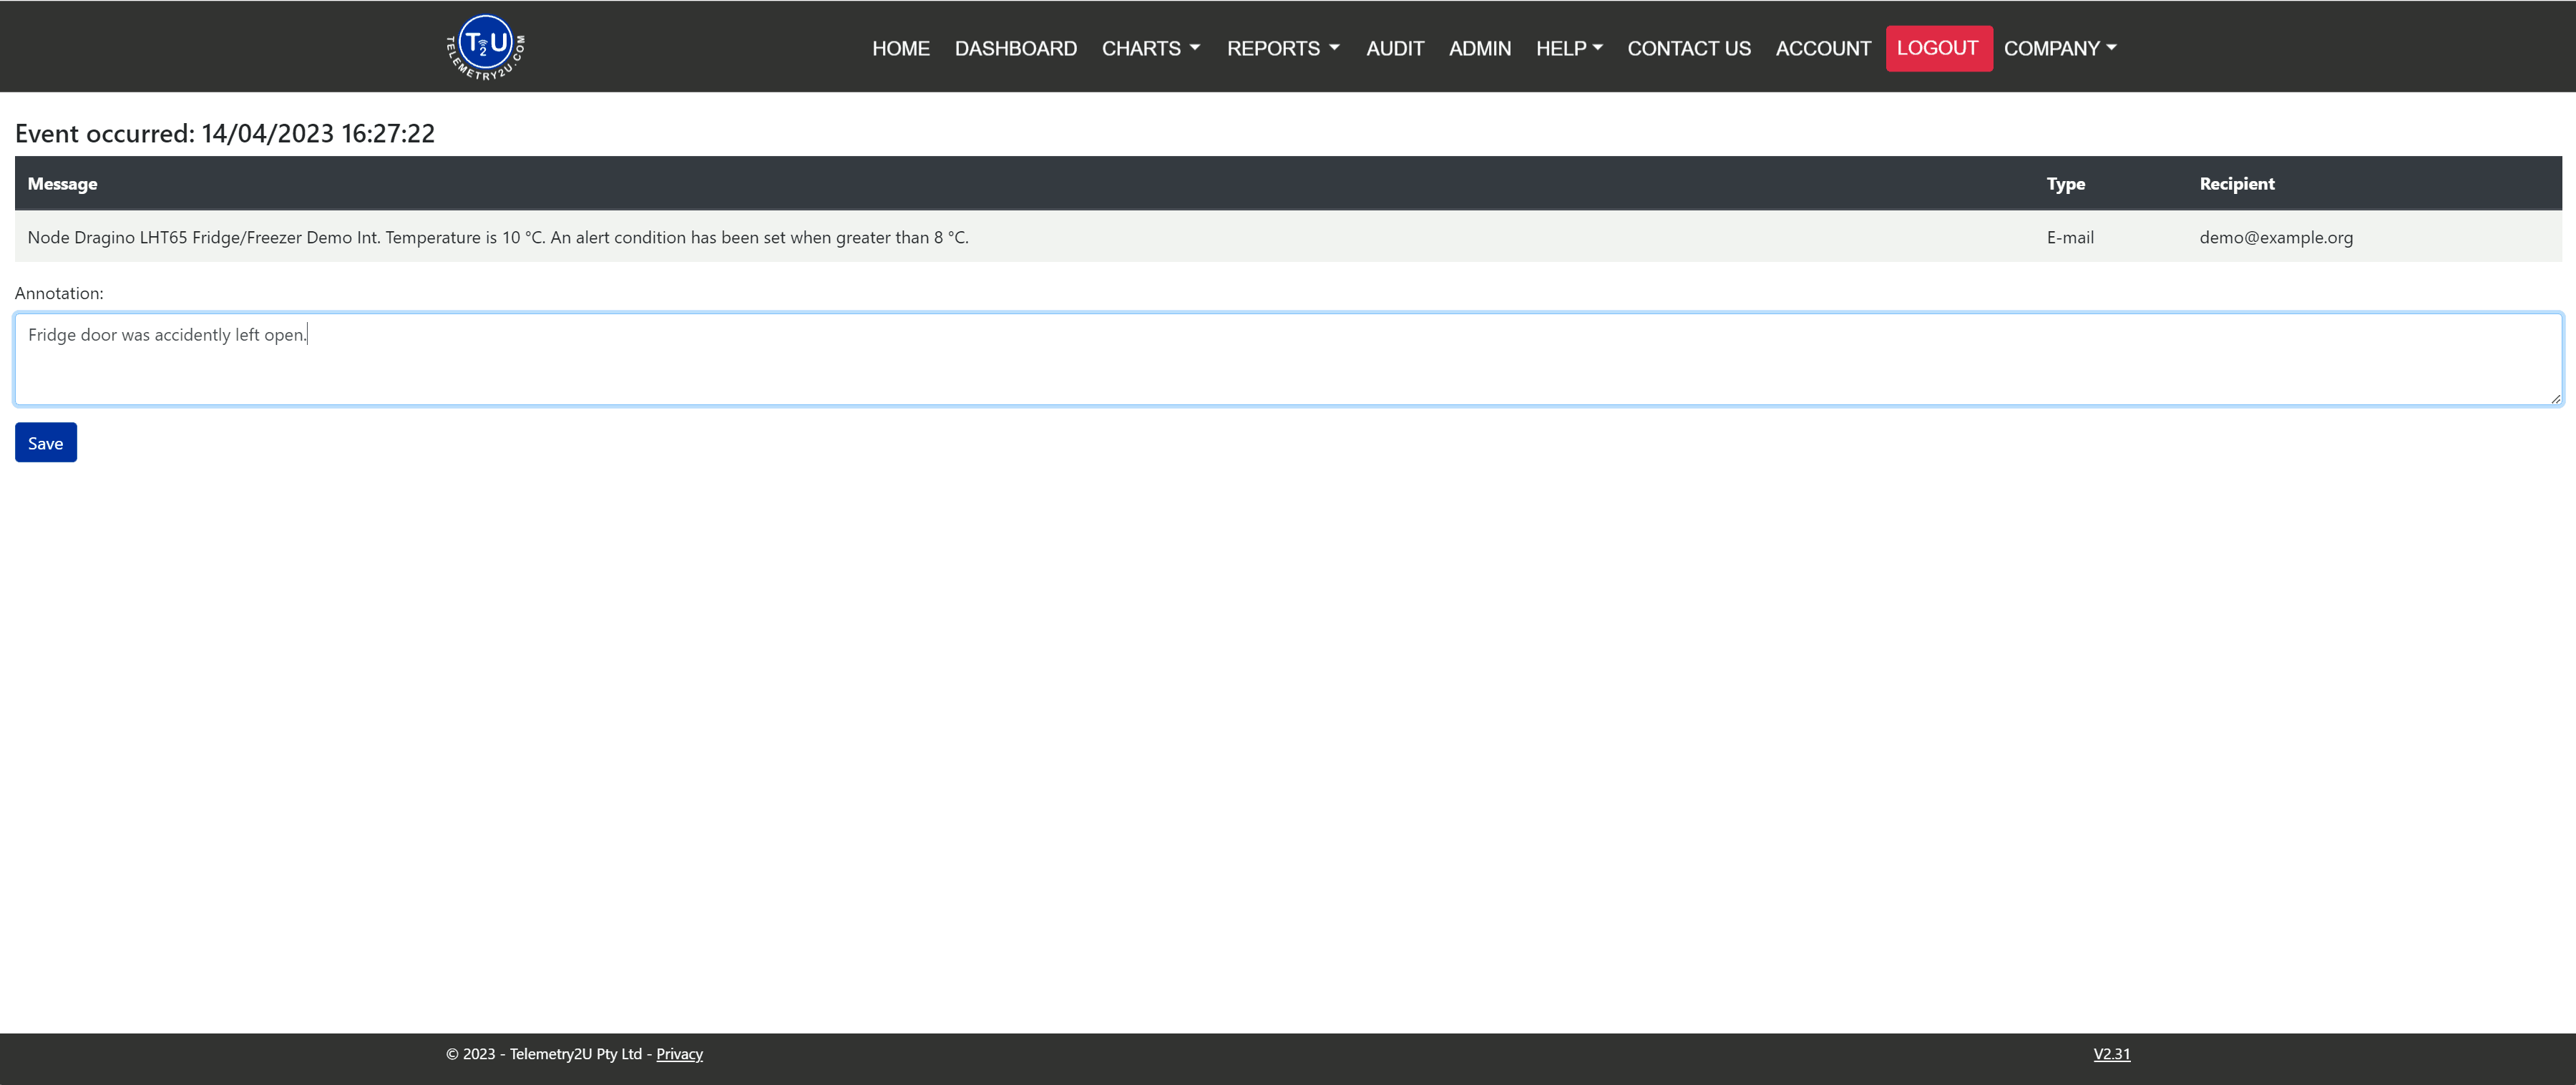
- Confirm that the event timestamp and notification details match the event you intend to document.
- Enter a concise explanation in the Annotation field.
- Select Save.
Recommended entry: record the observed cause, the action taken, the person or team involved where appropriate, and the outcome. Avoid speculation or unrelated notes.
3. Confirm, Edit or Delete the Annotation
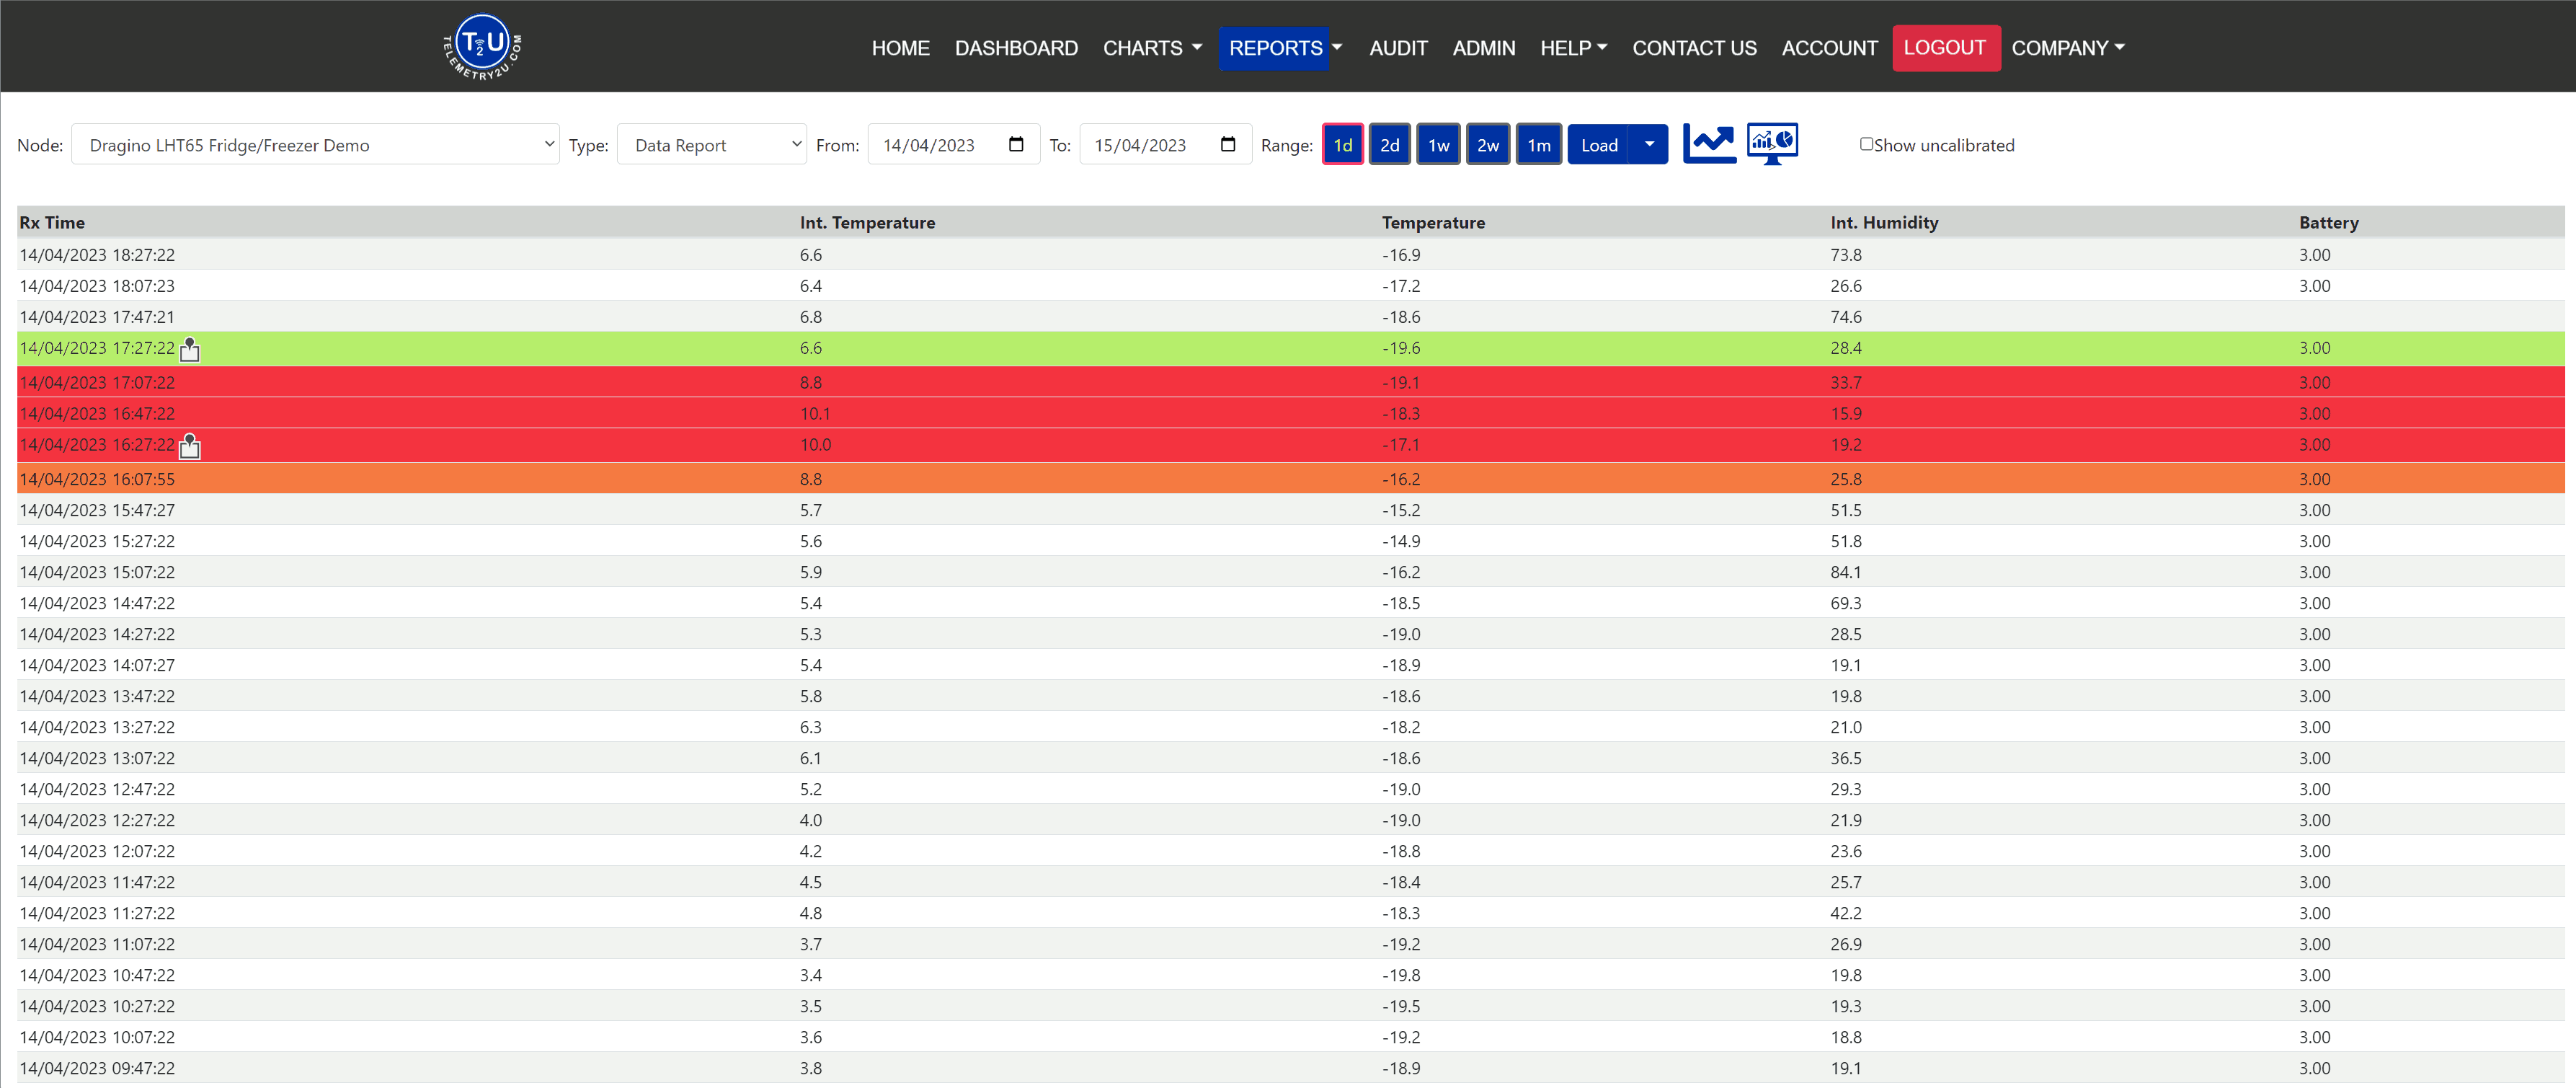
After saving, the warning or recovery icon changes to the annotation pin icon. This confirms that a note is attached to the event. Select the pin later to review, edit or delete the saved annotation.

The pin icon identifies an event with an existing annotation.
Review Annotations in Audit Reports and Charts
Saved annotations remain linked to the original event. Review them as a chronological record in an Audit Report or inspect a specific entry on the Charts page.
Audit Reports
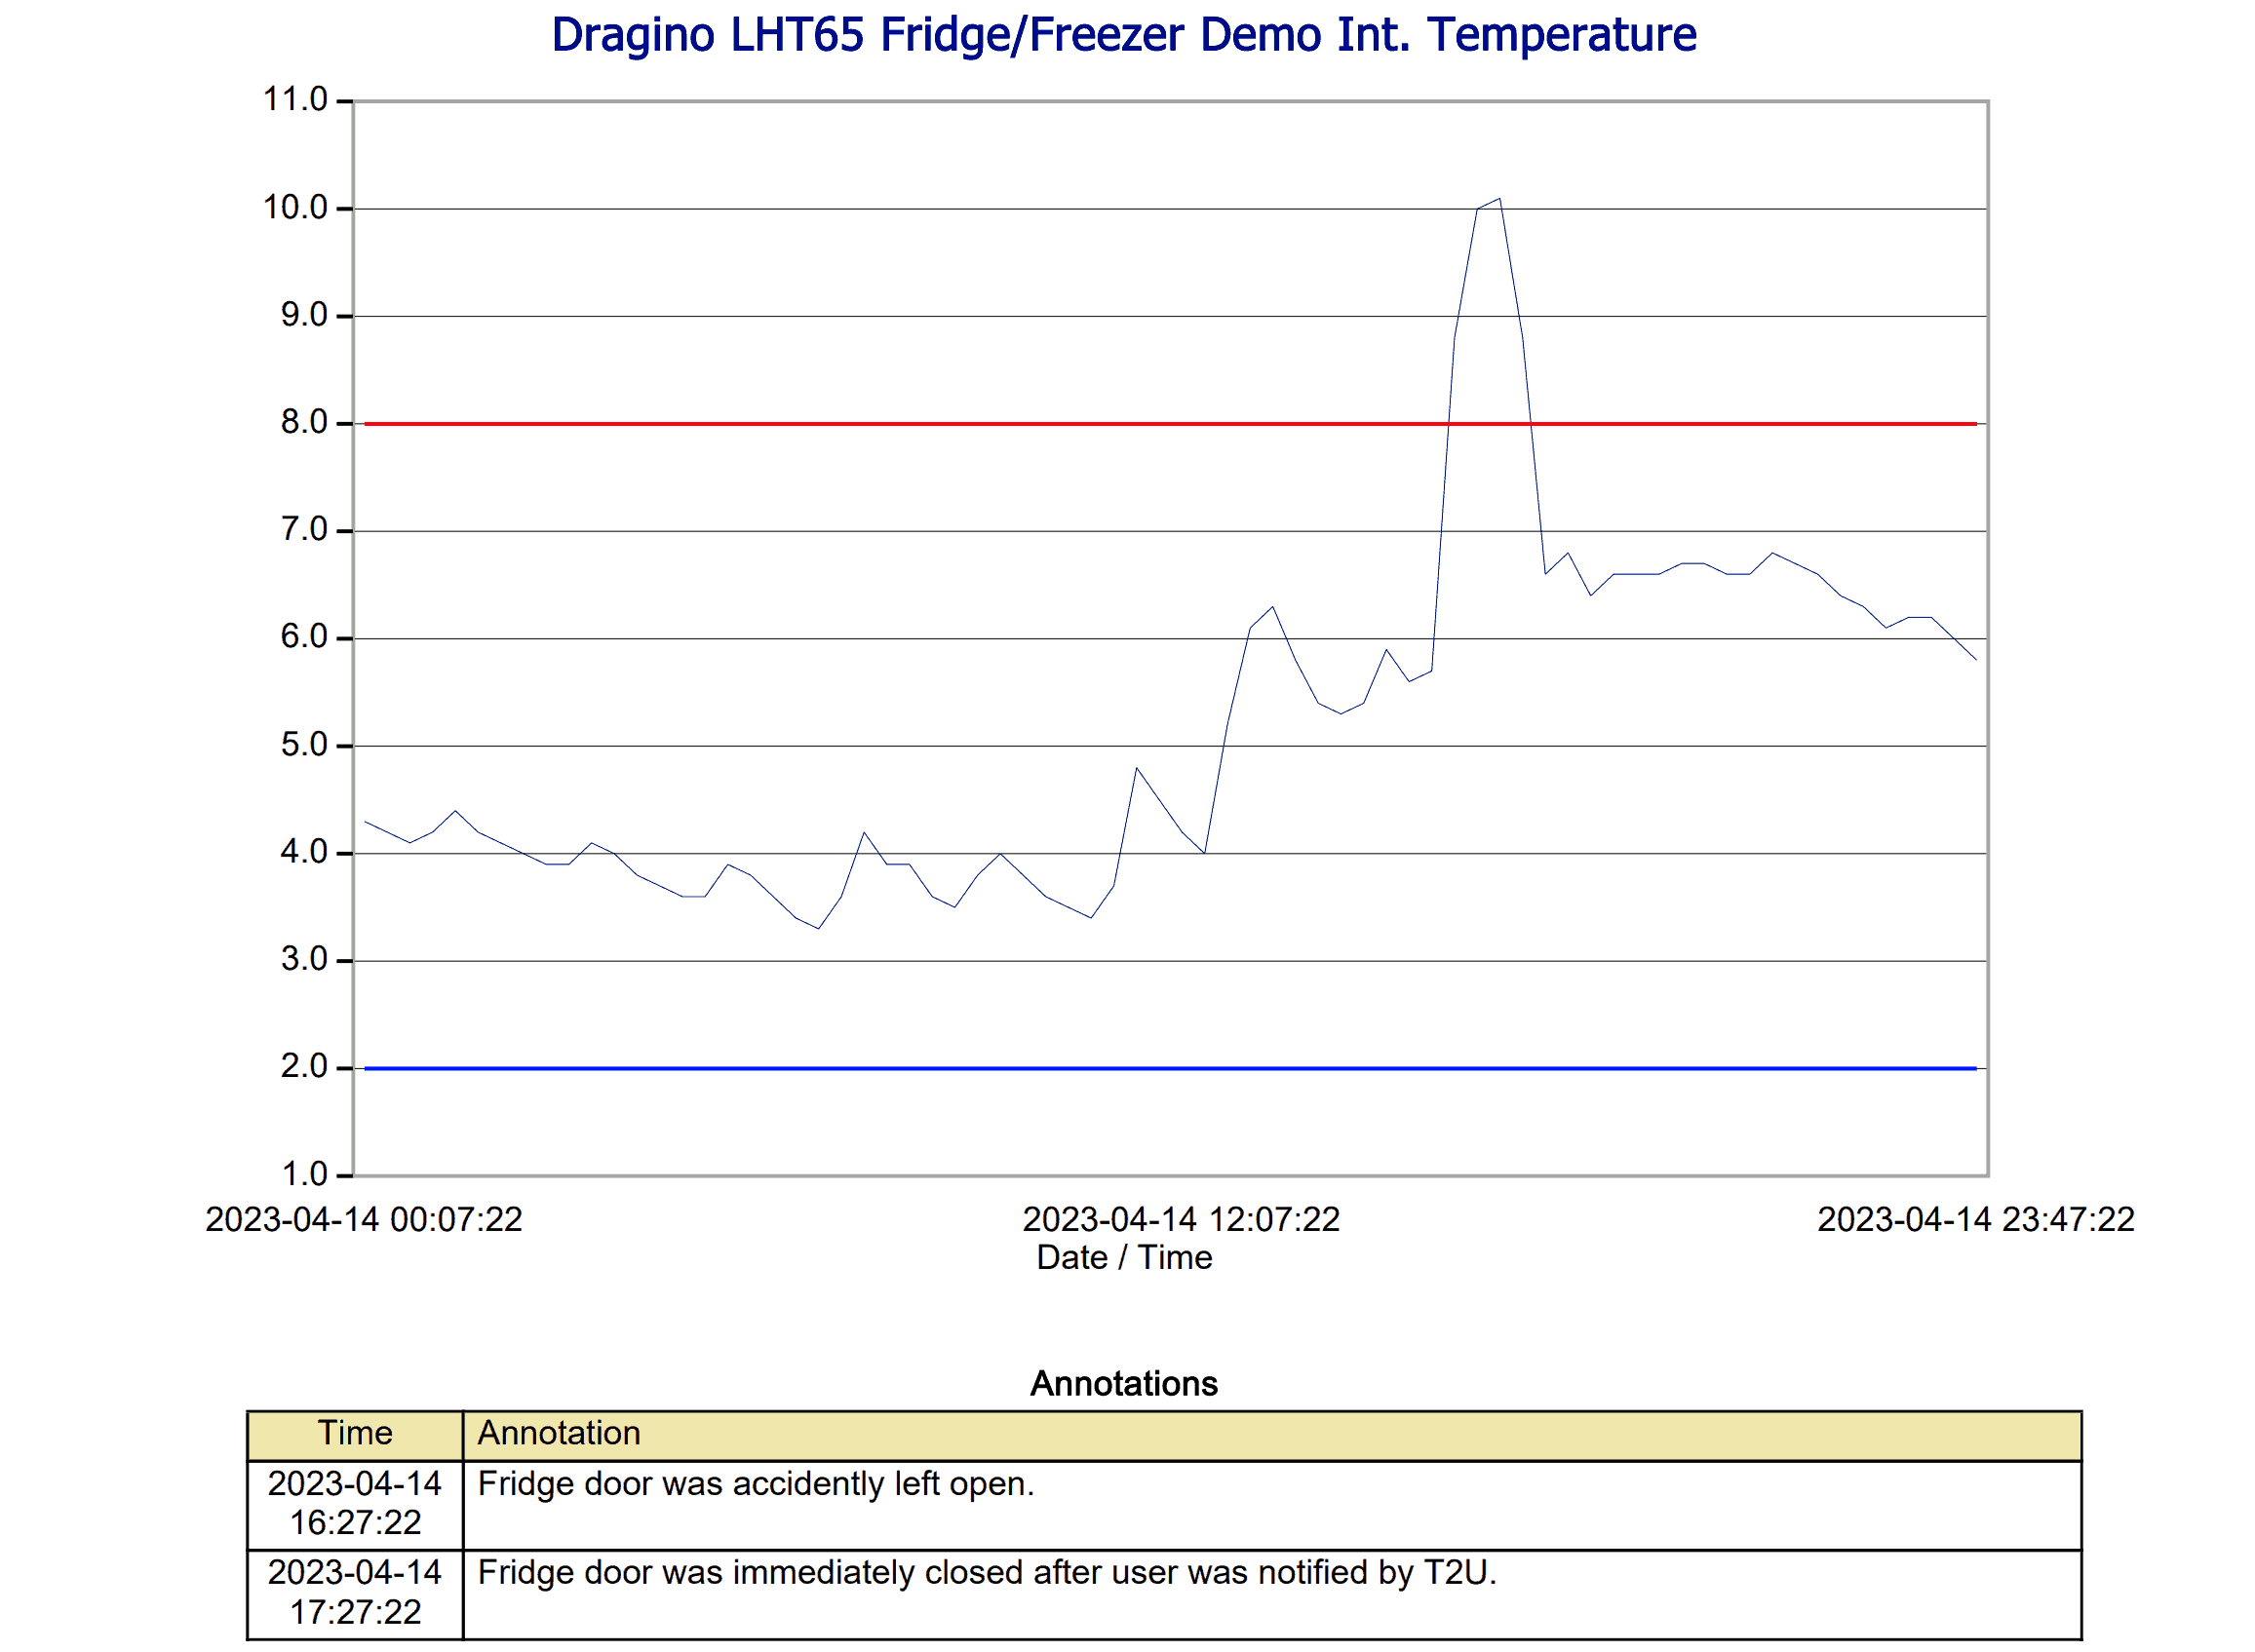
Enable Include Annotations in the Audit Report configuration to display a chronological annotation table beneath the node chart.
Editing an Audit Report requires the Audit Admin role. See Section 5.0 – Audit Reports for configuration instructions.
Charts Page
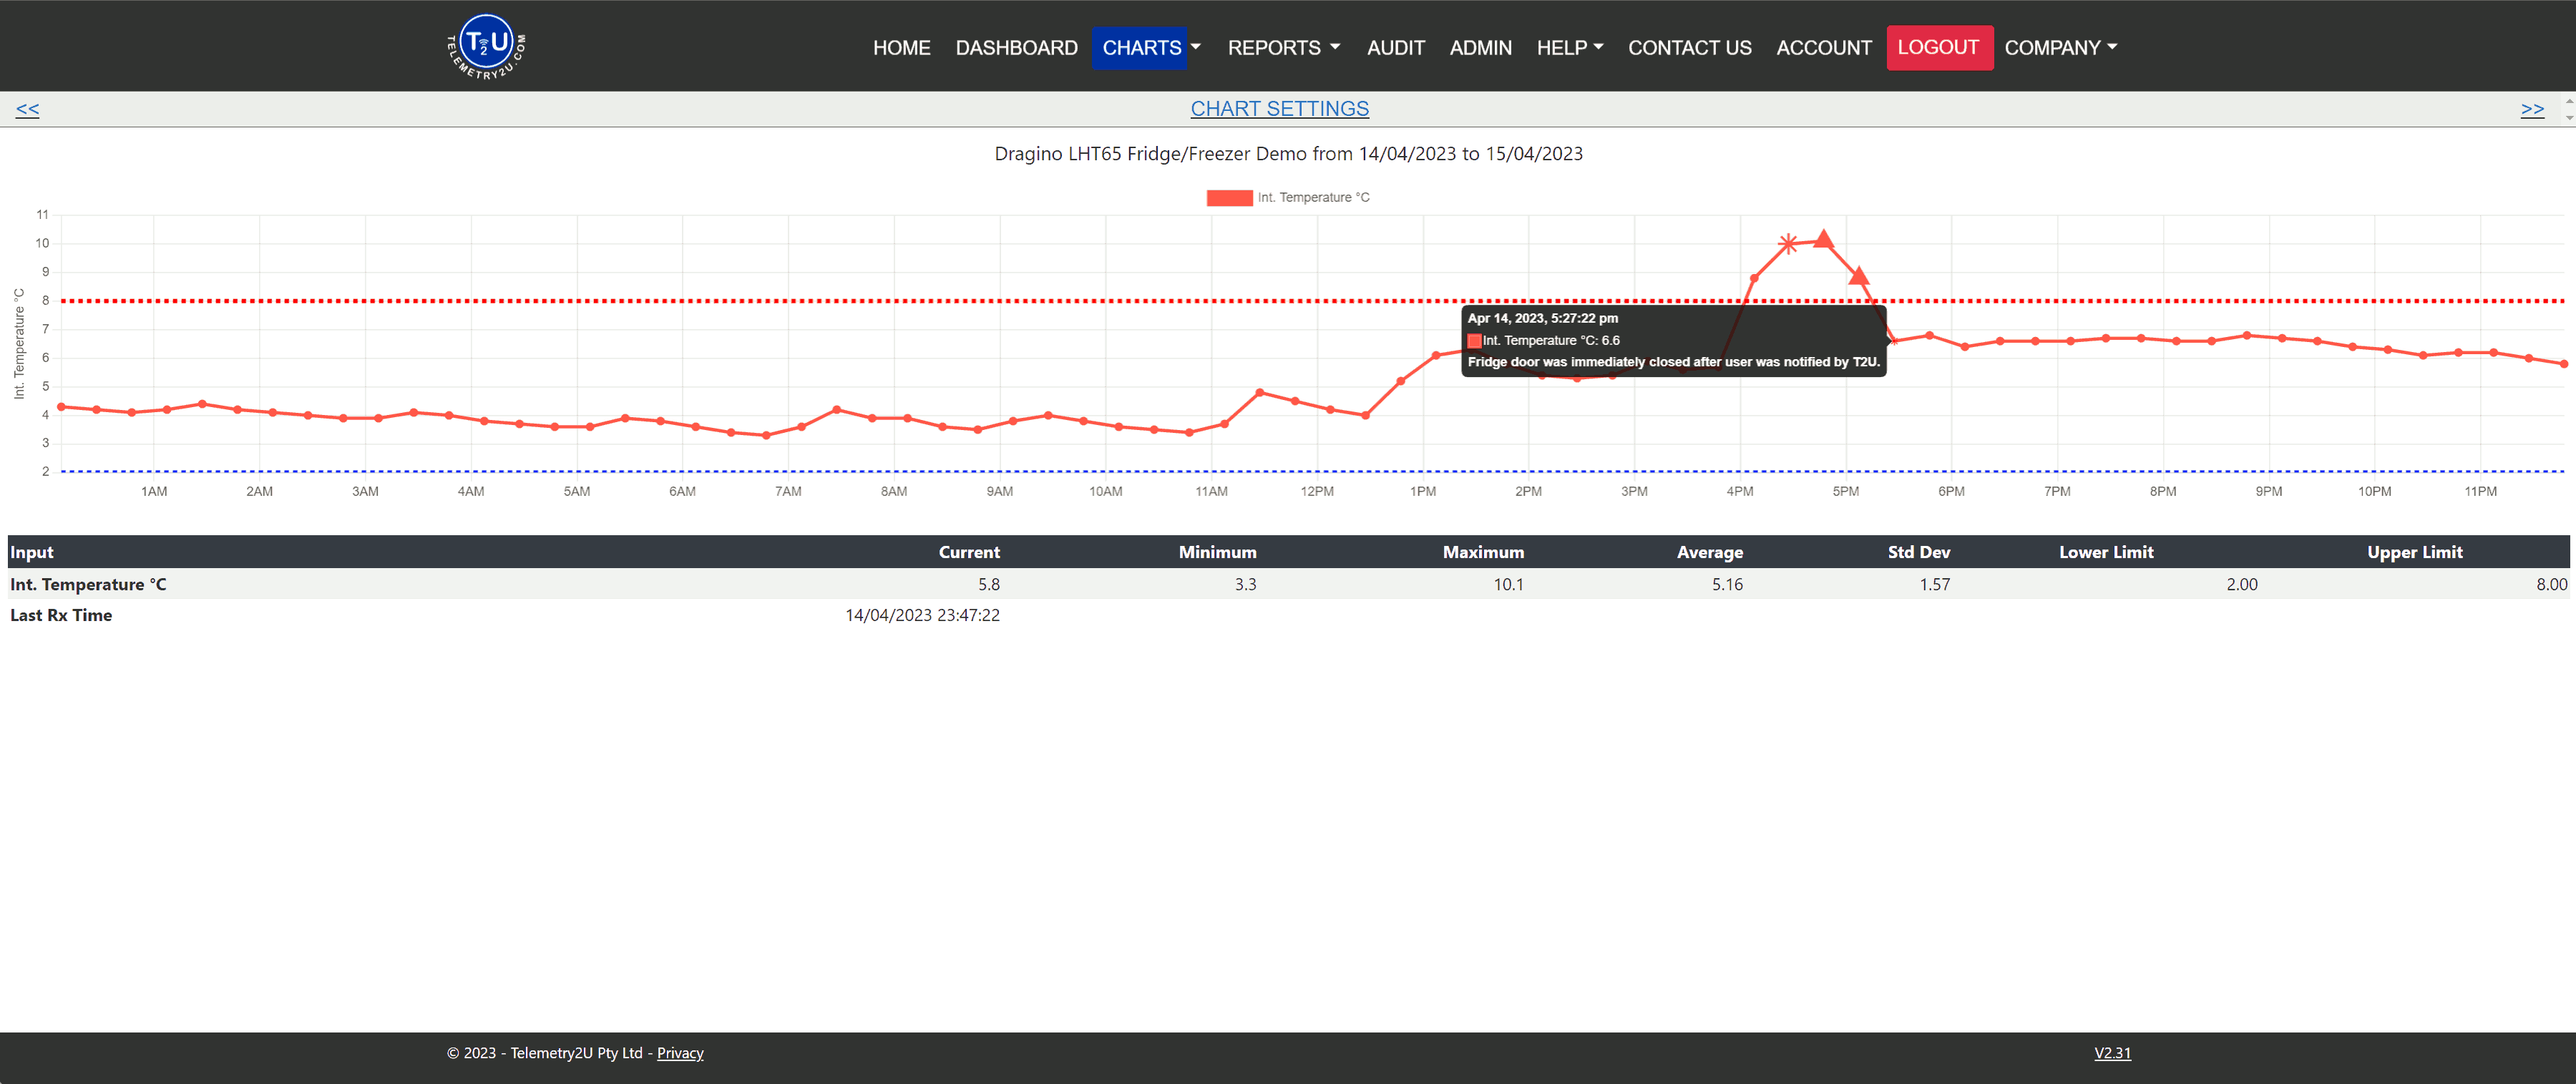
On Charts, hover over the annotation marker on the graph to display the note associated with that event.