How to Create and Invite Users in Telemetry2U
Invite additional people to an existing Telemetry2U account, control which features and nodes they can access, add them to alert notification groups, and make the required dashboards visible.
Set Up Each User with Only the Access They Need
Creating a user sends an email invitation and links the accepted account to your company. The invitation does not grant access to sensor data or platform features by itself. A Company Admin must assign the appropriate user roles and node access after the account is activated.
This example creates a standard user who can add alert annotations, view gateway status, access selected temperature and humidity sensors, receive configured alert notifications, and view a shared dashboard.
You must be able to manage users, access controls and notification groups.
Have their login email, first name, last name, time zone and preferred date/time format ready.
Enter an alert email and phone numbers if the user will receive email, SMS or voice-call alerts.
Decide which roles, nodes, notification groups and dashboards the user requires.
1. Create the User and Send the Invitation
Sign in to Telemetry2U, open Admin > User Maintenance, then select Create a New User to open the user form.
Complete at least the following required fields:
- User Login E-mail
- First Name
- Last Name
- Date/time Format
- Time Zone
If the user will receive notifications, also complete the relevant alert email,
SMS number and voice-call number. Enter phone numbers in international format,
such as +61xxxxxxxxx for Australia.
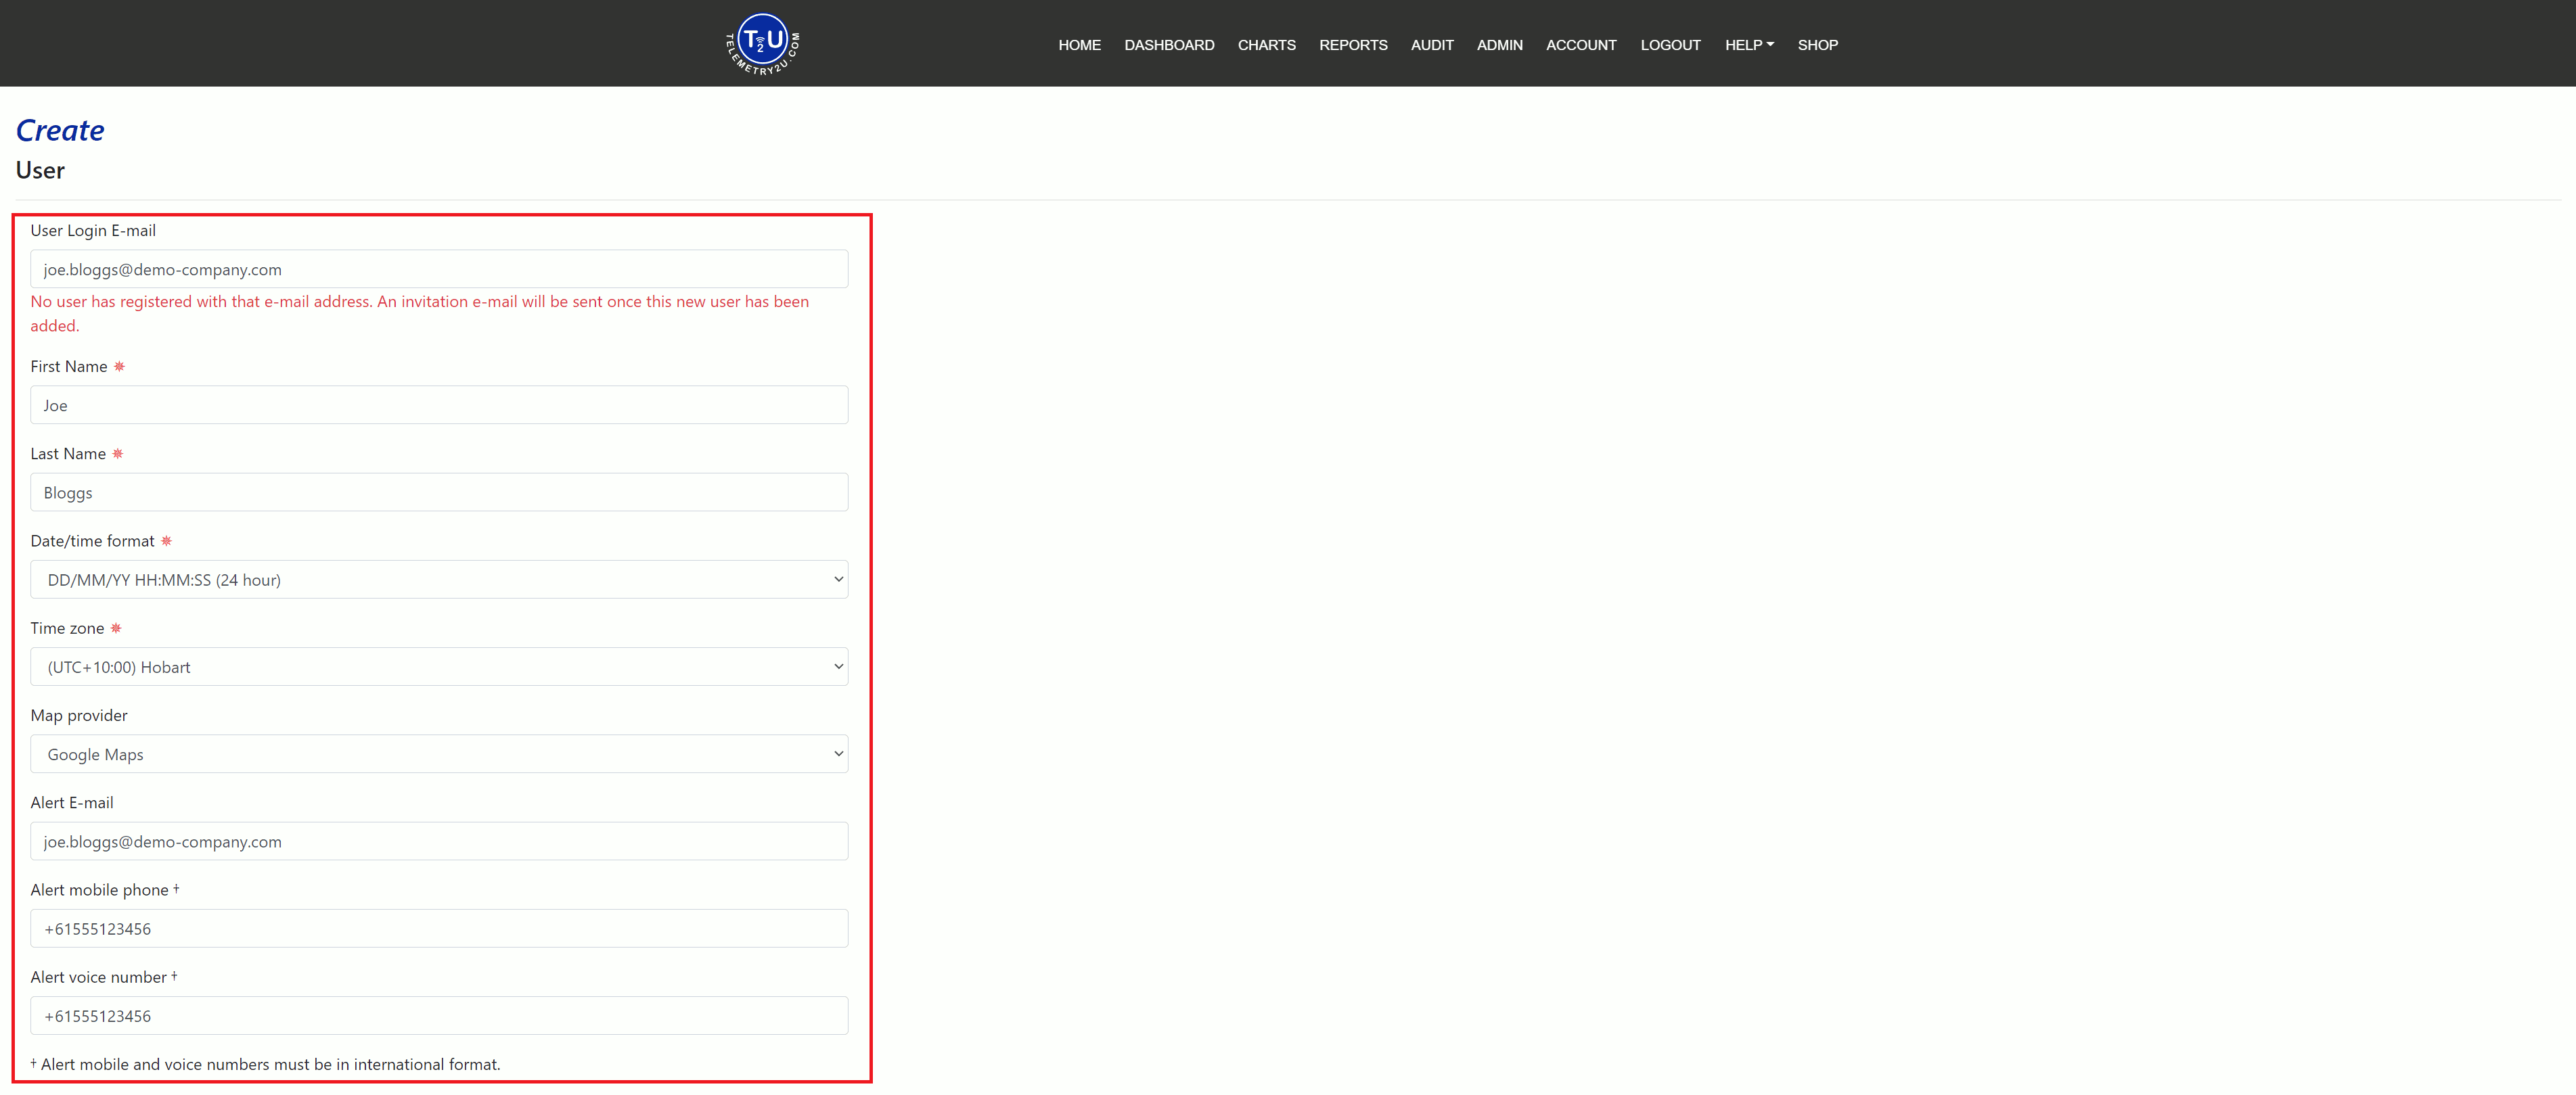
Select Create at the bottom of the form. Telemetry2U returns to the user list, displays the new record and sends an invitation to the login email address.
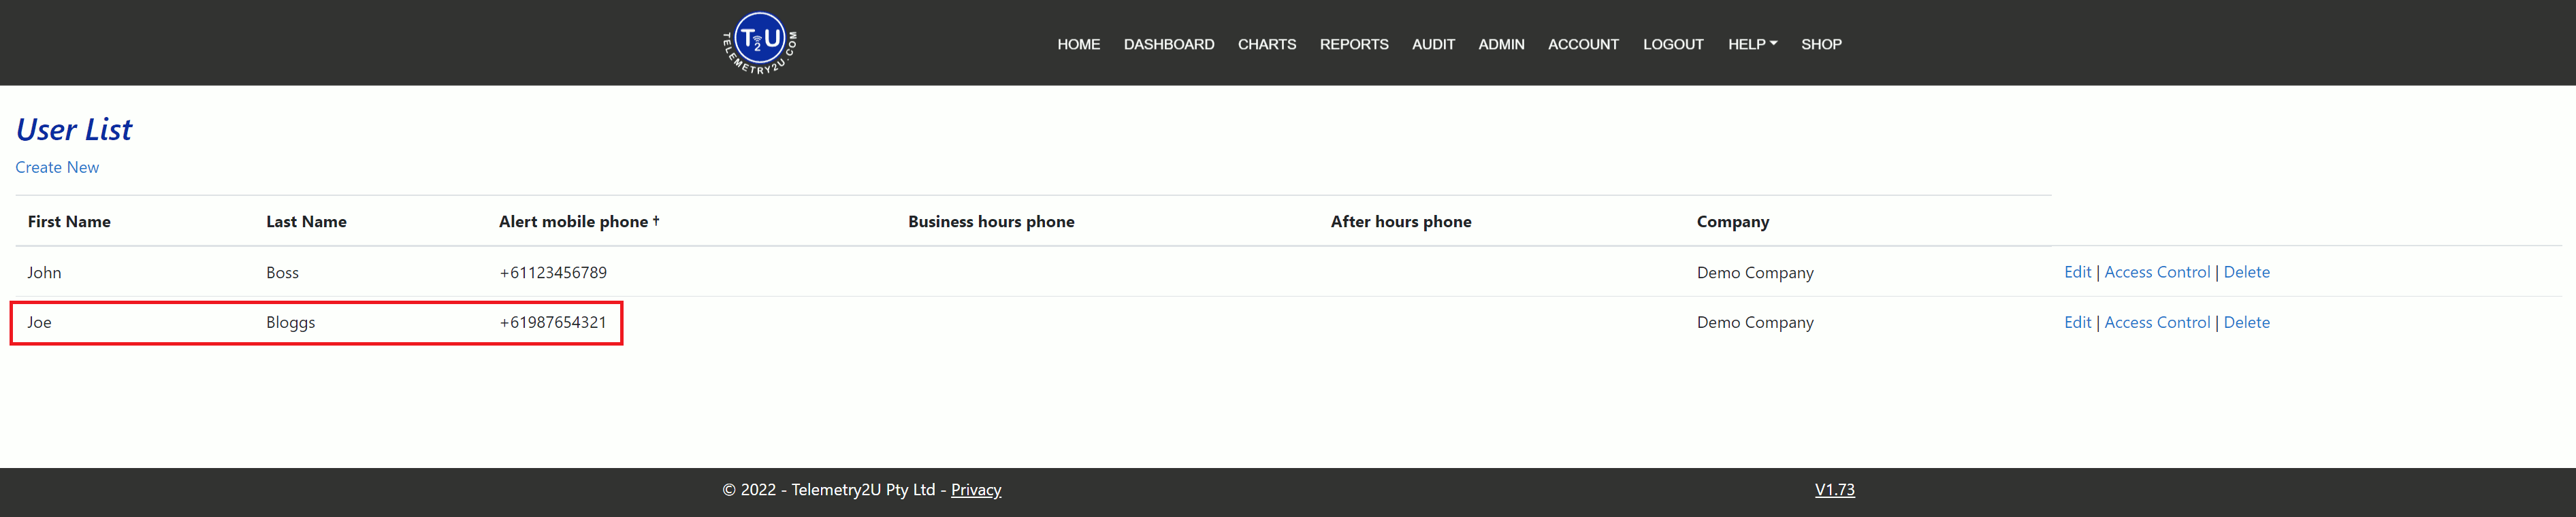
Email delivery: invitations normally arrive promptly but can take up to 30 minutes. Ask the recipient to check their junk or spam folder and confirm that the login email was entered correctly.
2. Accept the Invitation and Create a Password
The invited user must open the unique link in their invitation email. The link takes them to a secure Telemetry2U page where they can create and confirm their password.
- Open the Telemetry2U invitation email.
- Select the invitation link.
- Enter and confirm a password that satisfies the requirements shown on the page.
- Select Set Password.
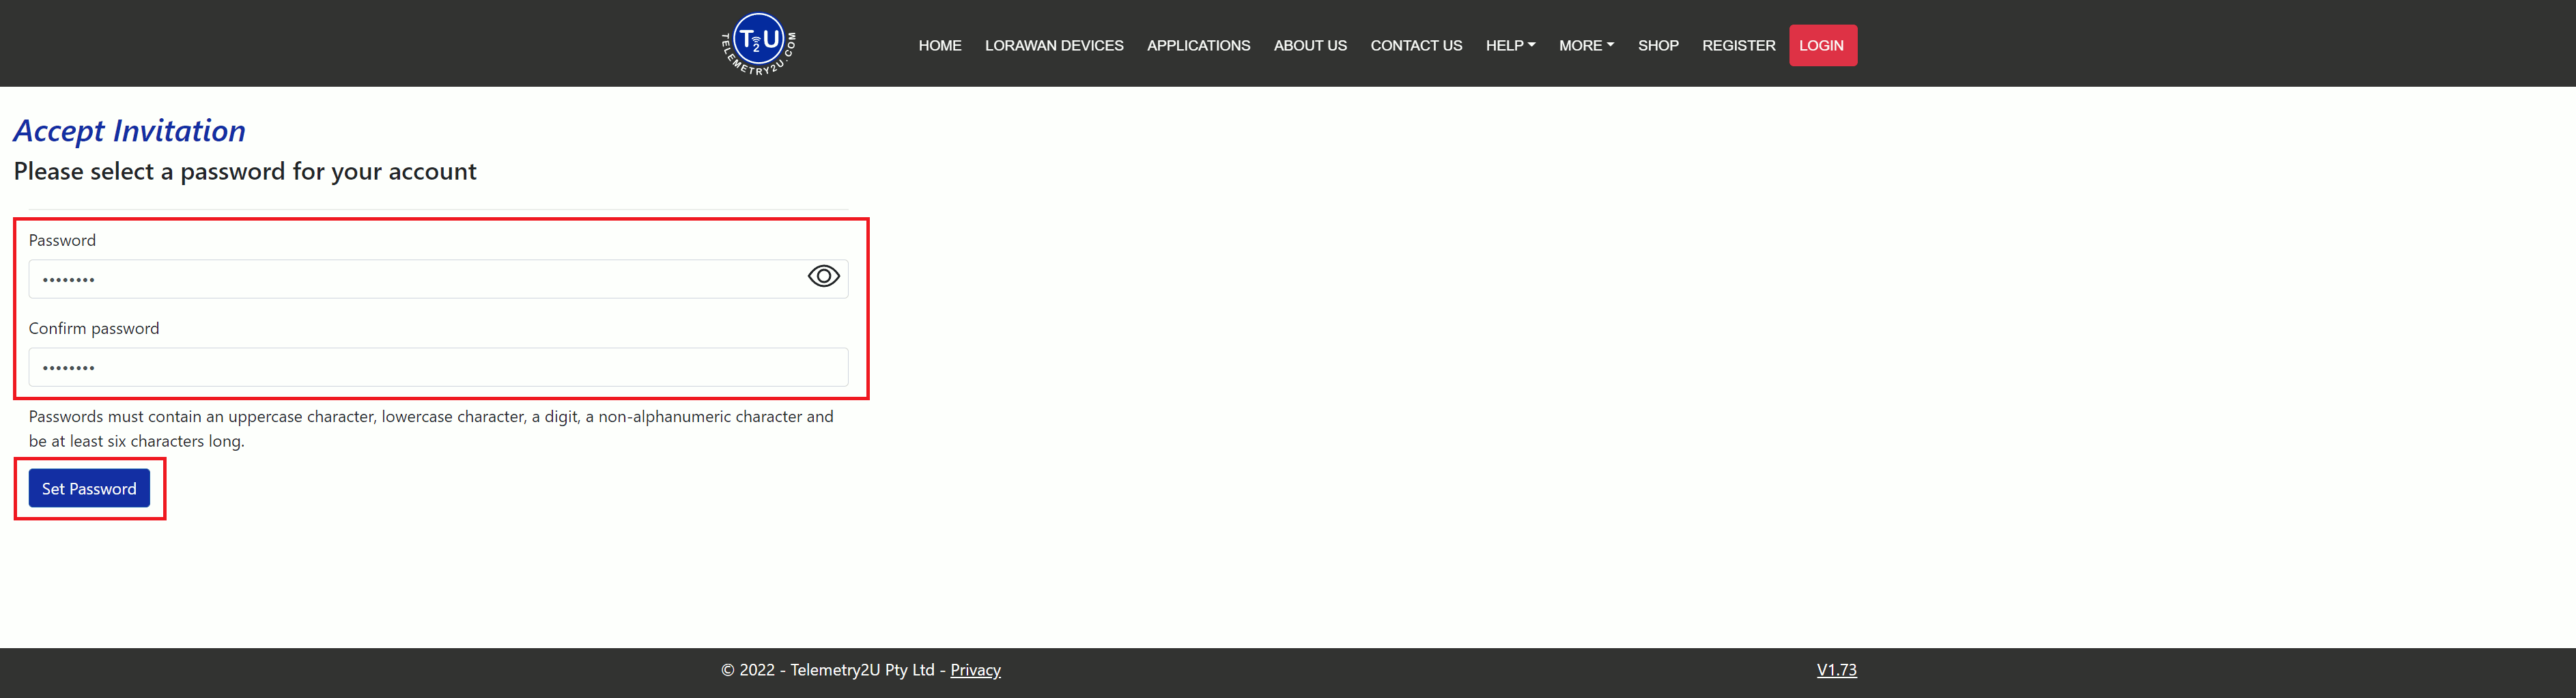
After activation, the user may be signed in and redirected to Reports, but they will not be able to view nodes or restricted features until a Company Admin completes the access settings in the next step.
3. Assign User Roles and Node Access
Return to Admin > User Maintenance, locate the new user and select the access-control link on the right-hand side of their row.
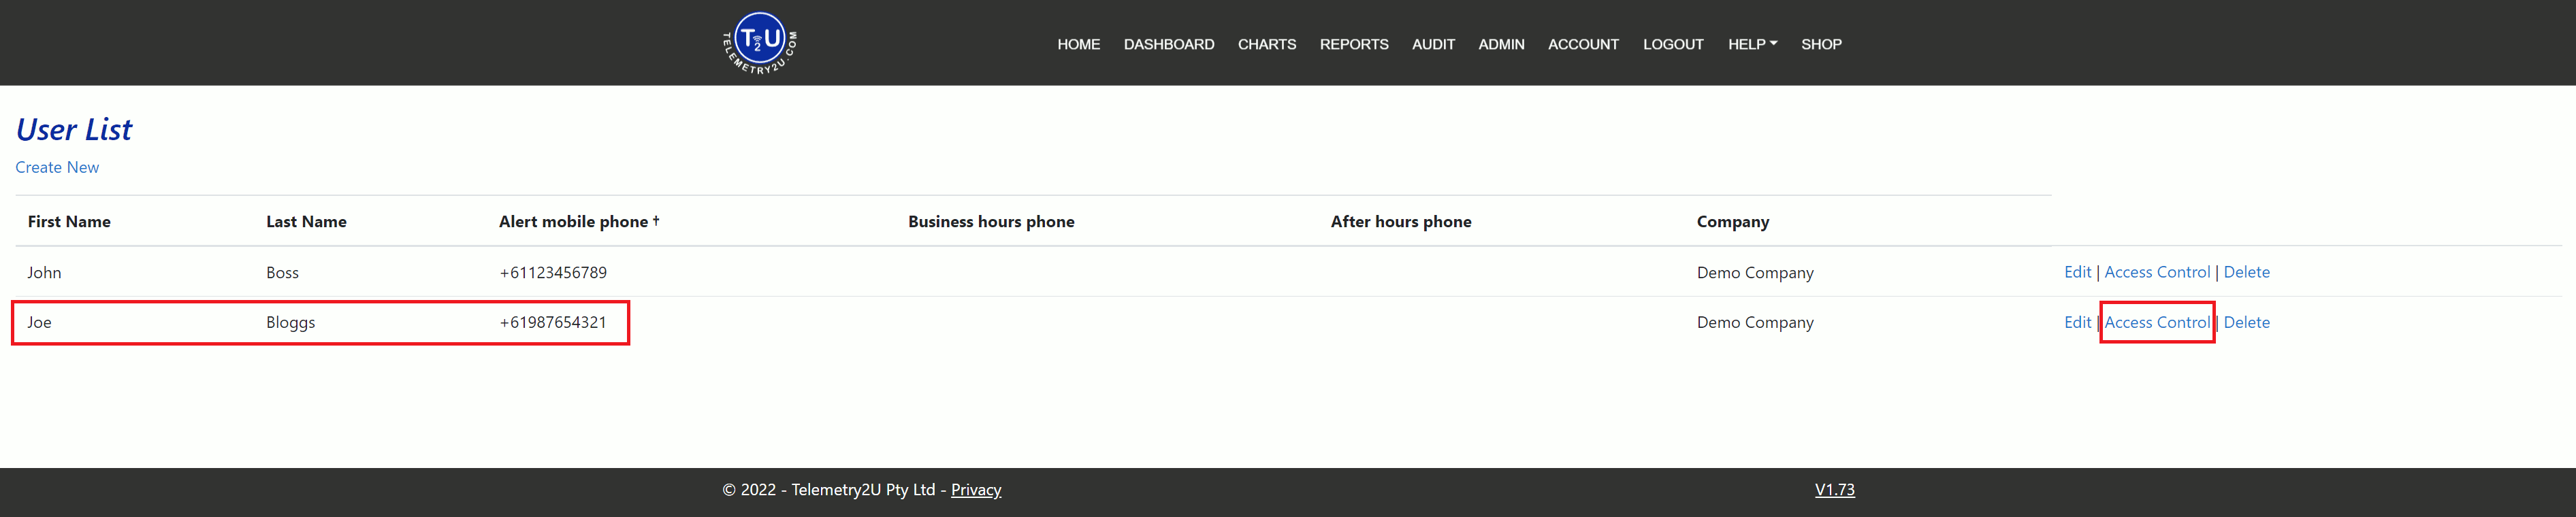
Under User Roles, select only the functions the person needs. In this example, the user receives Add Annotations and View Gateway Status. Under Node Access Control, select the temperature and humidity sensors the user should be able to view.
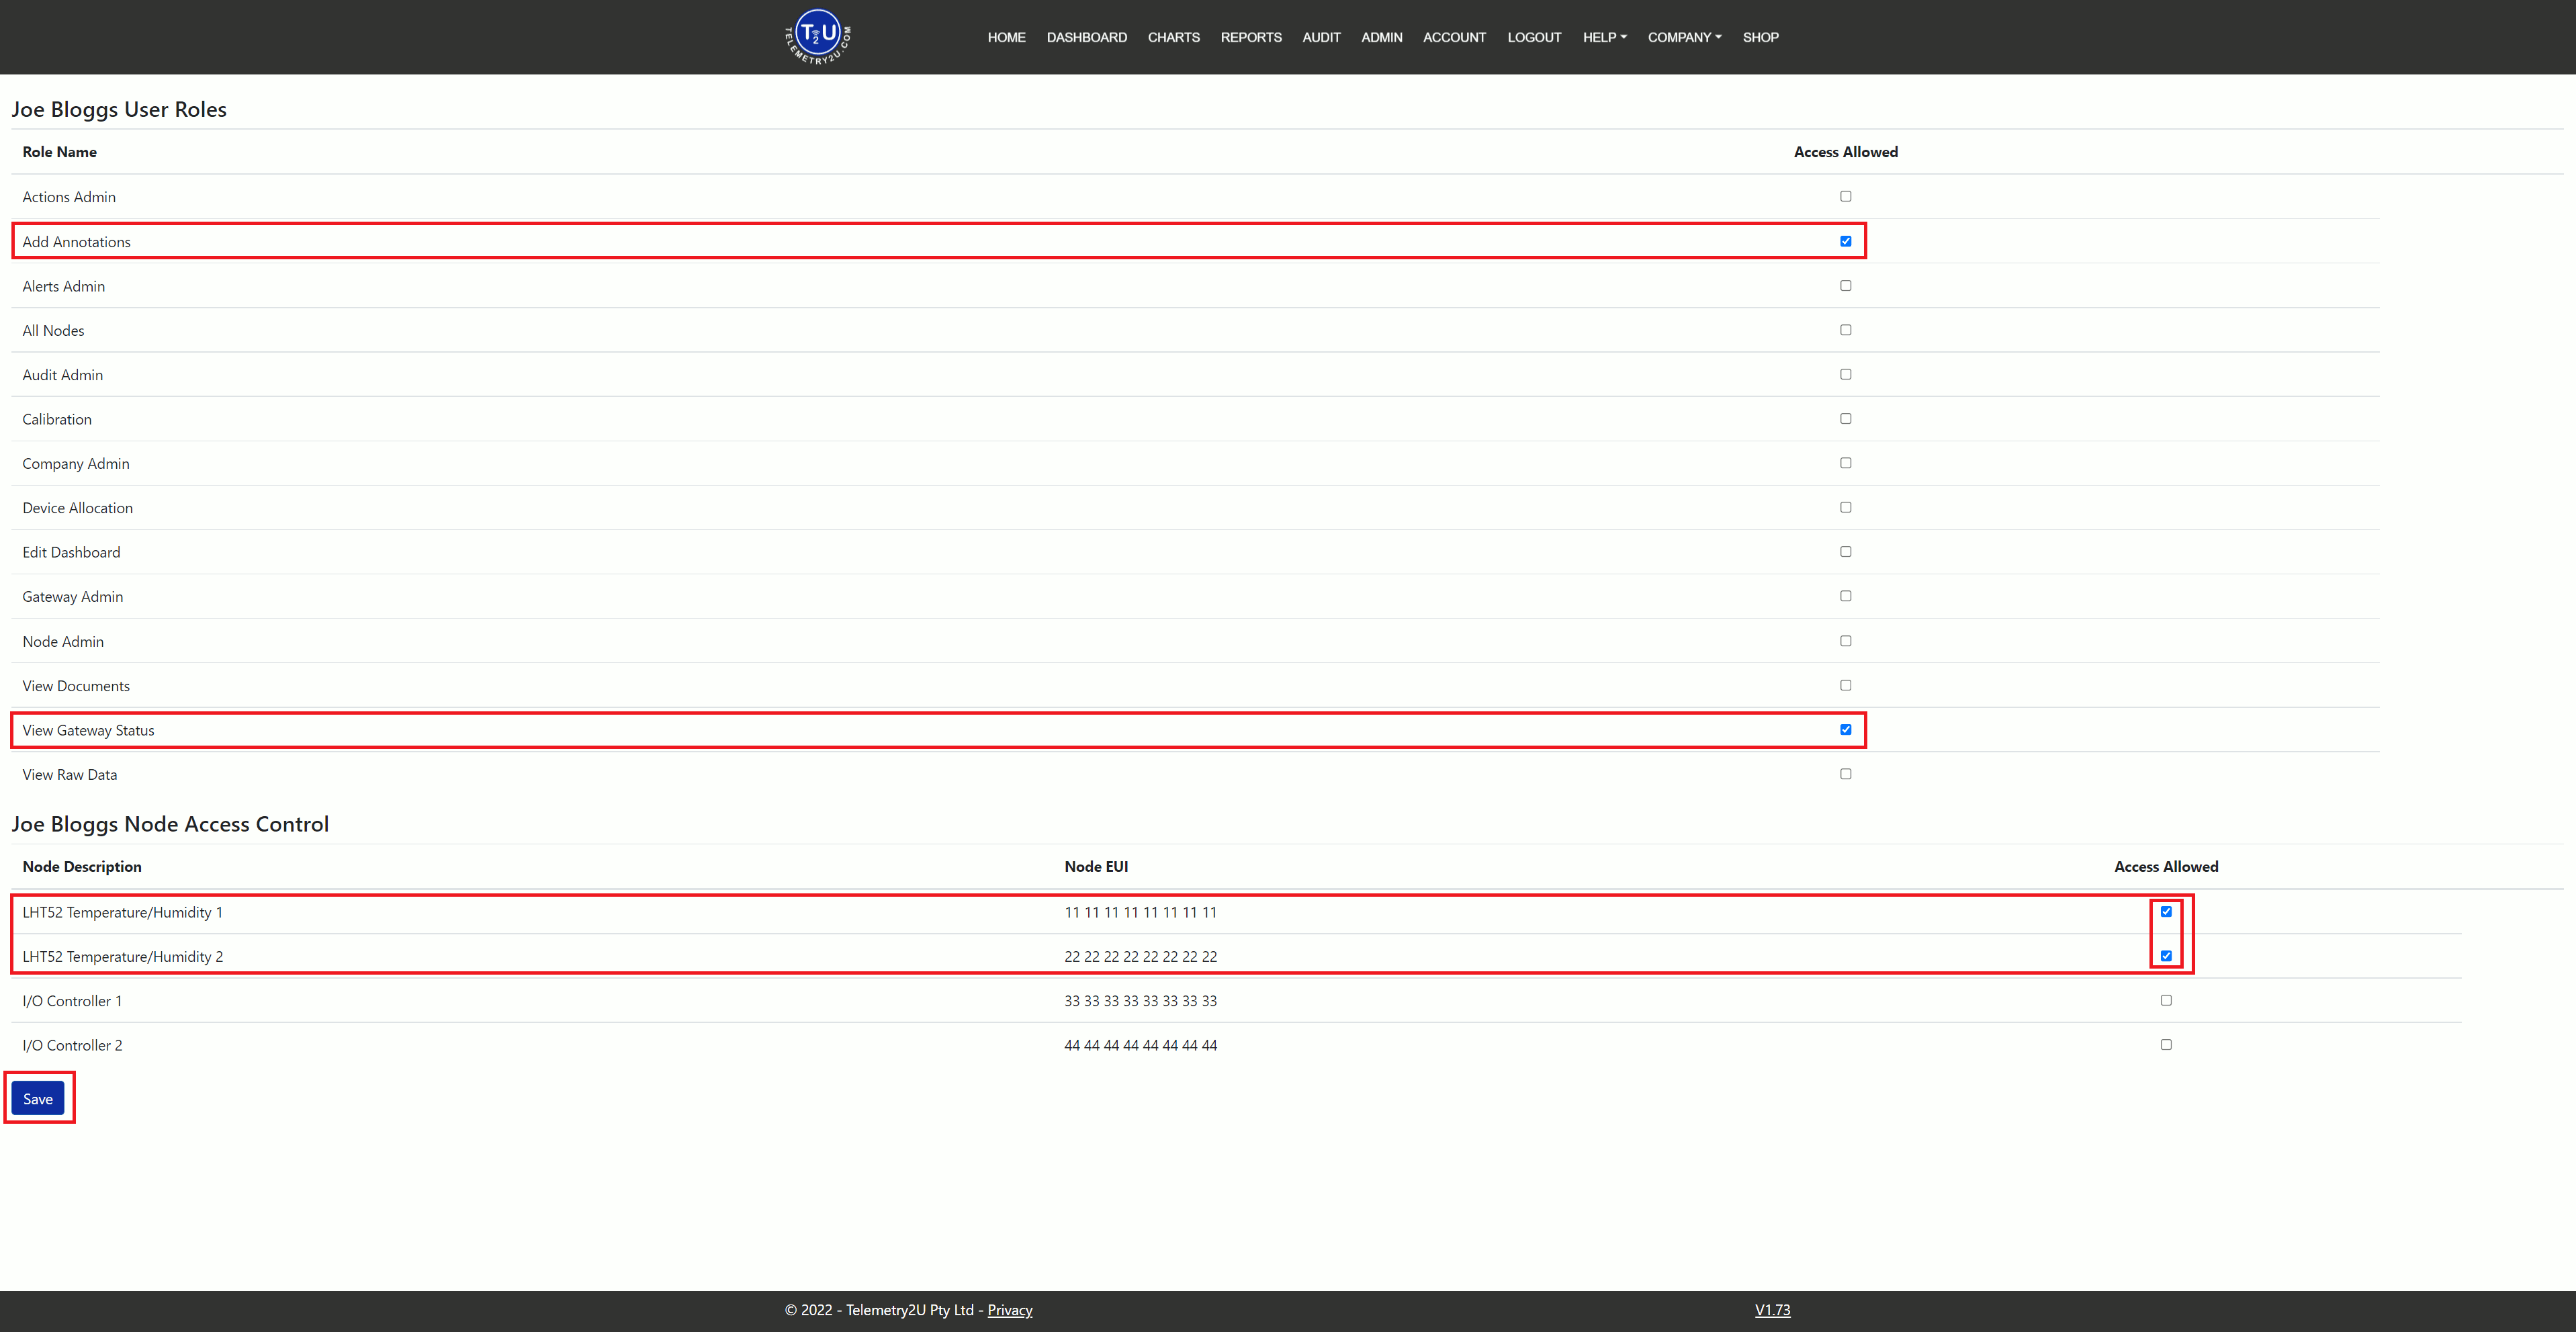
Use least-privilege access: grant only the roles and nodes needed for the user's work. You can return to User Maintenance and change these settings at any time.
Select Save when the role and node selections are complete. See the User Maintenance section of the Administration Help for descriptions of all available roles and access options.
4. Add the User to a Notification Group
User access and alert delivery are configured separately. To send alerts to the new user, open Admin > Notification Groups, then open the members for the group you want to update.
- Select the new user as a member of the notification group.
- Enable the required Email, SMS and/or Voice Call options.
- Set the days and times during which each notification type should be sent.
- Set the voice-call priority when the order of escalation matters.
- Select Save.
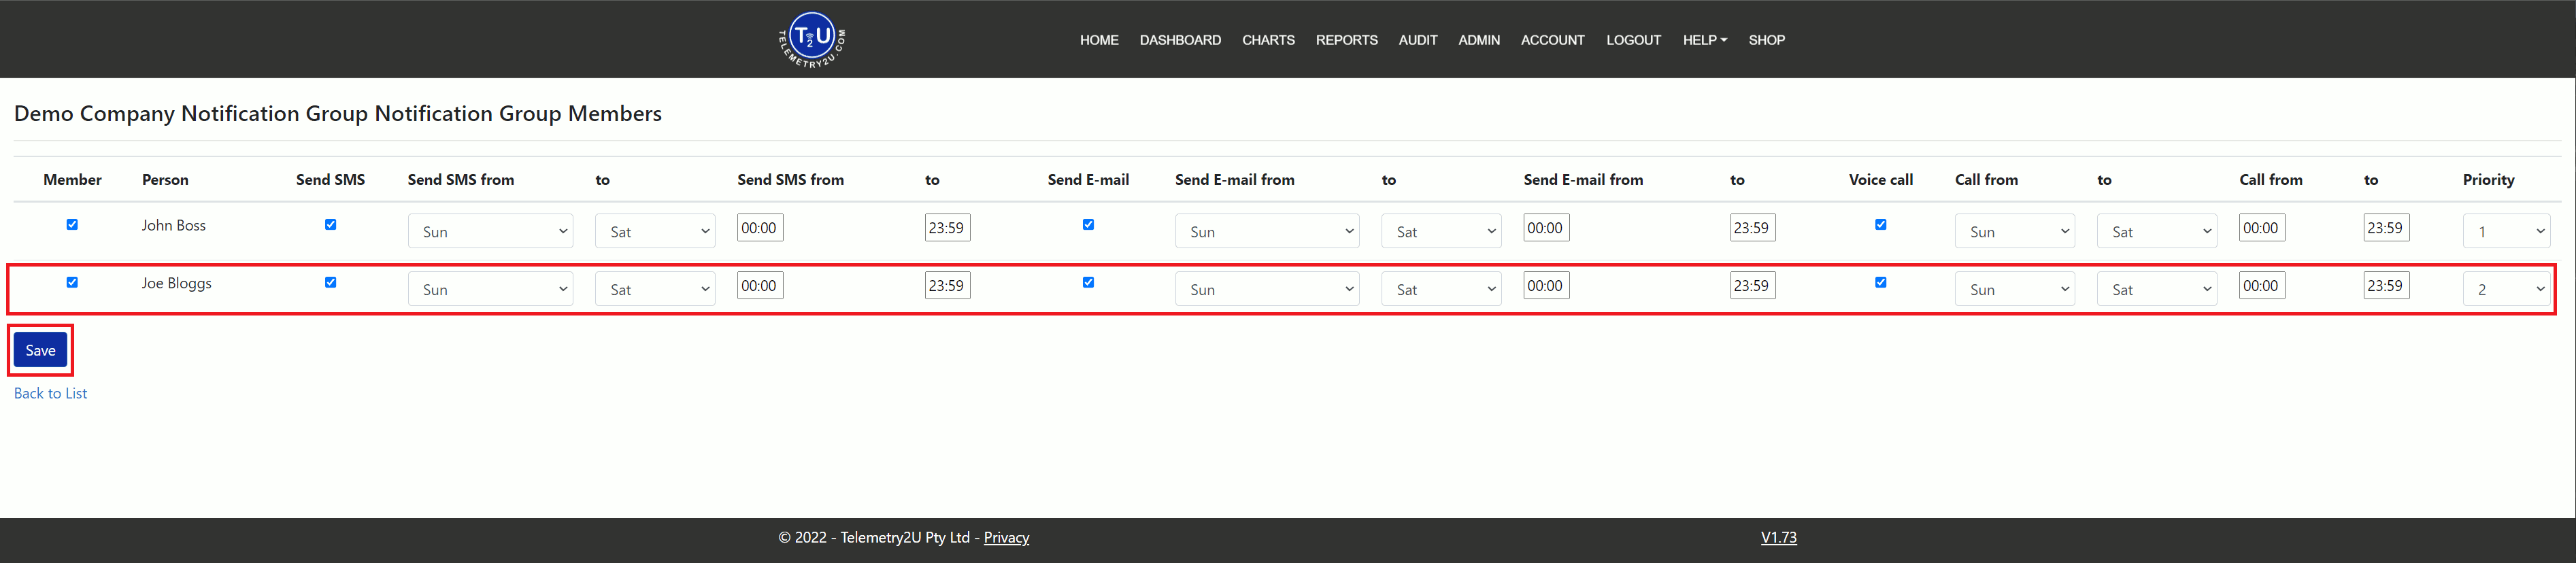
Notification delivery requires the corresponding alert email or phone number to be present in the user's contact details. SMS and voice numbers must use international format.
5. Share Dashboards and Confirm the User's Access
A user does not need permission to edit dashboards to view a dashboard shared across the company. Open the required dashboard and enable Company Wide in the dashboard controls.
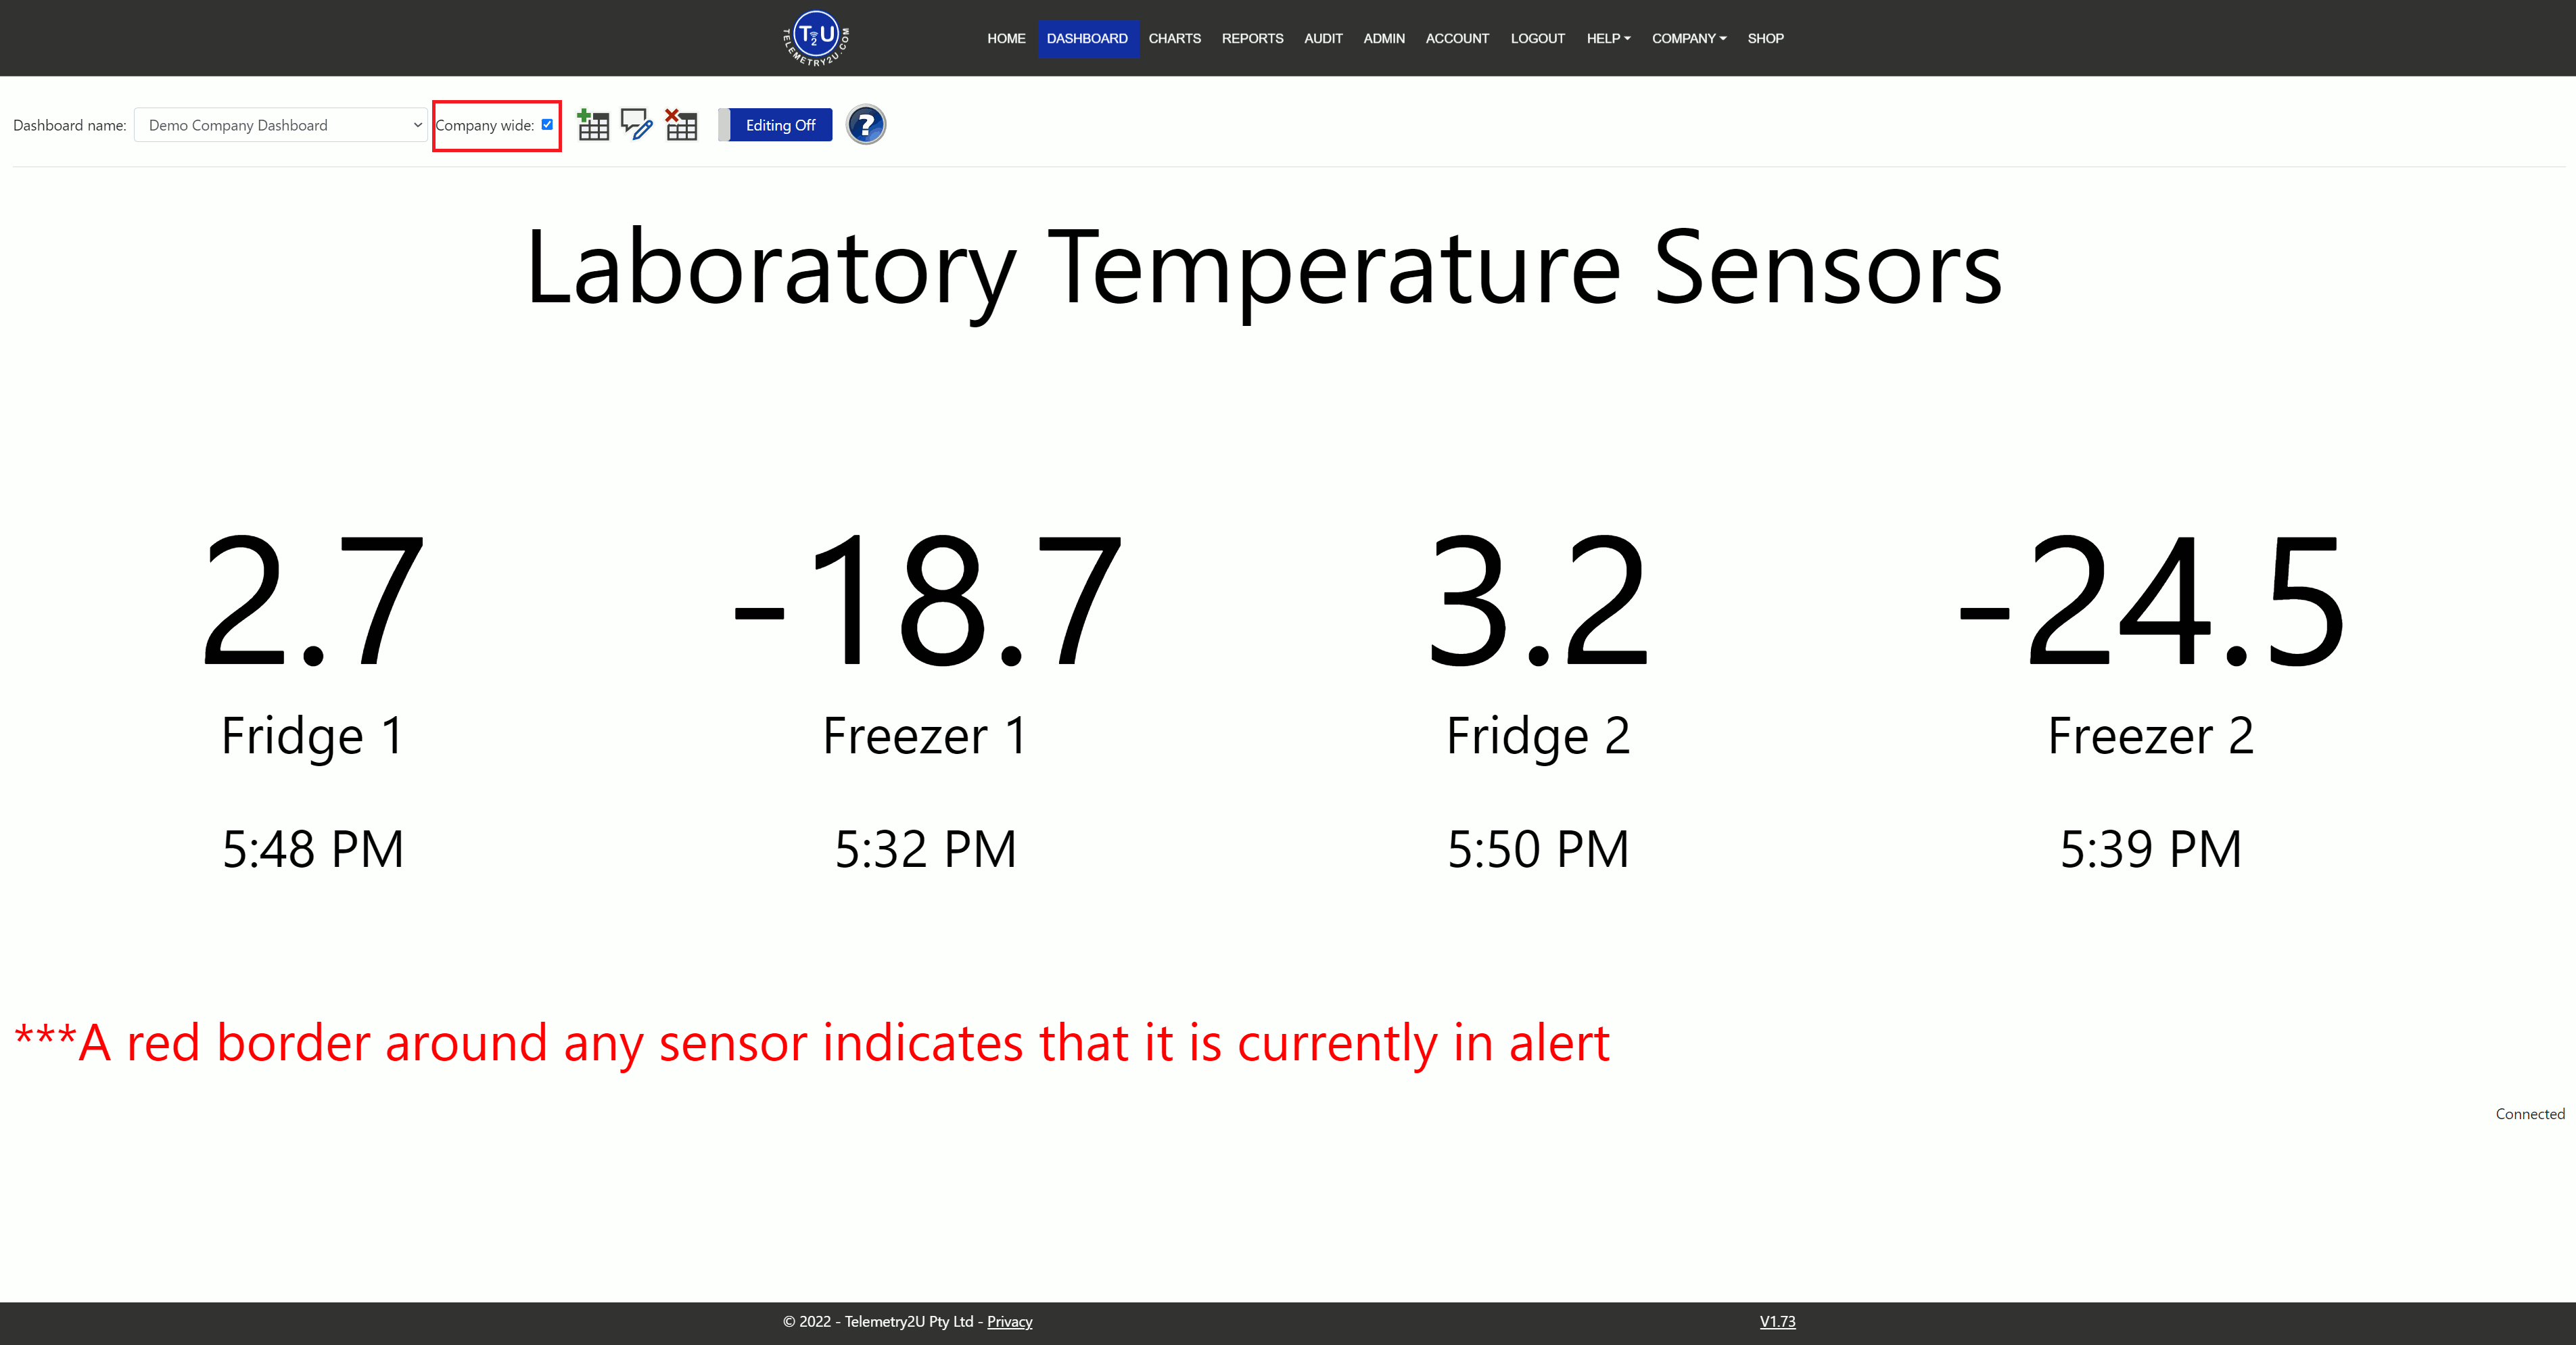
Ask the new user to sign in and confirm that they can:
- Open the shared dashboard.
- View data from the nodes assigned to them.
- Open the Charts and Reports pages for those permitted nodes.
- Receive a test notification through each configured delivery method, where practical.
- Use the platform functions enabled by their assigned roles.
If anything is missing, return to Admin > User Maintenance and review the user's roles and node access. Dashboard editing requires the separate Edit Dashboard role, but a Company Wide dashboard remains view-only for users who did not create it.