How to Automate LoRaWAN Device Control with Alerts
Create alert-triggered actions that automatically control a connected device. This example switches a Milesight WS52x Smart Wall Outlet according to soil moisture readings from a Dragino LSE01 sensor.
Use Sensor Data to Trigger Device Commands
Telemetry2U Actions can send supported device commands when an alert condition is met. In this example, the outlet turns on when soil moisture falls below 15% and turns off after moisture rises above 25%.
The separate on and off thresholds create a control band between 15% and 25%. This avoids repeatedly switching the outlet when readings fluctuate close to a single threshold. The same method can be adapted to compatible relays, pumps, ventilation equipment, lighting and other controllable devices.
Sign in to an account with access to Actions Maintenance and Alert Maintenance.
Add the Dragino LSE01 and Milesight WS52x to the same Telemetry2U account before creating the automation.
Confirm that sensor uplinks are arriving and that the network path supports downlink commands to the outlet.
Keep the controlled load within the outlet manufacturer's electrical ratings and installation requirements.
Before automating live equipment: test the actions with a non-critical load and confirm that manual control, command delivery and status reporting all work as expected.
1. Create the Turn On and Turn Off Actions
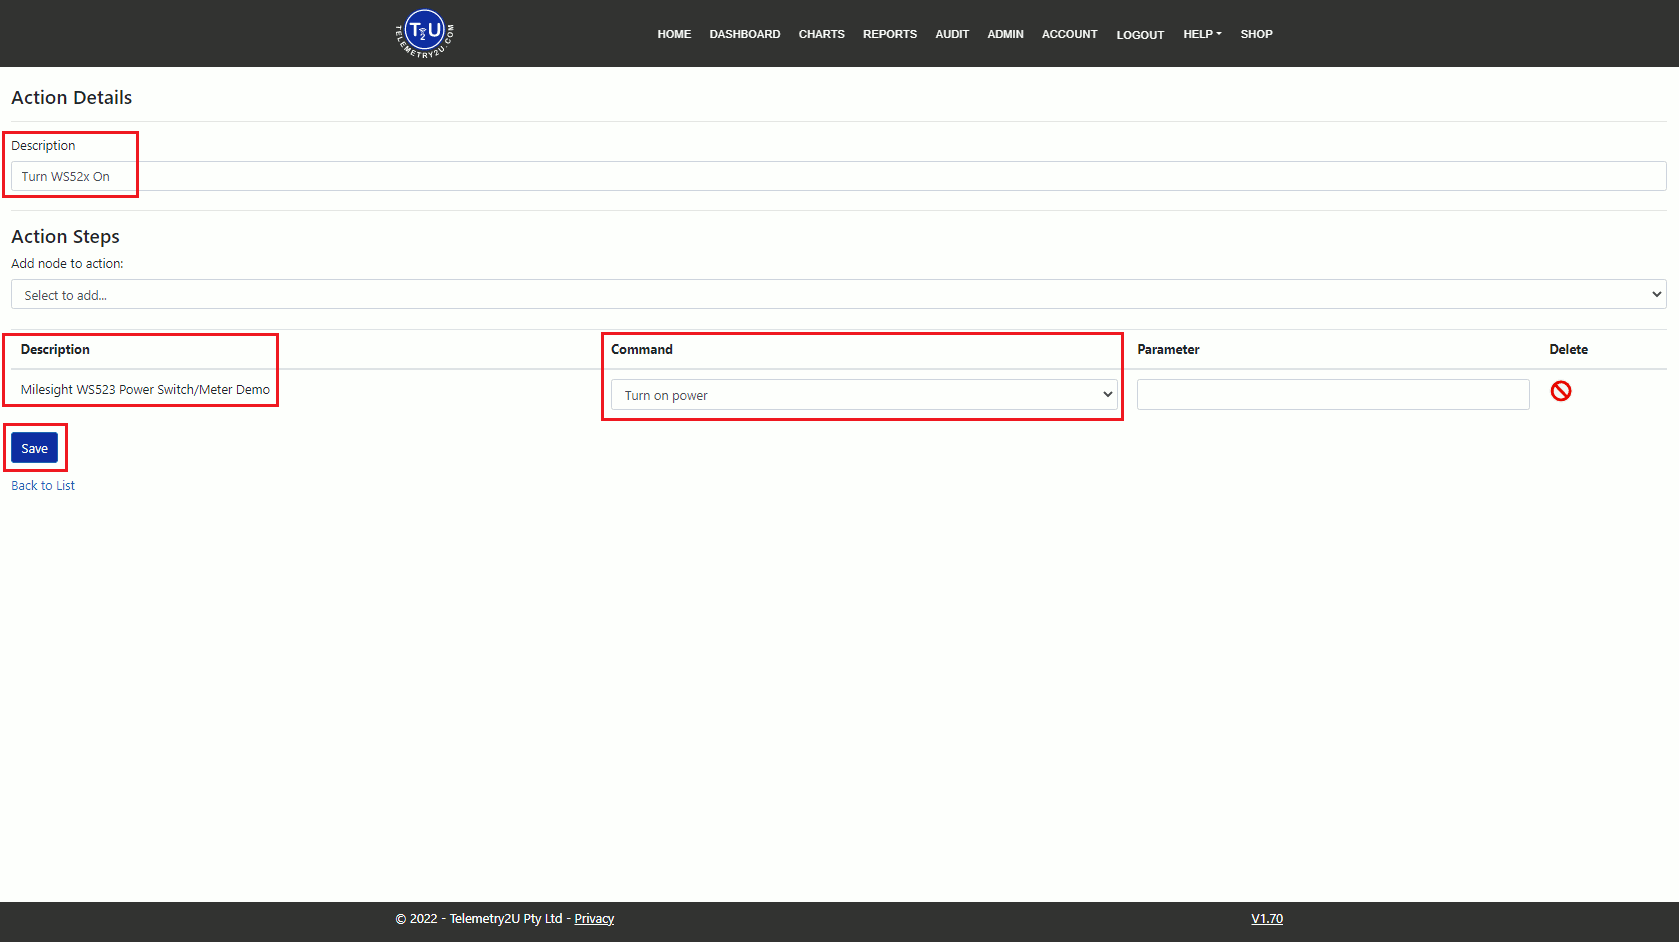
Create two clearly named actions: one that sends the WS52x power-on command and another that sends the power-off command. The alert conditions will reference these actions in the next stage.
- Sign in to Telemetry2U and open Admin > Actions Maintenance.
- Select Create New.
- Enter a clear description such as Turn WS52x On, then select Create.
- Under Add Node to Action, select the Milesight WS52x.
- From the Command list, select
Turn On Power. - Leave Parameter blank and select Save.
- Repeat the process with a second action named Turn WS52x Off using the
Turn Off Powercommand.
2. Create the Soil Moisture Alert Conditions
Create one alert containing two conditions. The low condition turns the outlet on, while the high condition turns it off after the soil moisture has recovered.
- Open Admin > Alert Maintenance.
- Select Create New.
- Enter a description such as Soil Moisture Automation.
- Select Save to open the full alert configuration.
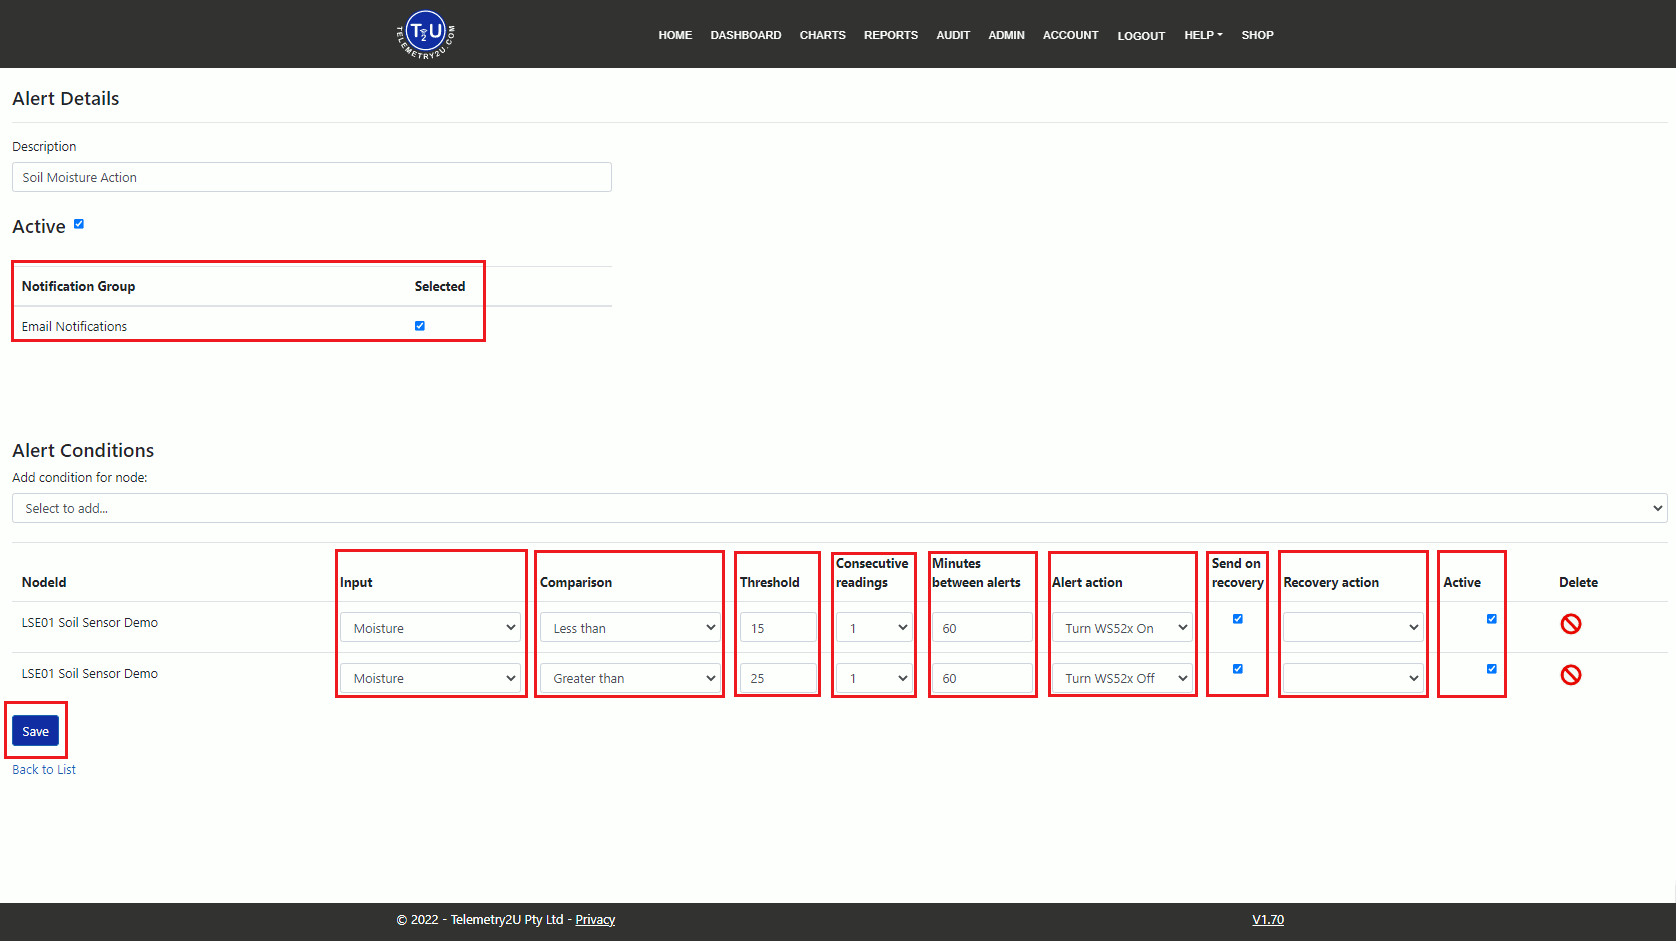
- Under Alert Conditions, add the Dragino LSE01 sensor twice so each threshold can use its own action.
Low-Moisture Condition
Use this condition to turn the outlet on when the soil becomes too dry.
- Input: Moisture
- Comparison: Less Than
- Threshold: 15
- Consecutive Readings: 1
- Minutes Between Alerts: 60
- Alert Action: Turn WS52x On
- Send on Recovery: Checked
- Recovery Action: Leave blank
- Active: Checked
High-Moisture Condition
Use this condition to turn the outlet off after sufficient moisture has been restored.
- Input: Moisture
- Comparison: Greater Than
- Threshold: 25
- Consecutive Readings: 1
- Minutes Between Alerts: 60
- Alert Action: Turn WS52x Off
- Send on Recovery: Checked
- Recovery Action: Leave blank
- Active: Checked
Select any notification groups that should also receive email, SMS or voice notifications. Leave the notification groups unselected when the alert is being used only for automation. Select Save after reviewing both conditions.
3. Test and Verify the Automation
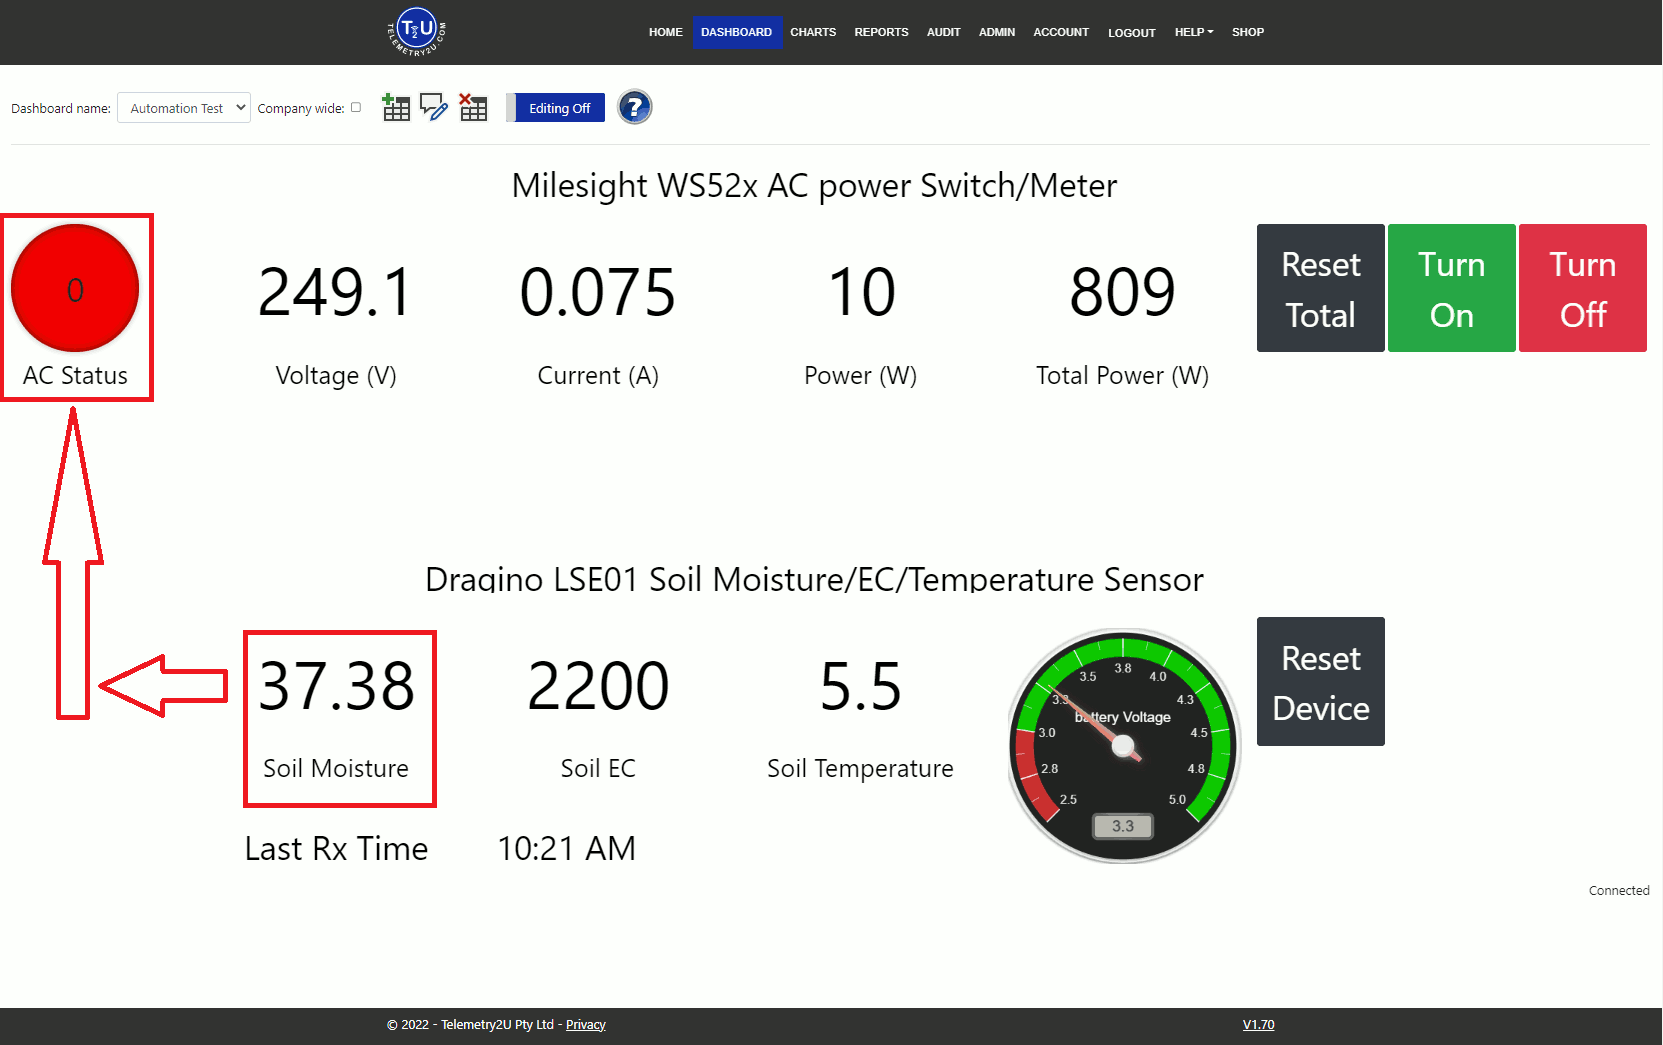
Display the WS52x outlet status and LSE01 soil moisture input on the same dashboard. This makes it easier to confirm the sensor reading, triggered action and resulting outlet state during testing.
- Add the WS52x power status and LSE01 soil moisture input to a Telemetry2U dashboard.
- Use manual dashboard controls to confirm that the outlet can turn on and off correctly.
- Test the alert logic under controlled conditions or temporarily use safe test thresholds.
- Confirm that the outlet turns on after moisture falls below 15%.
- Confirm that the outlet turns off after moisture rises above 25%.
- Restore the intended thresholds and reconnect the final load only after the full sequence has been verified.
The dashboard may not update at the exact moment a command is issued. Allow time for the downlink to be delivered and for the device's next status message to confirm the resulting outlet state.