How to Create and Schedule an Audit Report
Build an Audit Report containing the required charts, alert history, annotations, statistics and exports, then schedule the completed report for automatic email delivery to a configured Notification Group.
Prepare the Report and Delivery Settings
Audit Reports combine selected monitoring records into a repeatable report for review, download or scheduled distribution. Create the report definition first, confirm its nodes and chart limits, then attach it to a Scheduled Job.
Your User Access must include Audit Admin before you can create or edit Audit Reports.
Confirm that the required monitoring site and nodes are available to your account.
Create and verify the email recipients before scheduling automatic delivery.
Decide which charts, alerts, annotations, statistics and optional extracts are needed.
1. Open Audit Report Maintenance
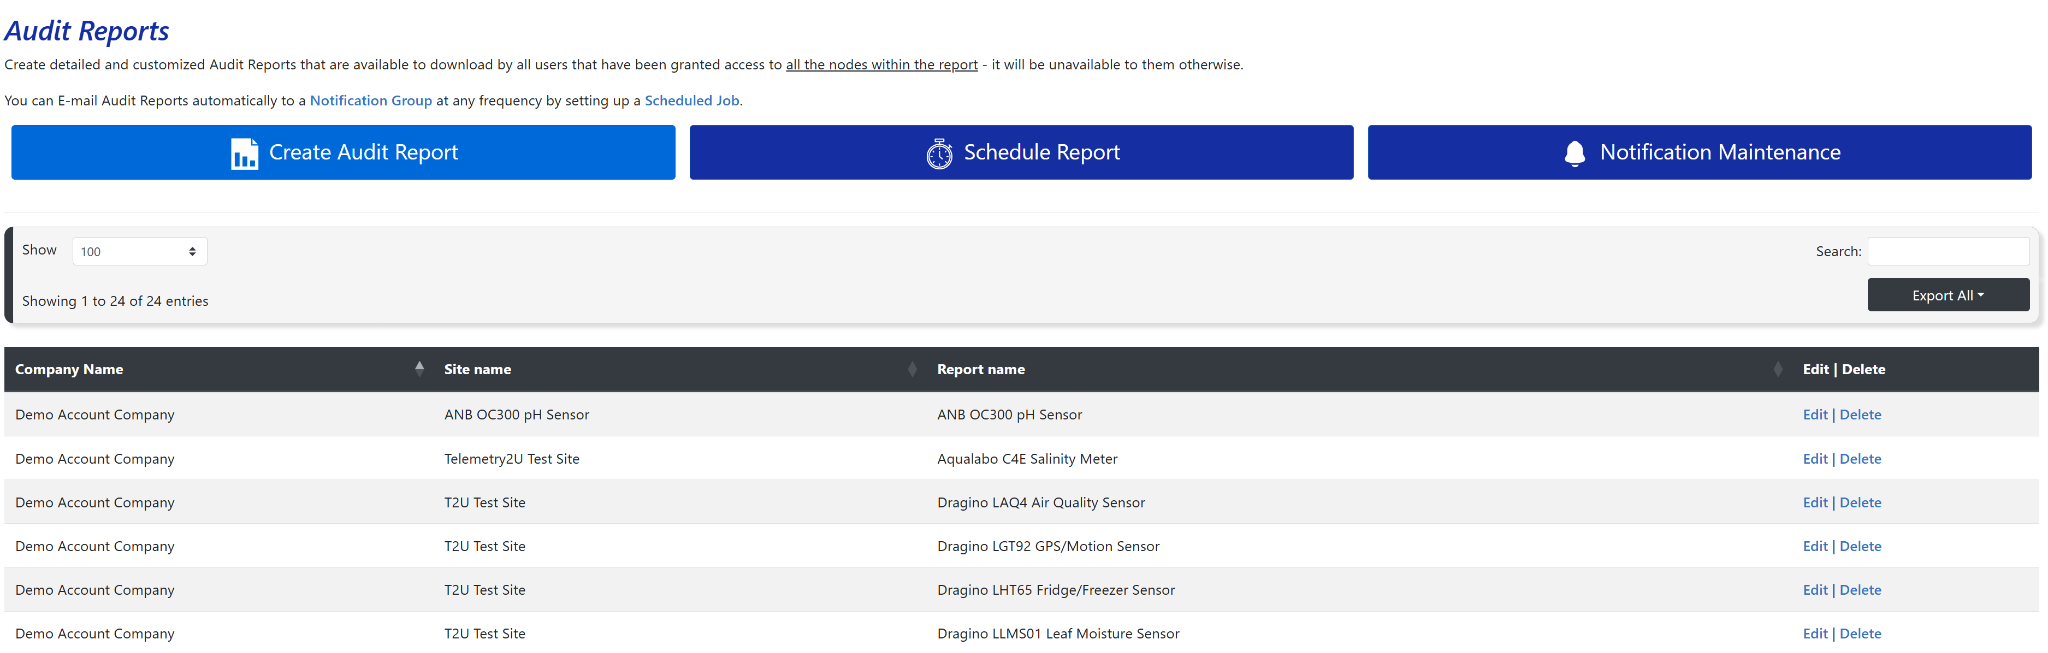
Use the platform sidebar to open Audit Report Maintenance. The Audit Reports page lists existing reports and provides direct controls for creating a report, scheduling delivery and maintaining Notification Groups.
Select Create Audit Report. Existing reports can also be opened with the Edit link in the report list.
2. Create the Audit Report Record
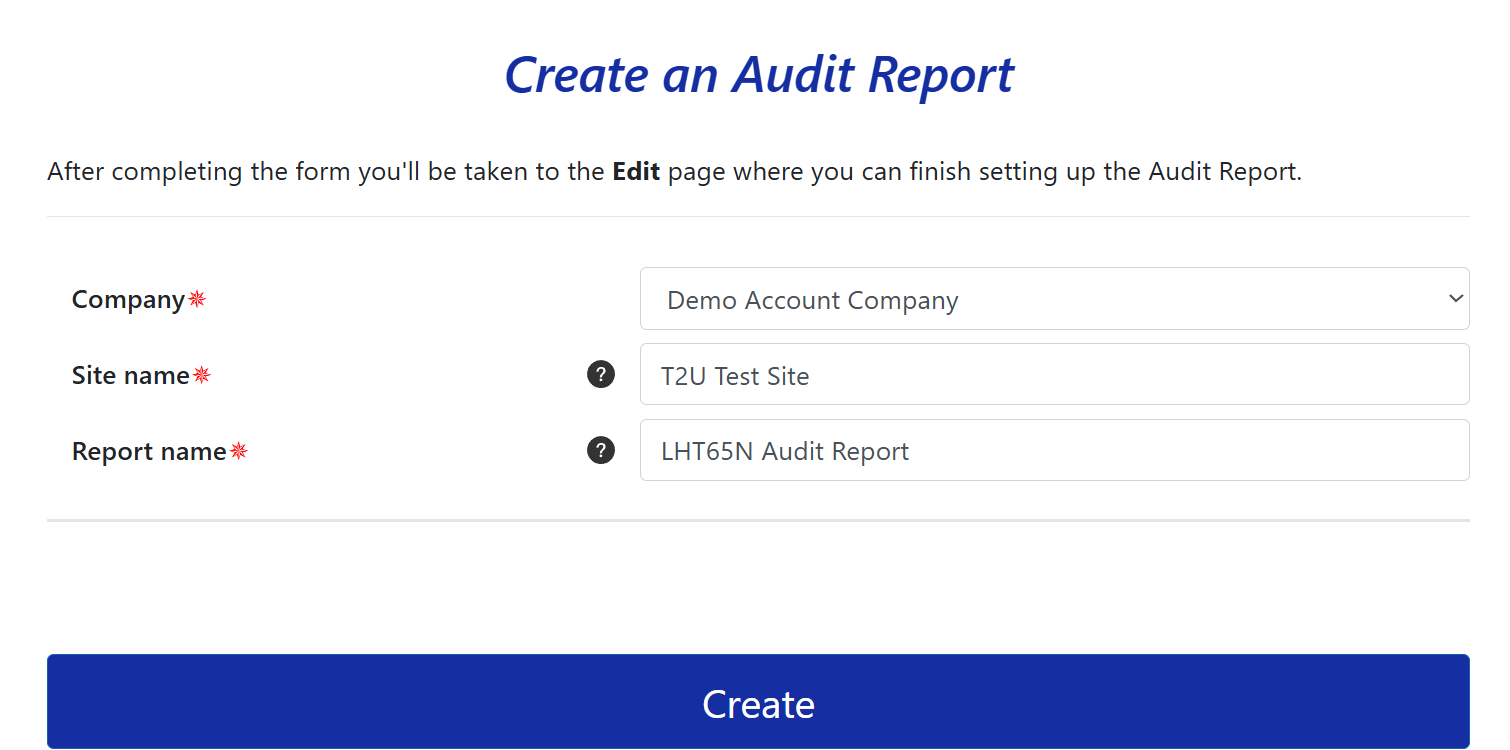
Select the company and site that contain the monitored devices, then enter a clear report name that will be easy to identify later in the report and scheduling lists.
- Select the required Company.
- Select the Site name.
- Enter a descriptive Report name.
- Select Create.
Telemetry2U creates the report record and opens the Edit Audit Report page, where the detailed content and monitored inputs are configured.
3. Configure the Report Contents and Nodes
On the Edit Audit Report page, confirm the report details, select the correct time zone and choose the information that should be included in the generated report.
Select the Information to Include
Enable the required report components, such as alert setup, charts, annotations, device statistics, email alerts, voice alerts, calibrations or optional data extracts. Hover over the question-mark tooltips beside an option for a short description, or review the Audit Reports help contents for more detailed information.
Add Nodes and Inputs
- Use Add node to select a node from the drop-down list.
- Select the required sensor Input in the new table row.
- Enter the Lower limit and Upper limit.
- Set the Sort order used in the report.
- Add the same node again when more than one input from that node is required.
- Use the red delete control to remove an unnecessary row.
- Select Save after completing the report configuration.
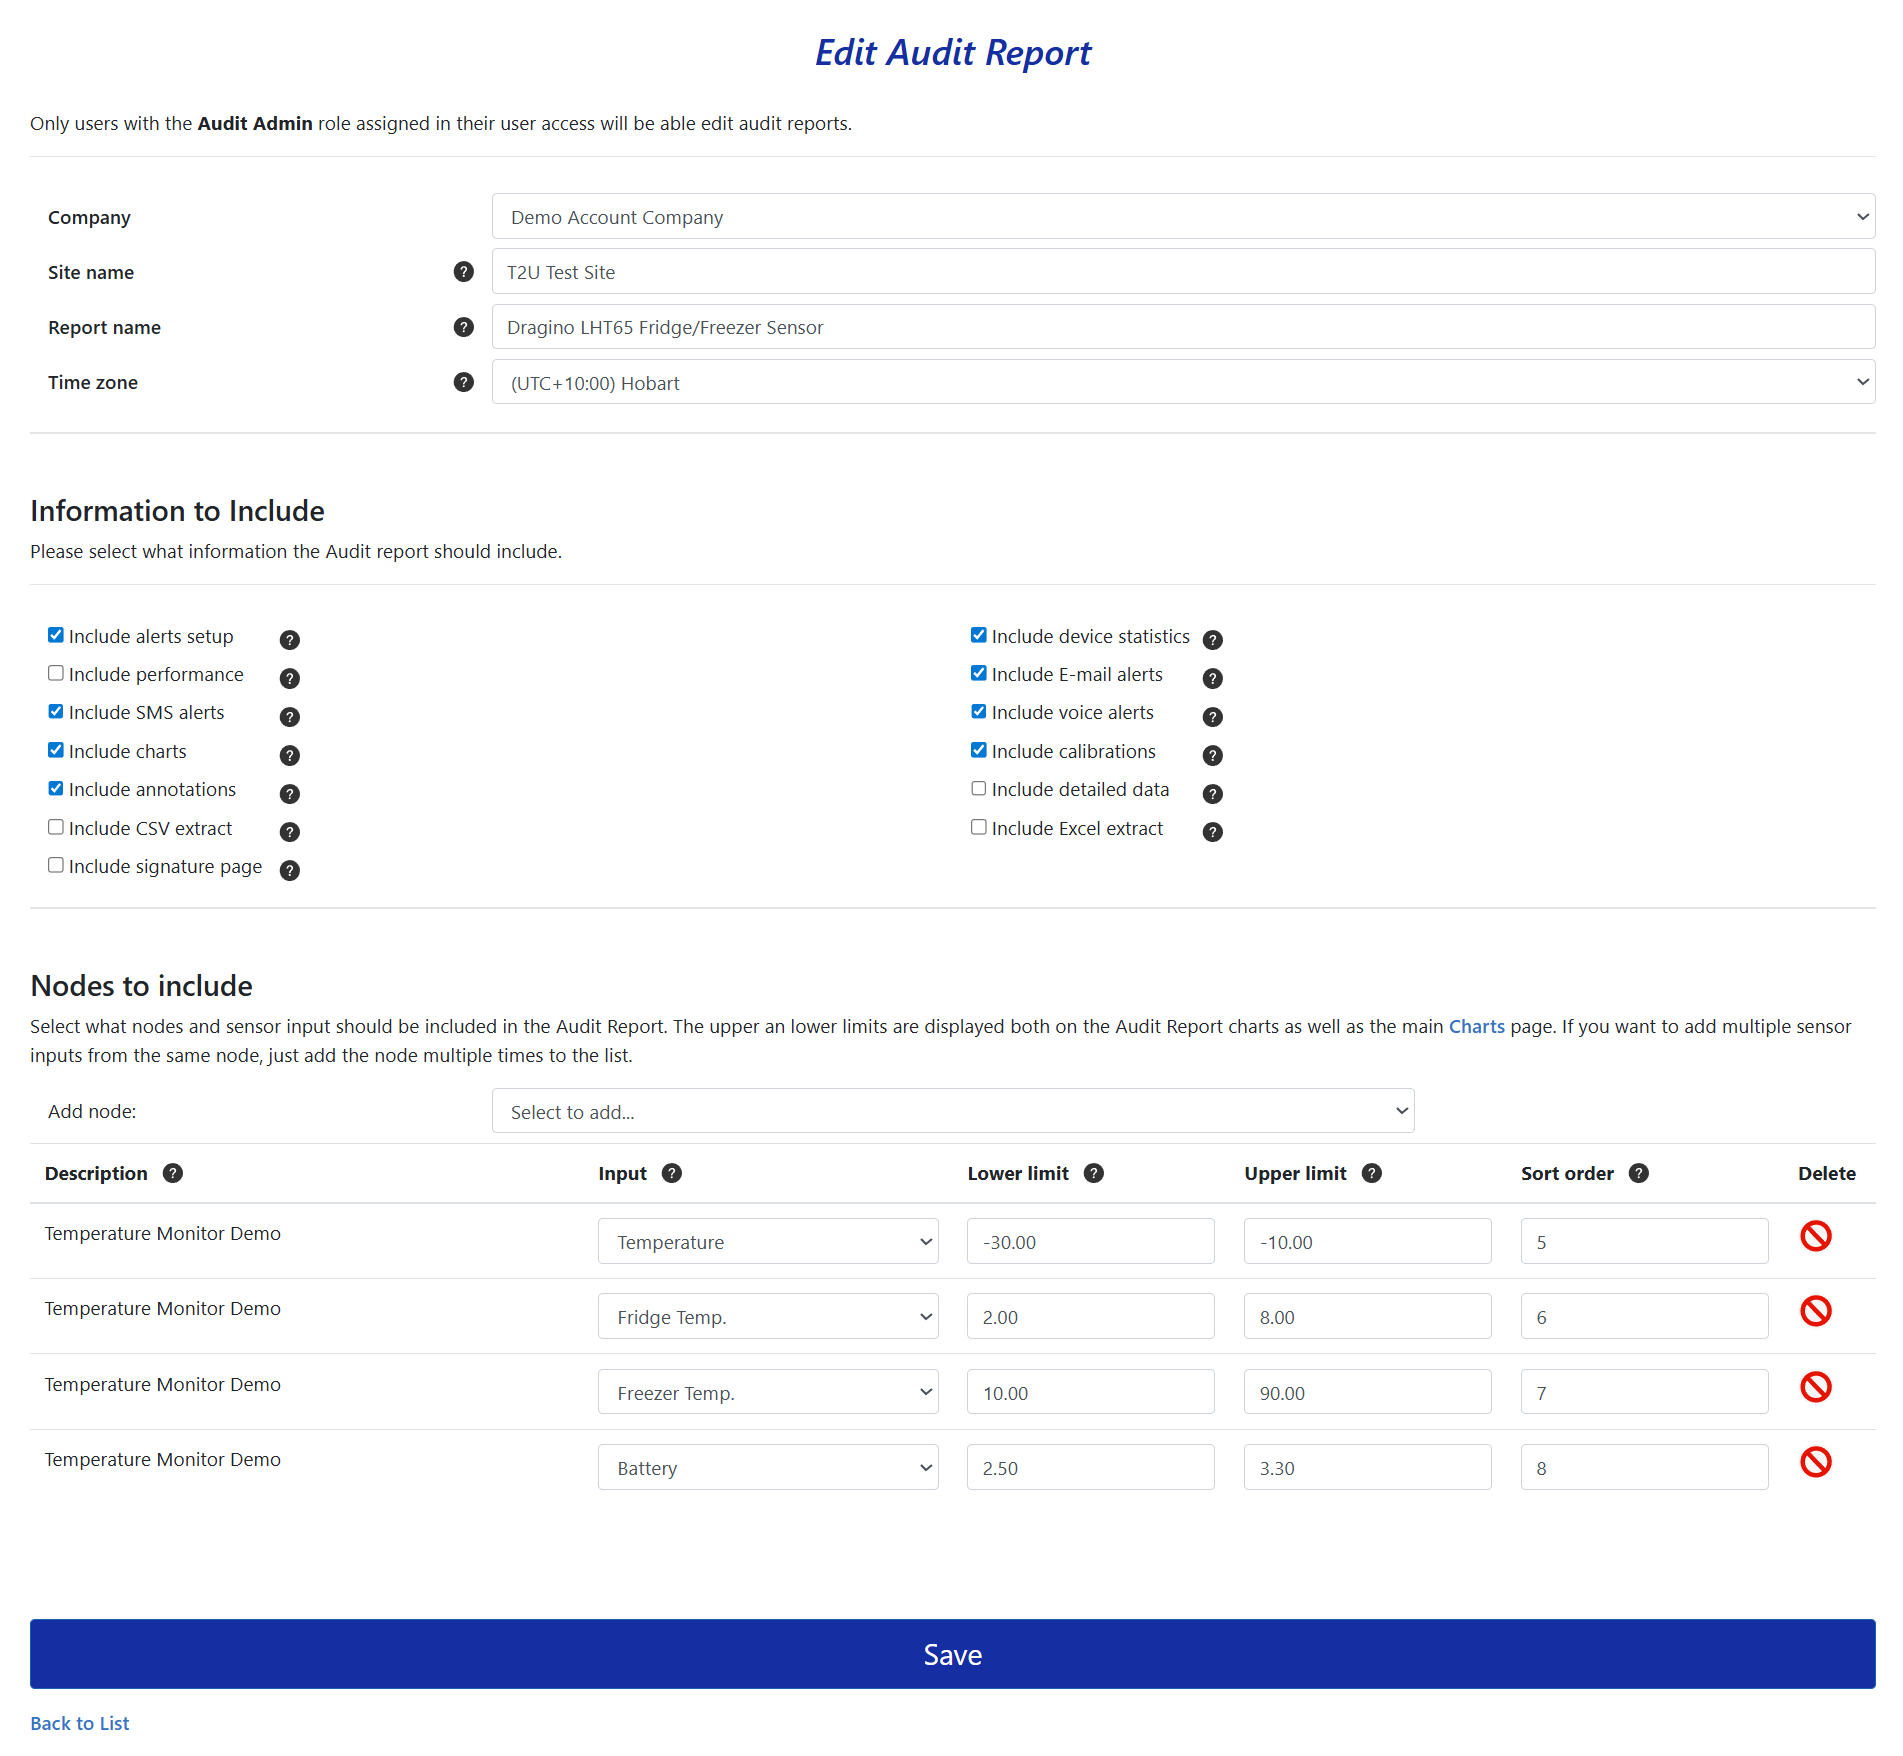
Chart Limit Note
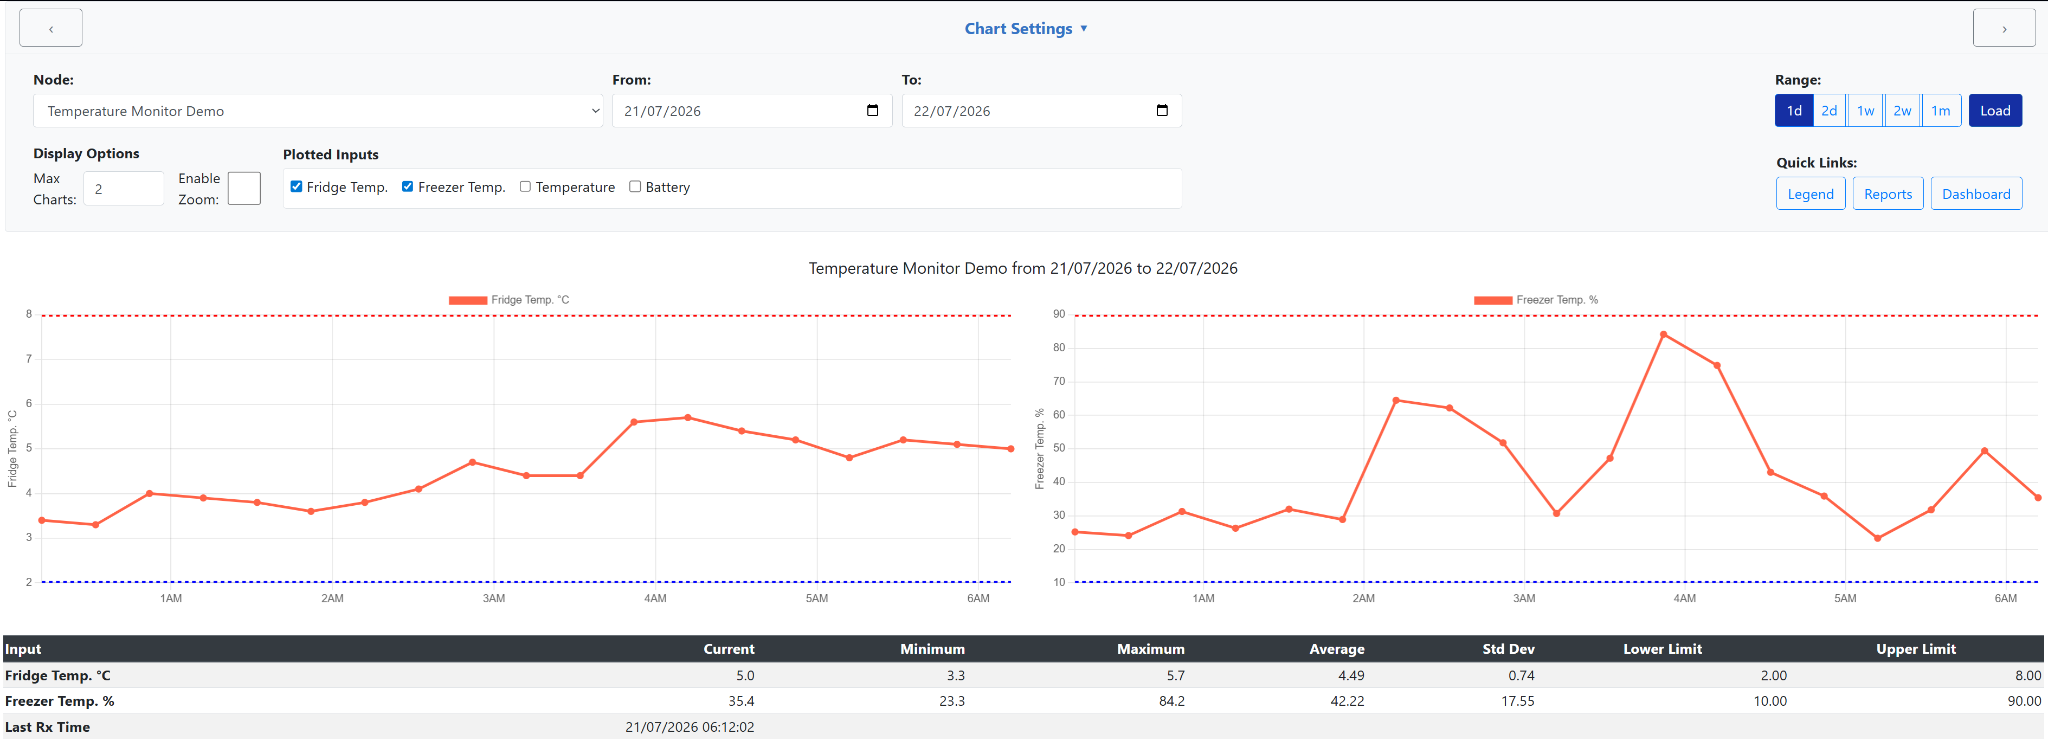
The Lower limit and Upper limit entered for each Audit Report input also appear as horizontal reference lines on the report charts and the main Charts page.
The lower value is shown as the lower horizontal line and the upper value as the upper horizontal line. Return to the Audit Report editor if either limit needs to be corrected.
4. Schedule Automatic Email Delivery
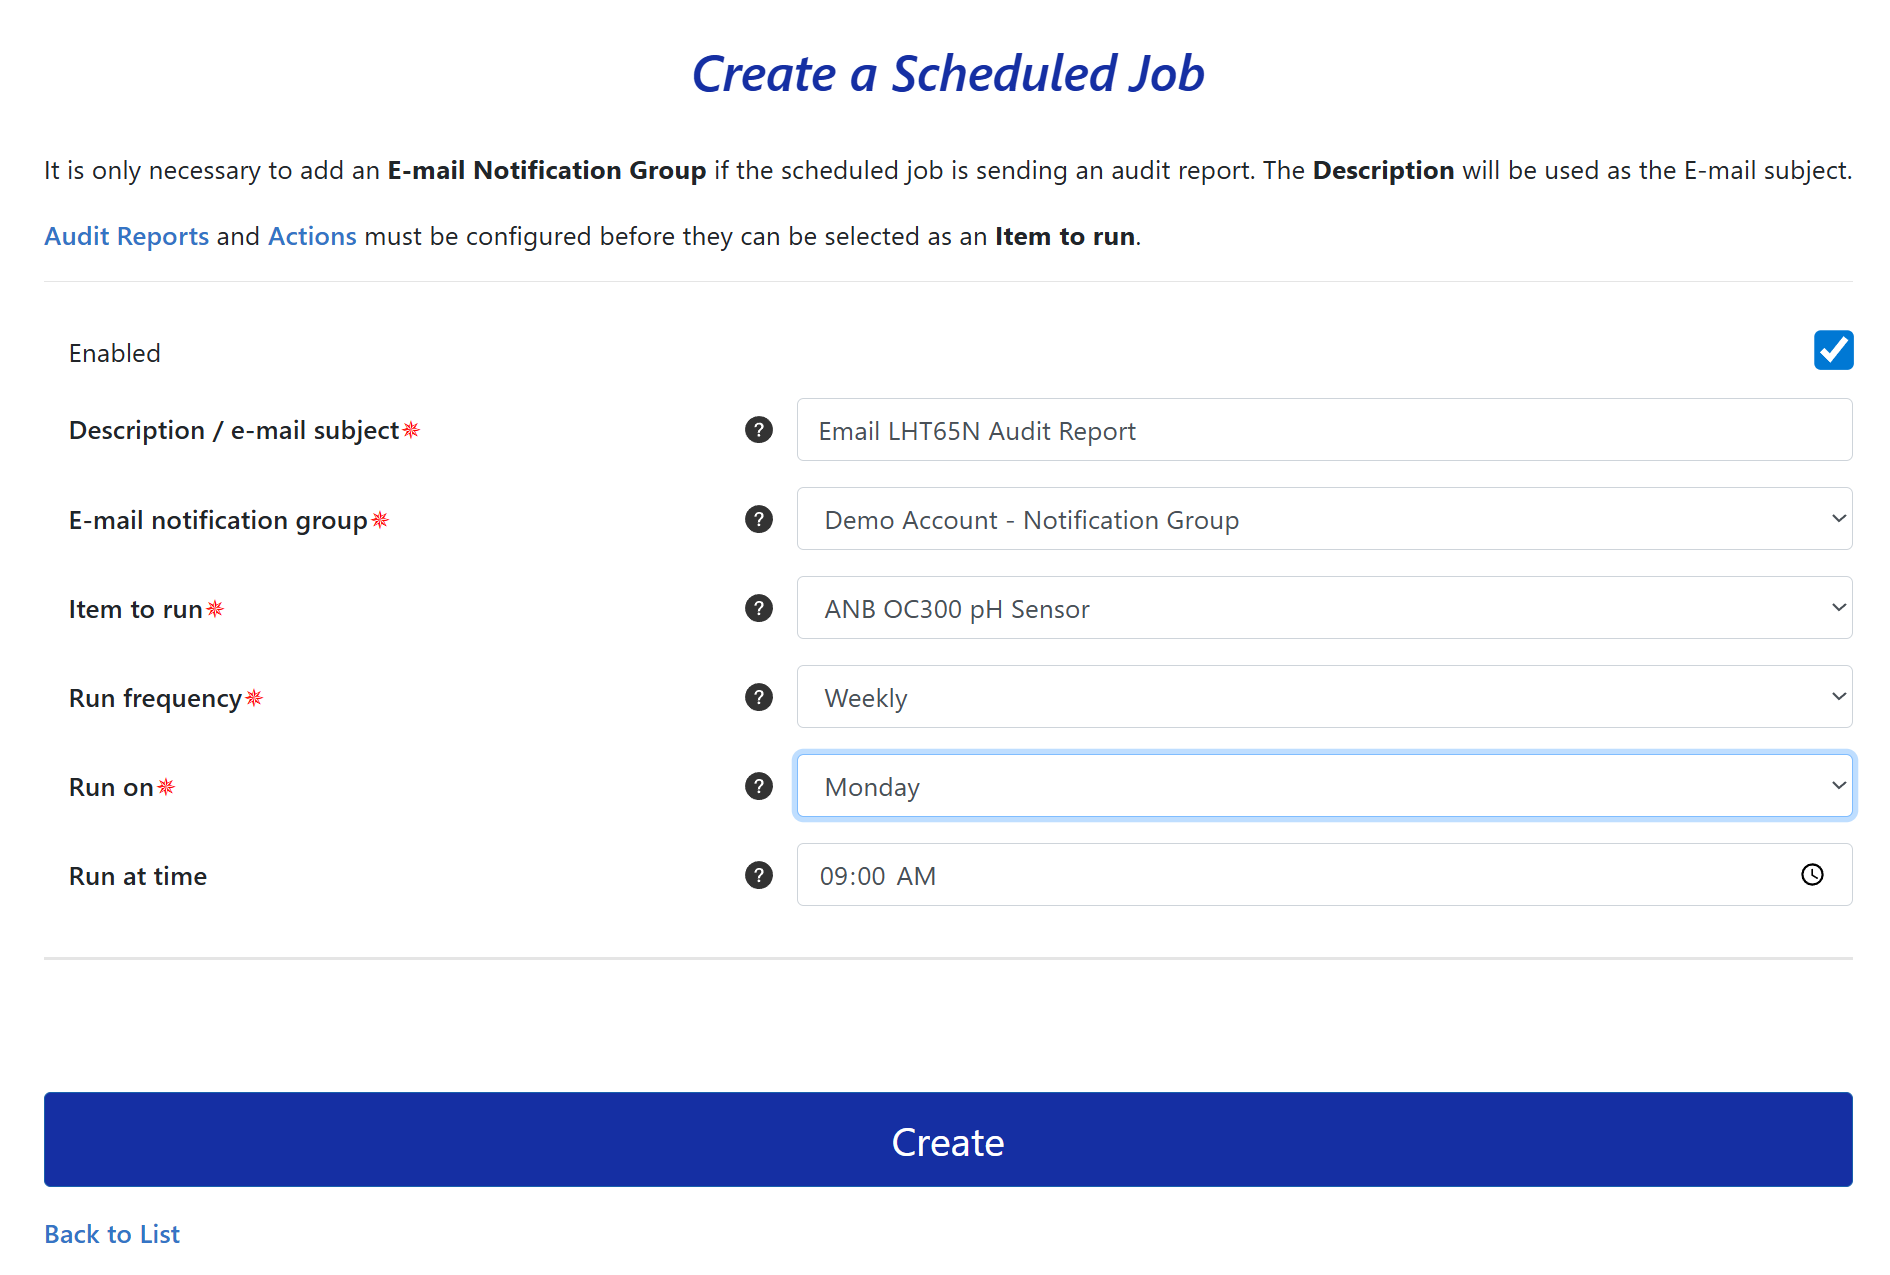
Use the sidebar to open Audit Maintenance > Create Audit Report Schedule. This opens the Scheduled Jobs area. Select Schedule a New Job to create the delivery schedule. You can also use Schedule Report from the Audit Reports page.
- Confirm that the Enabled checkbox is selected.
- Enter a Description / e-mail subject. This text becomes the email subject.
- Select the E-mail notification group that contains the intended recipients.
- Confirm that the selected Notification Group has been configured correctly.
- Under Item to run, select the Audit Report created in the earlier steps.
- Select the required Run frequency.
- Select the day or other frequency-specific option under Run on.
- Set the Run at time value.
- Select Create.
After the Scheduled Job is created, Telemetry2U emails the selected Audit Report to the members of the attached Notification Group according to the configured frequency, day and time.