Configure Dragino LTE-M and NB-IoT Sensors for Telemetry2U
Configure a Dragino CB or CS cellular sensor, connect it to the Telemetry2U server, set its reporting interval, register the device and create a dashboard. The tested command sequence below selects LTE-M for an Australian 1NCE deployment.
Prepare the Device, SIM and Account
Many Dragino models ending in -CB or -CS share the same basic cellular configuration workflow. Sensor inputs, power arrangements, firmware options and payload formats still vary by model, so select the Telemetry2U device profile that matches the exact product.
This bulletin uses a 1NCE SIM with the APN iot.1nce.net. Another
compatible SIM, including Simbase, can be used by substituting its correct APN
and any operator-specific settings.
1NCE Connectivity Used in This Example
The tested LTE-M configuration uses a 1NCE IoT SIM and the
iot.1nce.net APN. Telemetry2U is listed in the
1NCE partner directory.
Use a nano SIM with LTE-M service and coverage at the installation location.
Have the 15-digit IMEI, Bluetooth password or PIN, and exact Dragino model available.
Use an Android device with the supported serial Bluetooth terminal application.
Use an account with permission to add nodes and create or edit dashboards.
Regional settings: the operator and band commands in this bulletin are the tested Australian LTE-M settings. Do not use those two commands unchanged in another country or on a different mobile network.
1. Install the SIM and Connect over Bluetooth
Install the SIM before activating the sensor, then open the device's Bluetooth console. The Bluetooth radio is normally available for a limited period after activation, reset or a manual uplink.
- Remove power or place the device in its inactive state before inserting the nano SIM.
- Confirm the SIM is seated in the direction shown in the model-specific Dragino manual.
- Activate or reset the device. On many CB/CS models, hold the ACT button for more than three seconds.
- Open the serial Bluetooth terminal application and select Devices > Bluetooth LE.
- Select the Dragino device, connect and enter its Bluetooth password or PIN when requested.
For the complete application setup and connection sequence, see Connect to a Dragino Device with Serial Bluetooth Terminal.
2. Apply the Telemetry2U and LTE-M Settings
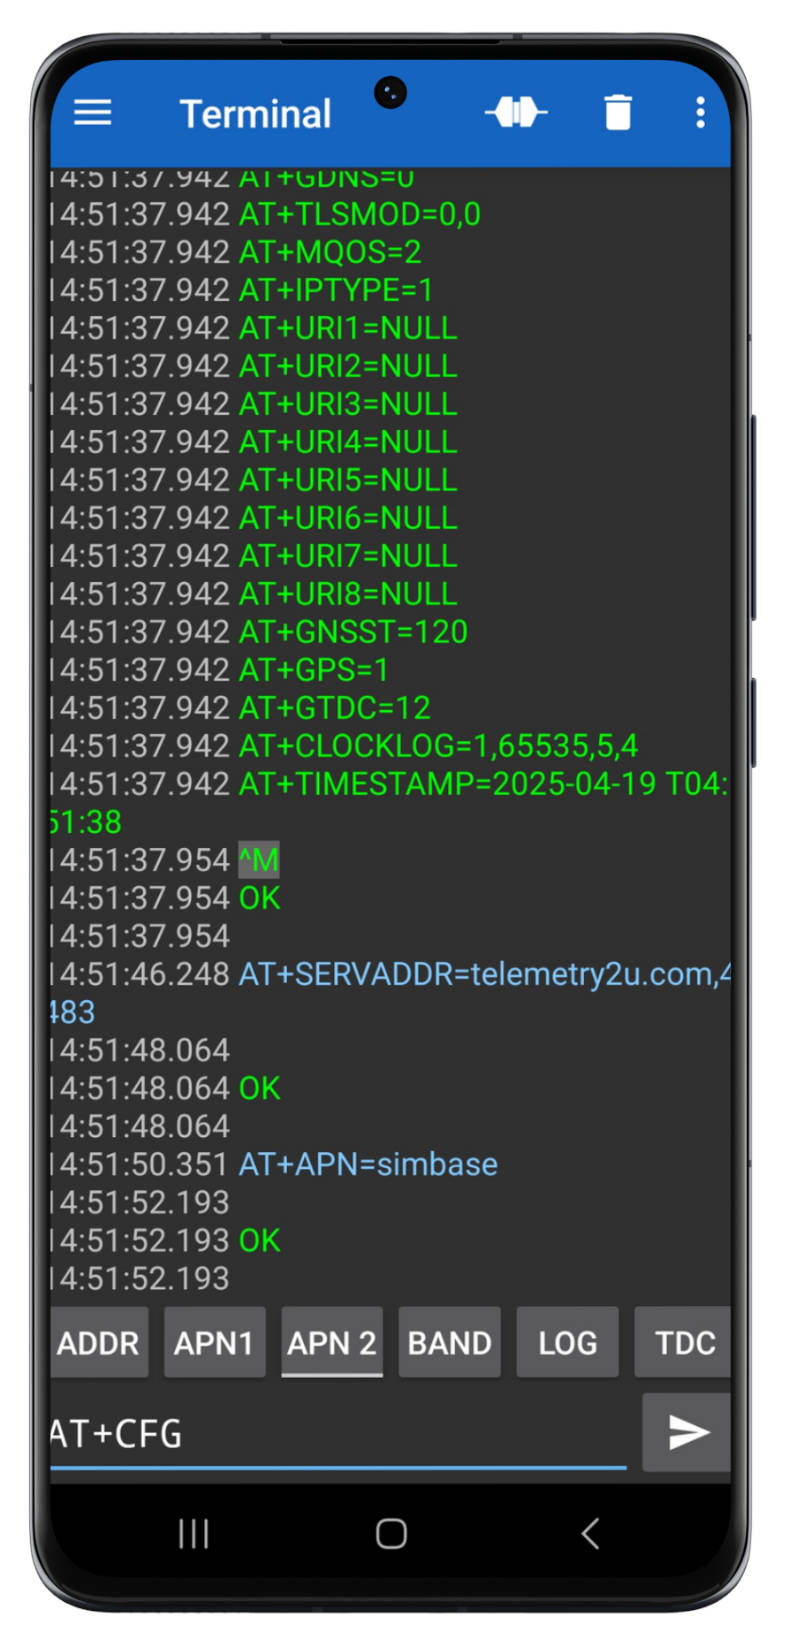
Enter the following commands in order. Wait for the expected response before sending the next command. The copy controls place only the command text on the clipboard.
Telemetry2U server and cellular settings
-
Sets the Telemetry2U server address and UDP port.
-
Sets the 1NCE access point name. Replace this value when another SIM provider requires a different APN.
-
Selects eMTC, commonly called CAT-M1 or LTE-M. Use the appropriate mode only when deliberately configuring NB-IoT instead.
-
Switches access to the cellular modem so the following modem-level commands can be applied.
-
Selects the specified Australian mobile network and LTE-M access technology.
-
Restricts the modem to the tested frequency-band configuration.
-
Restarts the device so the settings can take effect.
Confirm the Transport and Saved Configuration
Telemetry2U receives these direct cellular nodes through its UDP integration.
Where the device is not already configured for UDP with a hexadecimal payload,
apply the following transport command before the modem-level AT+QSW step.
— selects UDP transport with the hexadecimal payload format used by the matching Telemetry2U device profile.
After the restart, reconnect over Bluetooth and run:
— displays the current configuration so the server, APN, network mode and other saved values can be checked.
IMEI and DEUI: Telemetry2U node registration uses the device's 15-digit IMEI. A DEUI may also appear in the configuration output, but it is not entered in the IMEI field.
3. Set the Upload and Clock-Logging Behaviour
Choose between one current reading per transmission or multiple stored readings in each transmission. Longer reporting intervals and fewer cellular sessions can improve battery life, but they also increase the delay before new data appears.
Single Reading
Use this arrangement when Telemetry2U should receive one current reading at each transmission interval.
Disables stored clock records for the CB/CS firmware covered by this bulletin.
Sends a current reading every 1,800 seconds, or 30 minutes.
Batch Readings
Use this arrangement when the selected device profile supports timestamped historical records.
Records eight samples at 15-minute intervals after the device attaches to the network.
Uploads the stored group every 7,200 seconds, or two hours.
Important: use the exact clock-logging command supported by the installed firmware. The command shown for single readings follows the current CB/CS model manuals, which use zero for the sampling interval and record count to stop clock recording.
4. Add the Device to Telemetry2U
Register the device after its cellular settings have been saved. Telemetry2U uses the IMEI to associate incoming UDP data with the correct node and decoder.
- Sign in to Telemetry2U and open Admin > Node Maintenance.
- Select Add New Node.
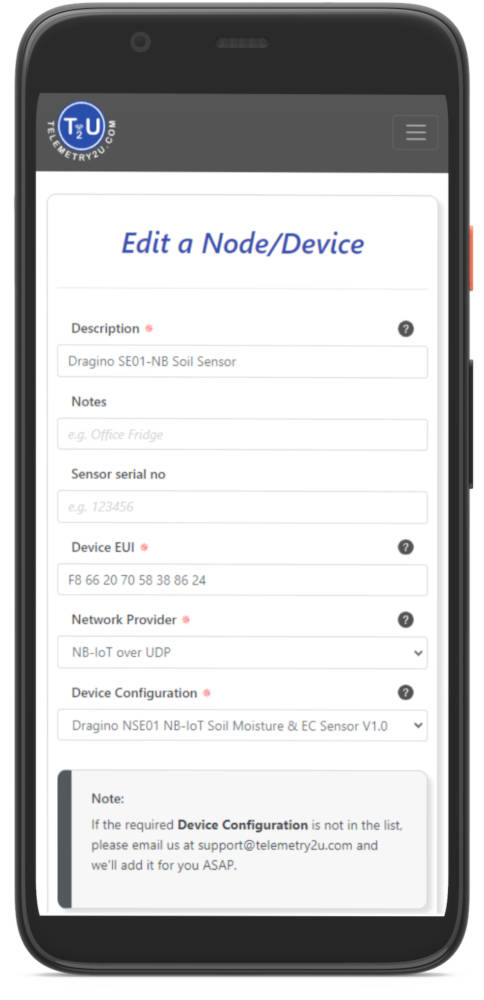
- Select NB-IoT over UDP as the network type.
- Select the device configuration that matches the exact Dragino model and payload format.
- Enter a clear node description.
- Enter the device's 15-digit IMEI, then save the node.
- Restart the sensor or trigger a manual uplink and allow it time to attach to the network.
Why the platform says NB-IoT: NB-IoT over UDP is the Telemetry2U network-type label for this direct cellular UDP integration. The radio itself remains in LTE-M mode when configured with AT+IOTMOD=0.
5. Confirm Data and Build the Dashboard
Confirm that a recent packet has been received before building the dashboard. If the node is online but its values are missing or incorrect, check the selected device configuration before changing the dashboard.
- Open Node Maintenance or the relevant data page and confirm that the node has received a recent packet.
- Open Dashboards and select Create New.
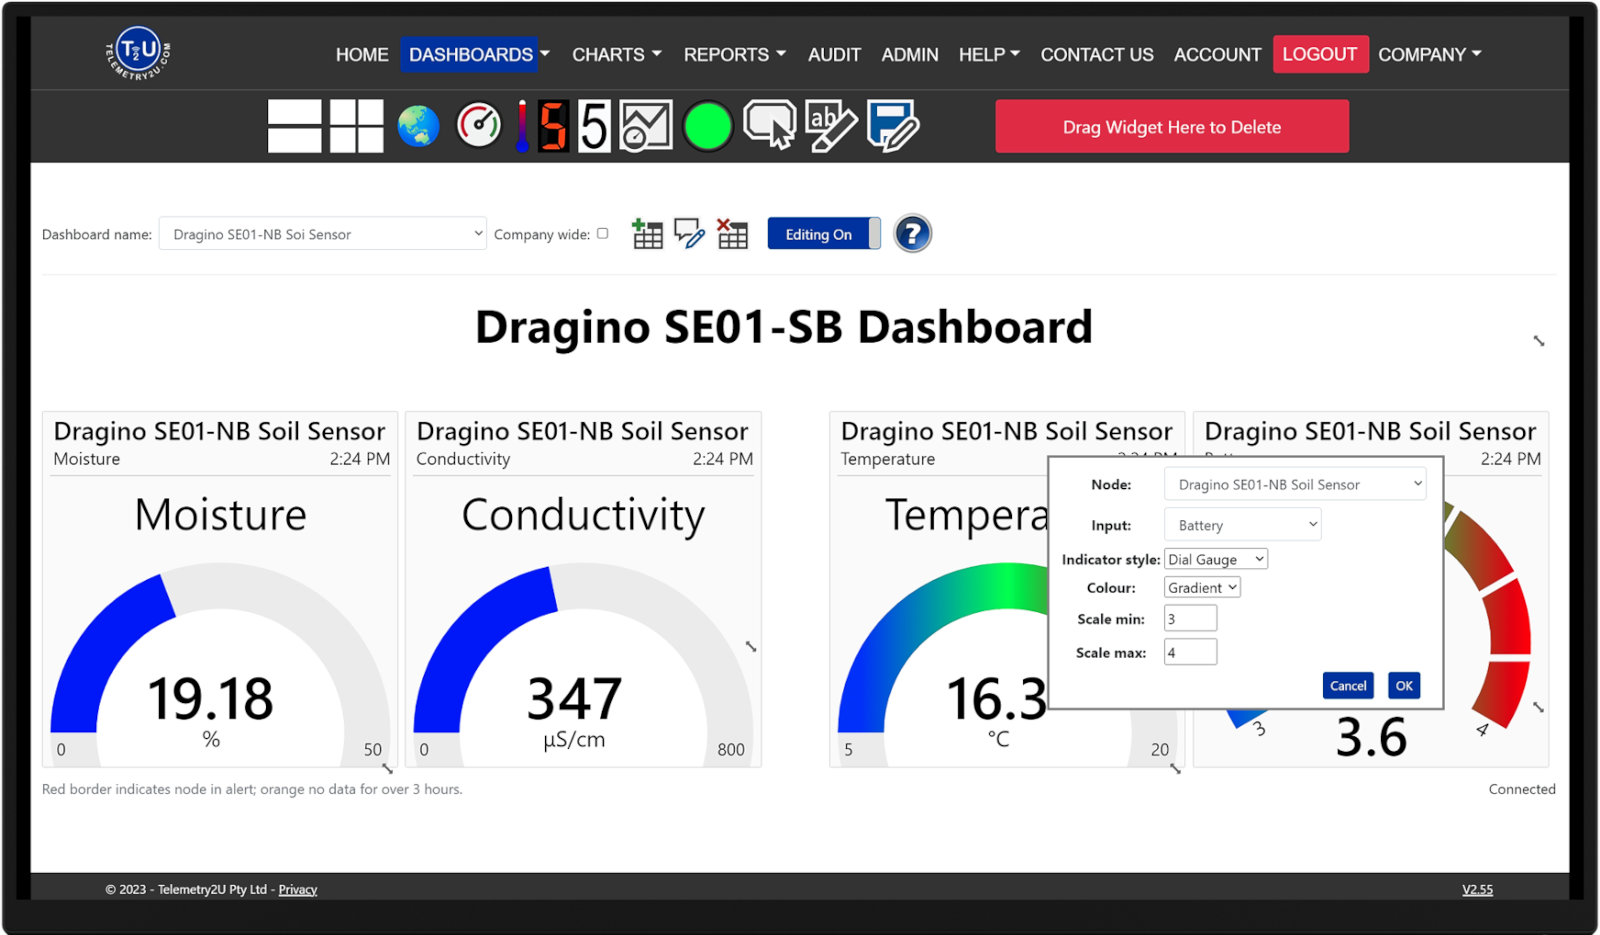
- Enter edit mode and add the required widgets.
- Open each widget's settings and select the new node and input.
- Set labels, units, ranges and display options as required.
- Save the dashboard. Enable Company Wide only when all account users should be able to access it.
Troubleshooting Checklist
- No recent packet: verify the SIM is active, the APN is correct, LTE-M coverage is available and the device has restarted after configuration.
- Unable to attach: recheck the operator and band commands, particularly when the installation is outside the tested Australian network.
- Packets arrive under no node: confirm that the IMEI entered in Telemetry2U exactly matches the device.
- Values are missing or incorrect: select the exact Dragino device profile and confirm that its payload format matches the device configuration.
- Bluetooth is unavailable: activate, reset or manually trigger the device to wake Bluetooth, then reconnect promptly.