How to Set Up Temperature Monitoring with Voice Alerts
Configure 24-hour email and SMS notifications, then add an after-hours voice-call escalation path for temperature excursions. This example uses a Dragino LTC2-SI LoRaWAN RTD temperature sensor and an 8.0°C high-temperature alert.
Add After-Hours Escalation to Temperature Monitoring
Telemetry2U notification groups control which registered users receive each alert channel and when that channel is active. Separating email, SMS and voice into three groups provides independent scheduling and recipient control.
In this example, email and SMS notifications remain active at all times. Voice calls are restricted to the overnight period from 6:00 PM to 7:00 AM. Each call must be acknowledged by pressing 1. If the first recipient does not answer or acknowledge the call, Telemetry2U escalates it to the next configured priority.
Your Telemetry2U subscription must include SMS and voice alert services.
Your user account requires both Company Admin and Alert Admin access.
A configured temperature sensor must be reporting through a private gateway, Helium or a supported integration such as The Things Stack.
Every email, SMS or voice recipient must be registered under the company account.
Example hardware: Dragino LTC2-SI LoRaWAN RTD temperature sensor. The same notification-group process can be used with other supported sensors and inputs.
1. Create the Email and SMS Notification Groups
Sign in to Telemetry2U and open Admin > Notification Groups. Create one group for email and a second group for SMS so each channel can be managed independently.
Email 24/7 Group
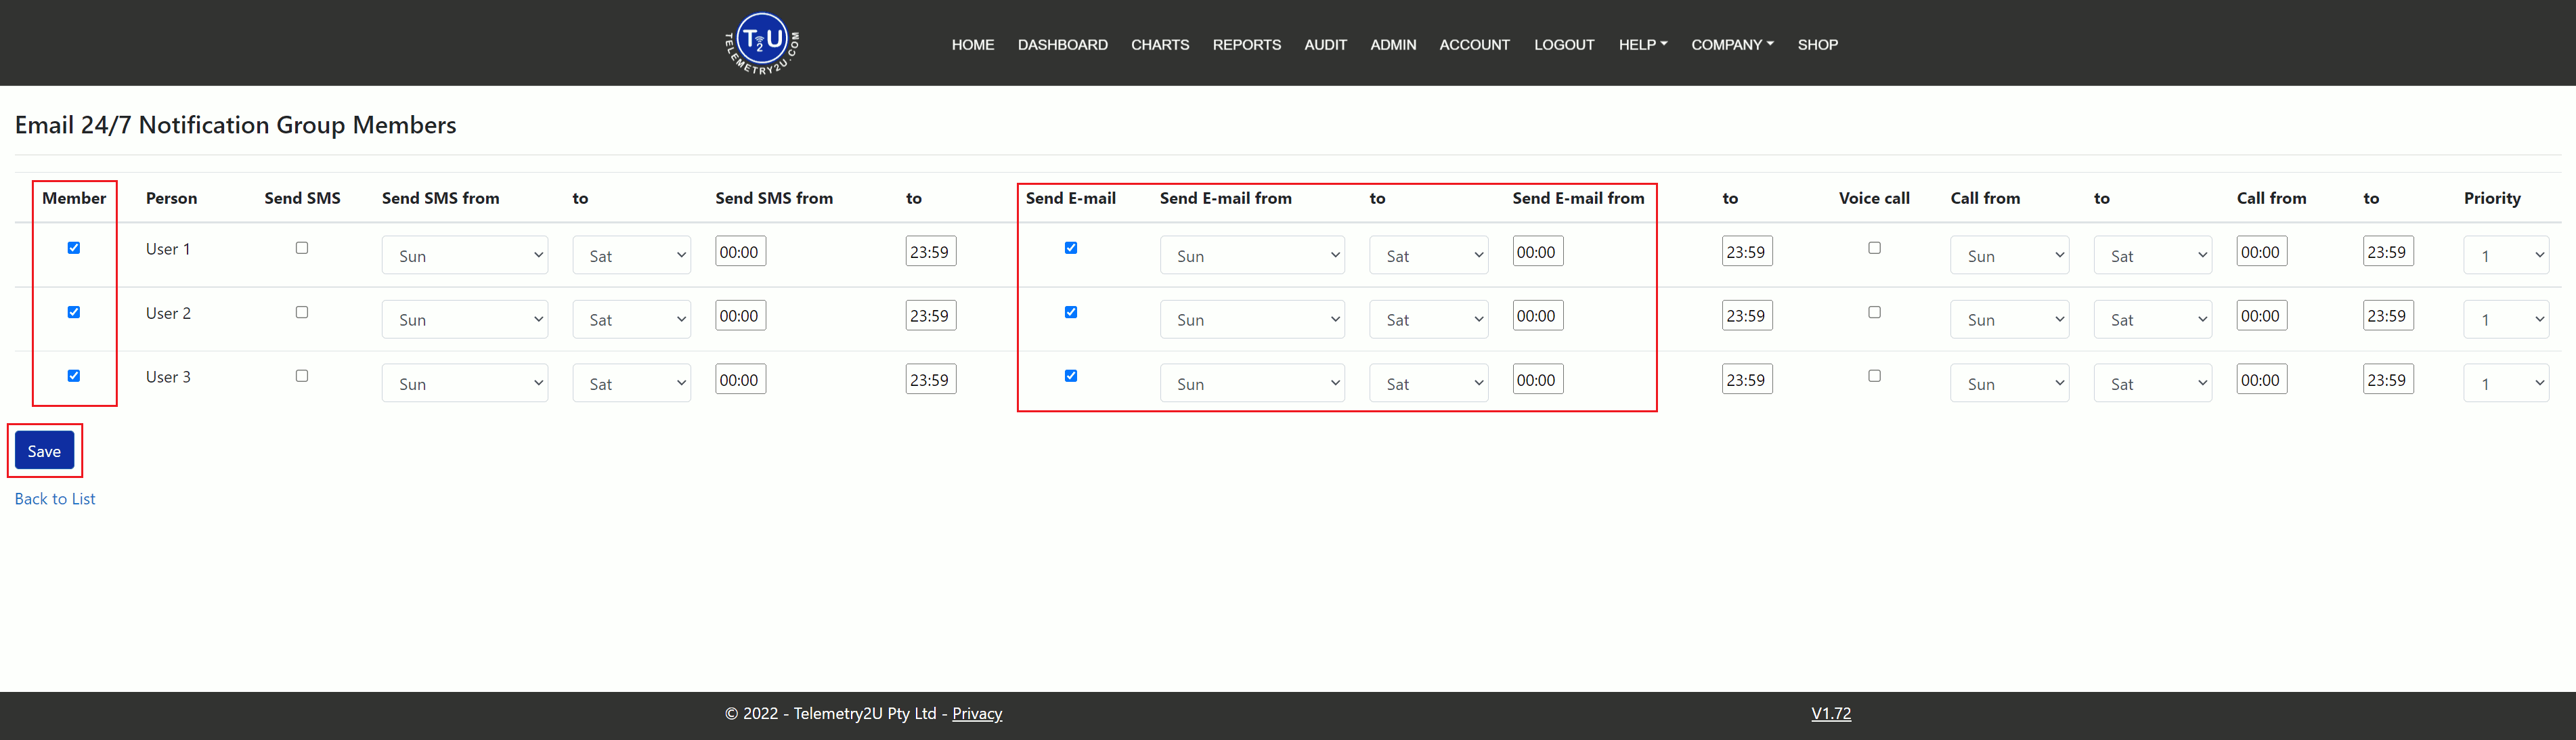
- Select Create New.
- Enter
Email 24/7as the group description and select Create. - Select the required members.
- Enable Send Email for each recipient.
- Confirm the email schedule covers the full week, then select Save.
SMS 24/7 Group
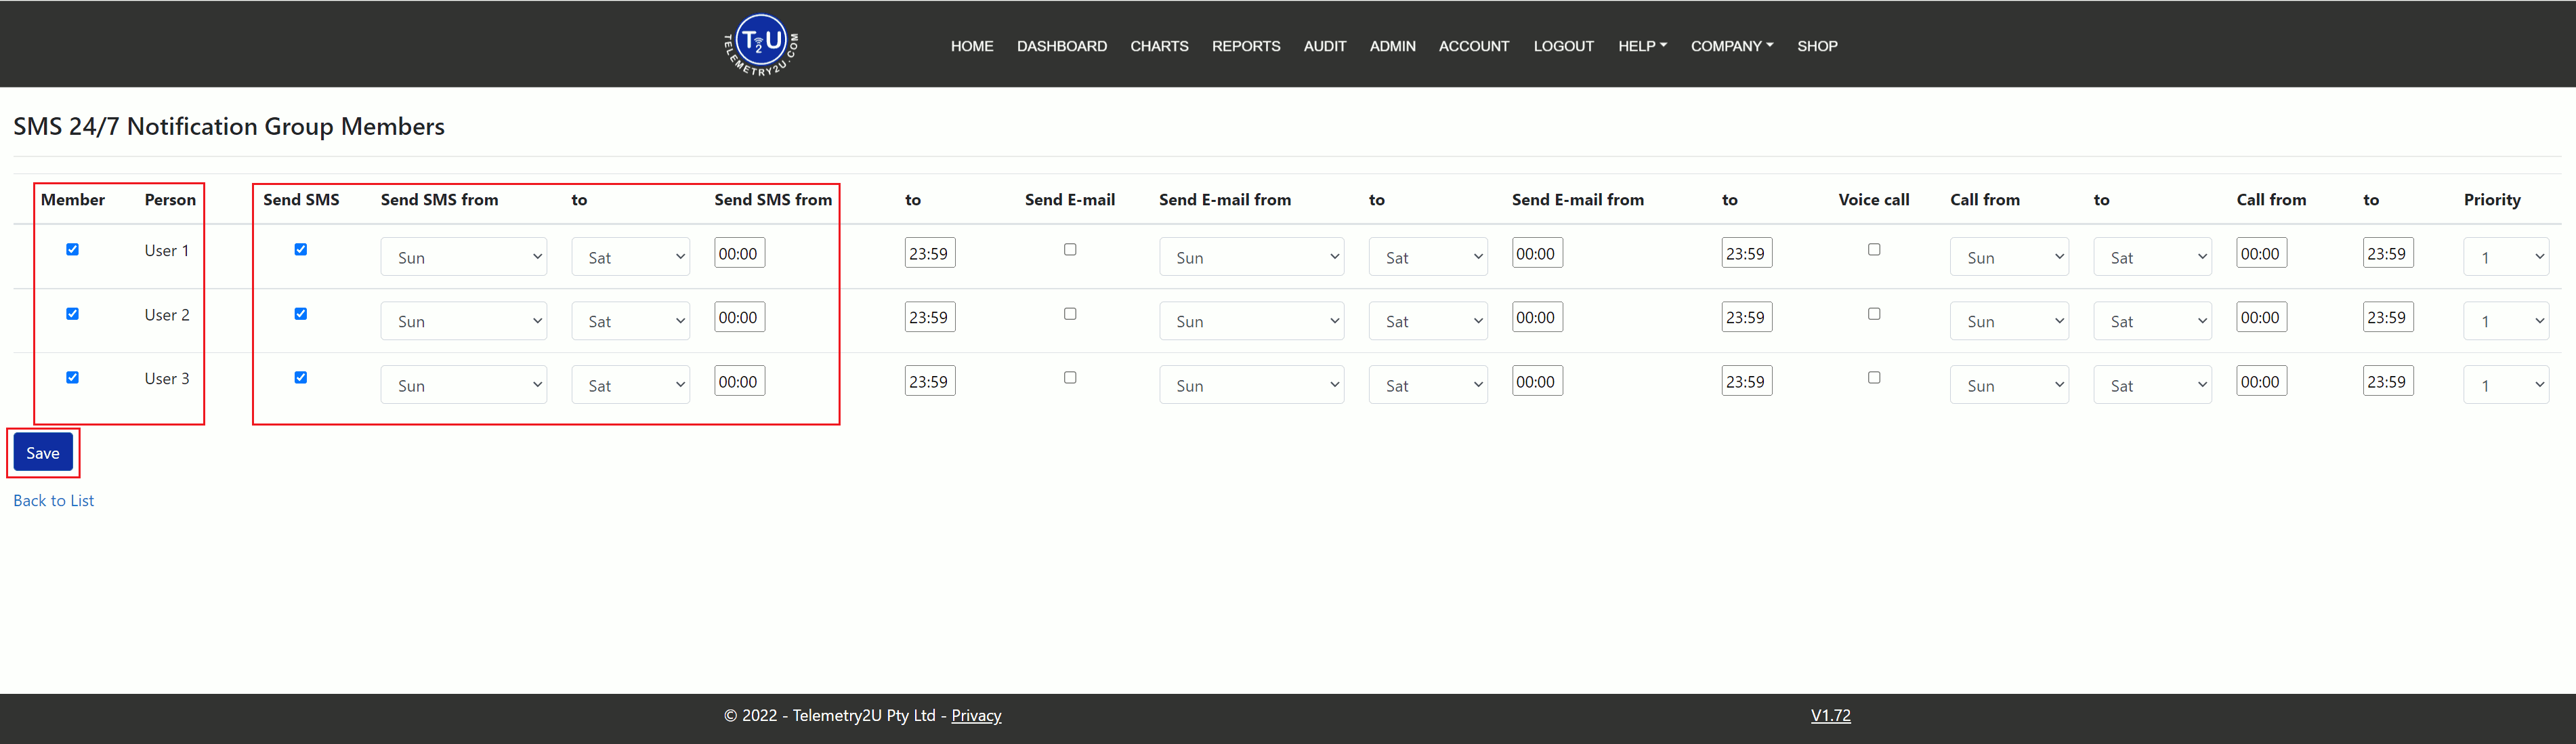
- Return to the Notification Groups list and select Create New.
- Enter
SMS 24/7as the group description and select Create. - Select the required members.
- Enable Send SMS for each recipient.
- Confirm the SMS schedule covers the full week, then select Save.
2. Configure the After-Hours Voice Notification Group
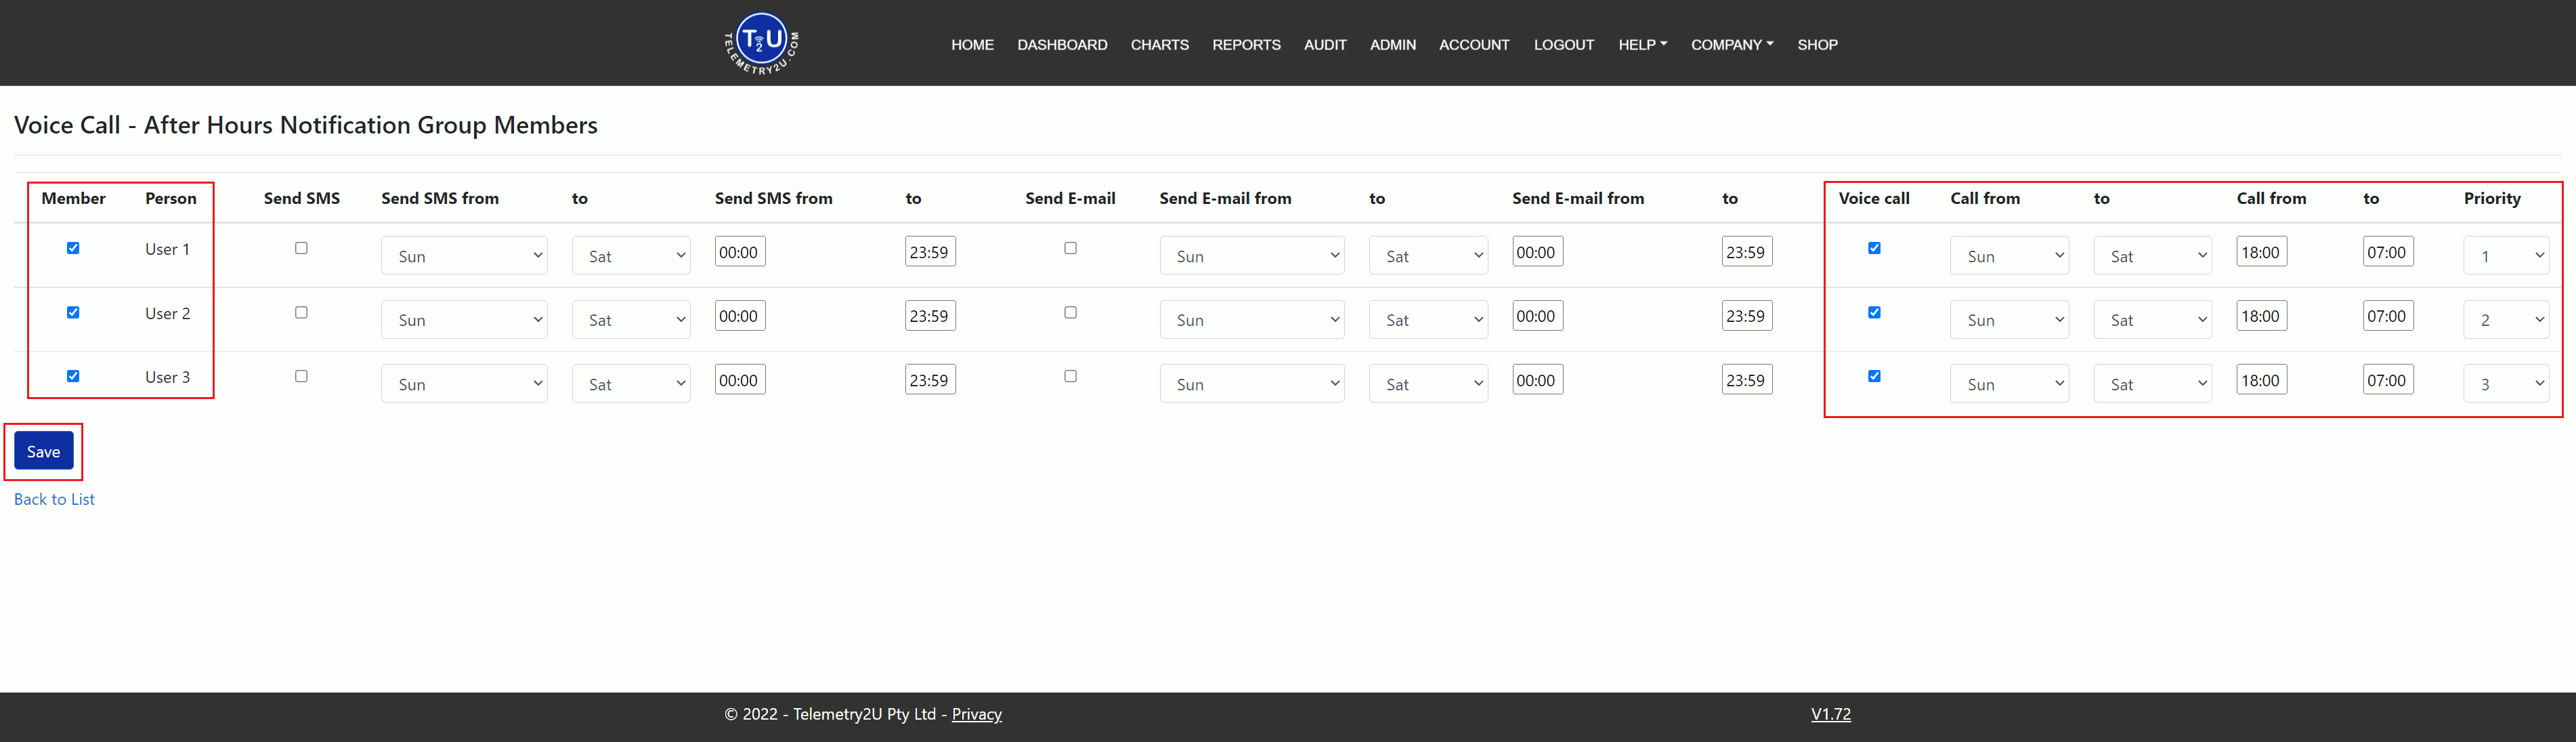
Create a third notification group for automated voice calls. The time filter limits calls to the overnight period, while the priority value controls the escalation order between as many as three recipients.
- From Admin > Notification Groups, select Create New.
- Enter
Voice Call – After Hoursas the description and select Create. - Select each user who should receive an automated call.
- Enable Voice Alert for those users.
- Set Start Day to Sunday and End Day to Saturday.
- Set Start Time to
18:00and End Time to07:00. - Assign each voice recipient a unique Priority from 1 to 3.
- Select Save.
Voice acknowledgement: the recipient must press 1 during the call. An unanswered call, voicemail or call without acknowledgement is escalated to the next person in the configured priority order.
Time format: enter notification times using the 24-hour clock.
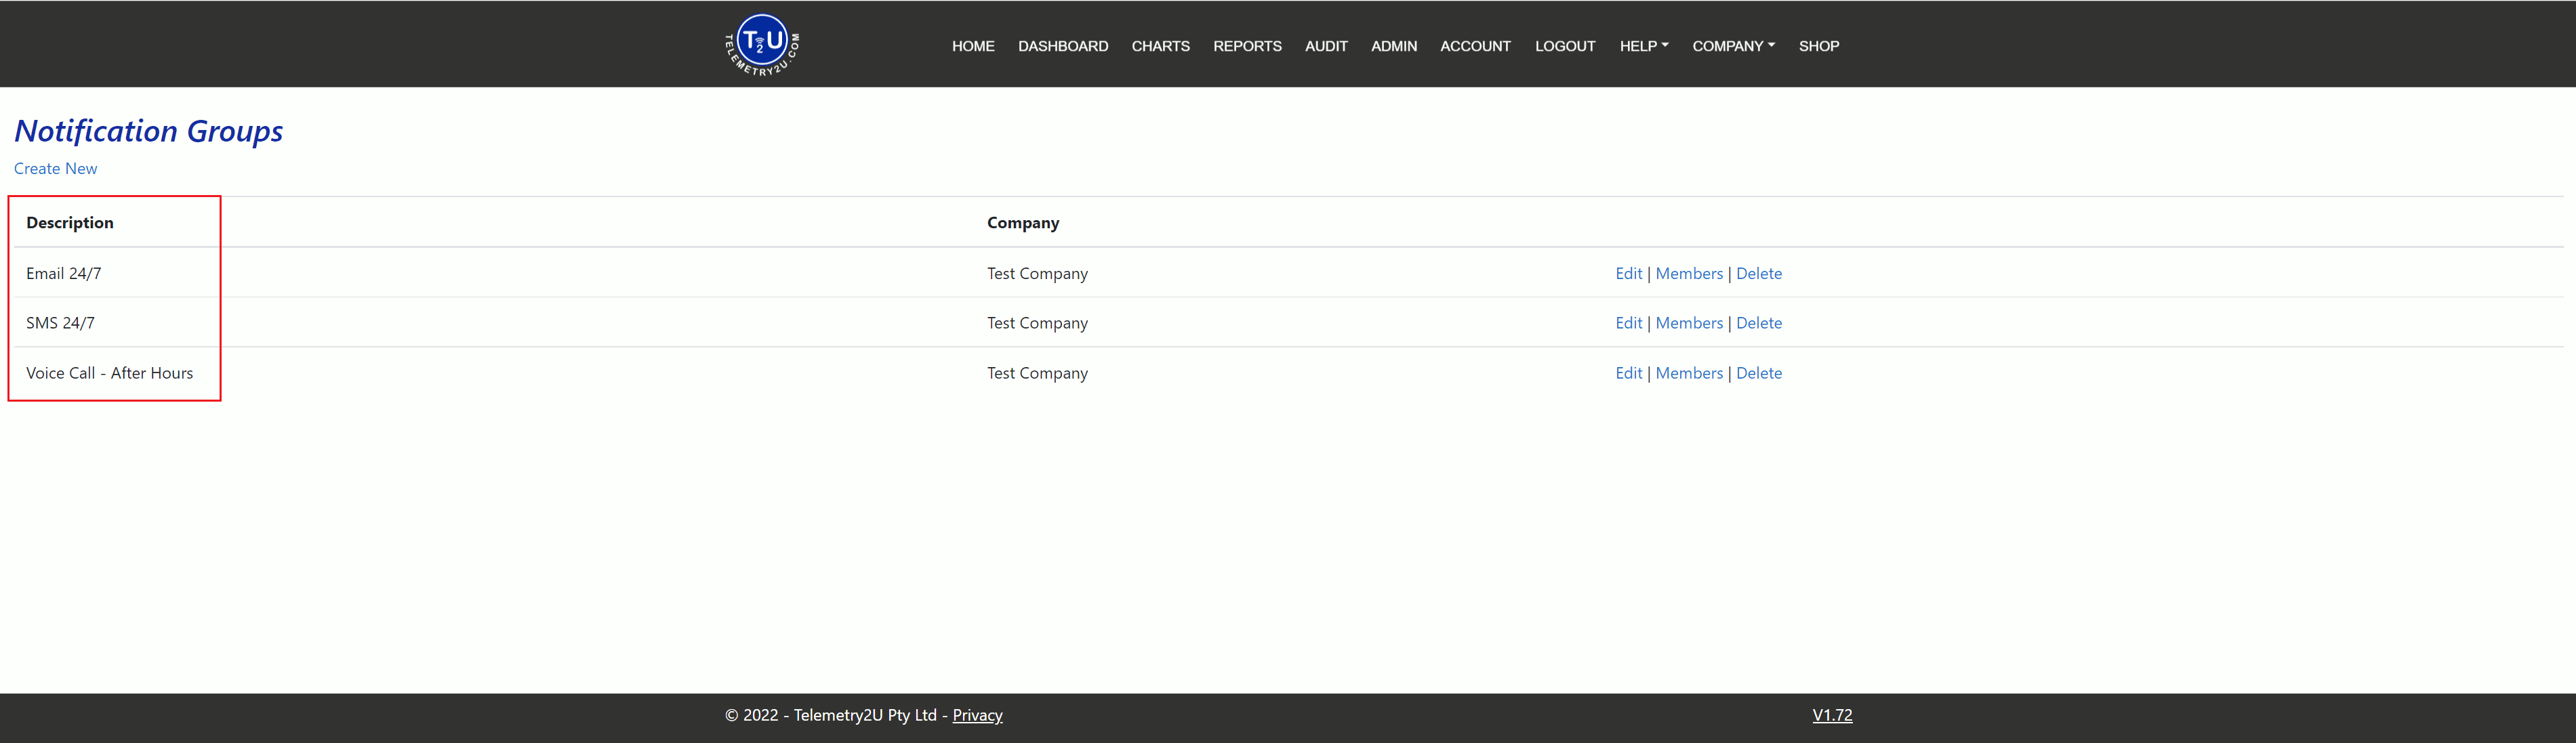
Return to the Notification Groups list and confirm that the three groups are present before creating the temperature alert.
3. Create the Temperature Alert and Assign All Three Groups
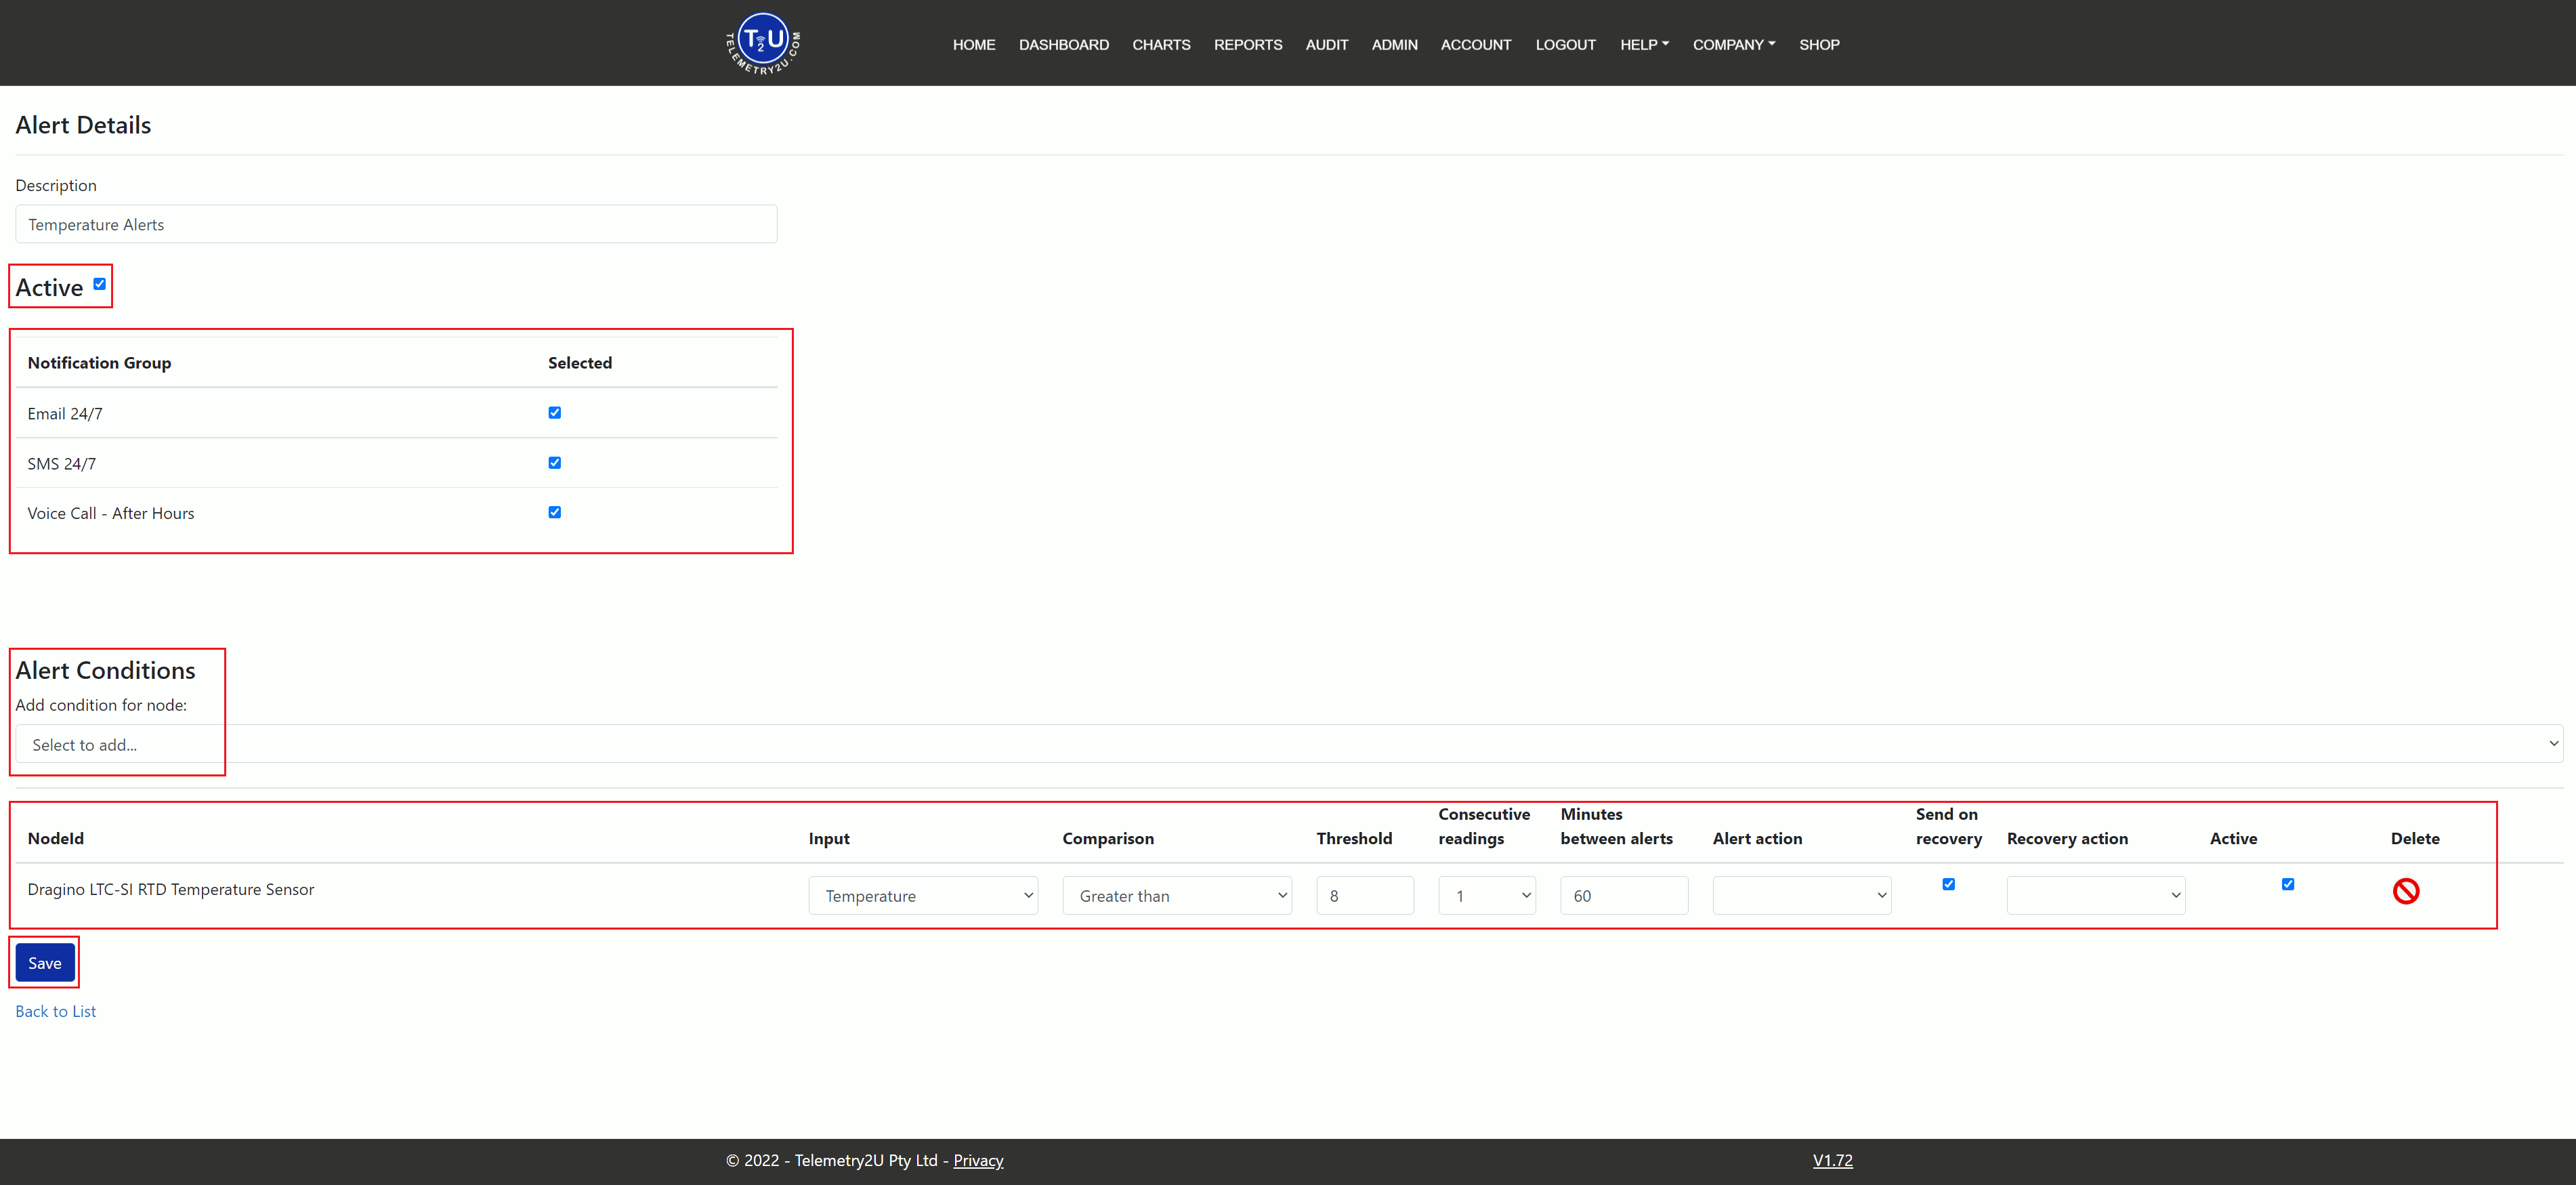
Open Admin > Alert Maintenance, select Create New, enter a clear description and save it to open the alert configuration page. The following example triggers when the external temperature exceeds 8.0°C.
In the Alert Conditions section, configure:
- Input: Temperature
- Comparison: Greater Than
- Threshold: 8
- Consecutive Readings: 1
- Minutes Between Alerts: 60
- Alert Action: Leave blank
- Send on Recovery: Checked
- Recovery Action: Leave blank
- Active: Checked
In the notification-group list, select Email 24/7,
SMS 24/7 and Voice Call – After Hours, then select
Save to complete the alert.
The 8.0°C threshold is an example. Set the threshold, consecutive-reading validation and repeat interval to suit the monitored asset and your approved response procedure.
4. Confirm the Alert and Escalation Behaviour
With the example configuration saved, a qualifying temperature excursion sends email and SMS notifications at any time. During the configured overnight window, Telemetry2U also begins the priority-based voice-call sequence.
Sent through their 24/7 notification groups when the alert condition is confirmed.
Sent from 18:00 to 07:00 and escalated by priority until a recipient acknowledges the call.
The recipient presses 1 during the automated call to acknowledge the alert.
Sent when the monitored input returns to its configured normal condition.
Checks When a Notification Is Not Received
- Confirm that each recipient is registered under the correct Telemetry2U company account.
- Confirm that users are selected in the intended notification groups.
- Check that each required channel is enabled for the individual recipient.
- Verify the email address and mobile number recorded for each user.
- Enter phone numbers in international format, such as
+61followed by the Australian number without its leading zero. - Confirm that the voice time filter includes the current day and time.
- Confirm that the alert is active and that all three notification groups are selected.