How to Create a Temporary User Account
Create a managed login for a technician, contractor or other temporary user without relying on an invitation email, then limit the account to the exact data and platform functions required.
Create Controlled Access Without a Working Login Email
A Company Admin can register a Telemetry2U account on another person's behalf, link it to the correct company and configure its access before sharing the login. The login address must be unique and formatted like an email address, but it does not need to receive email.
This is useful when a facility needs to provide short-term access to a technician completing temperature verification, calibration or other service work. The same method can also be used for a controlled shared-purpose account that remains under administrator management.
You must be able to create users and configure User Access settings.
Prepare a unique placeholder login and a password that is not reused elsewhere.
Important: A placeholder login cannot receive password-reset or account emails. Use this method only when the account will remain administrator-managed, and do not use an address that may belong to another person.
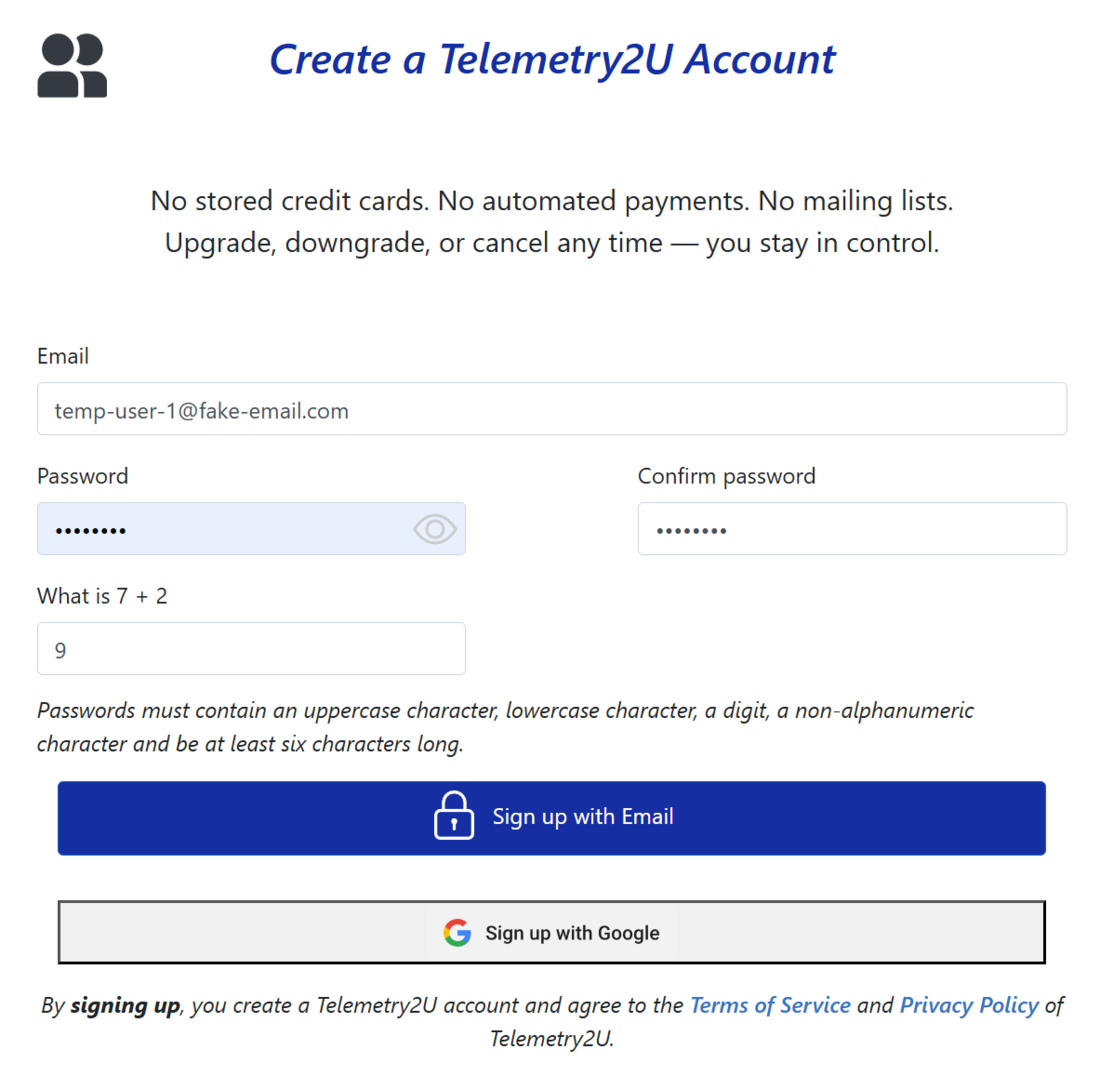
1. Register the Placeholder Account
Create the login before adding the user to the company. A private browser window lets you complete the registration without ending your existing administrator session.
- Open Telemetry2U in a private or incognito browser window.
- Select Register from the top menu.
-
Enter a unique email-format login, such as
temp-user-01@example.com. The address does not need to be deliverable. - Create and confirm a secure password, then complete the on-screen verification.
- Select Sign up with Email. Do not use Google sign-up for a placeholder address.
You do not need to open a confirmation email. The account will be confirmed and linked automatically when it is added through Invite a New User in the next step.
2. Link the Account to the Correct Company
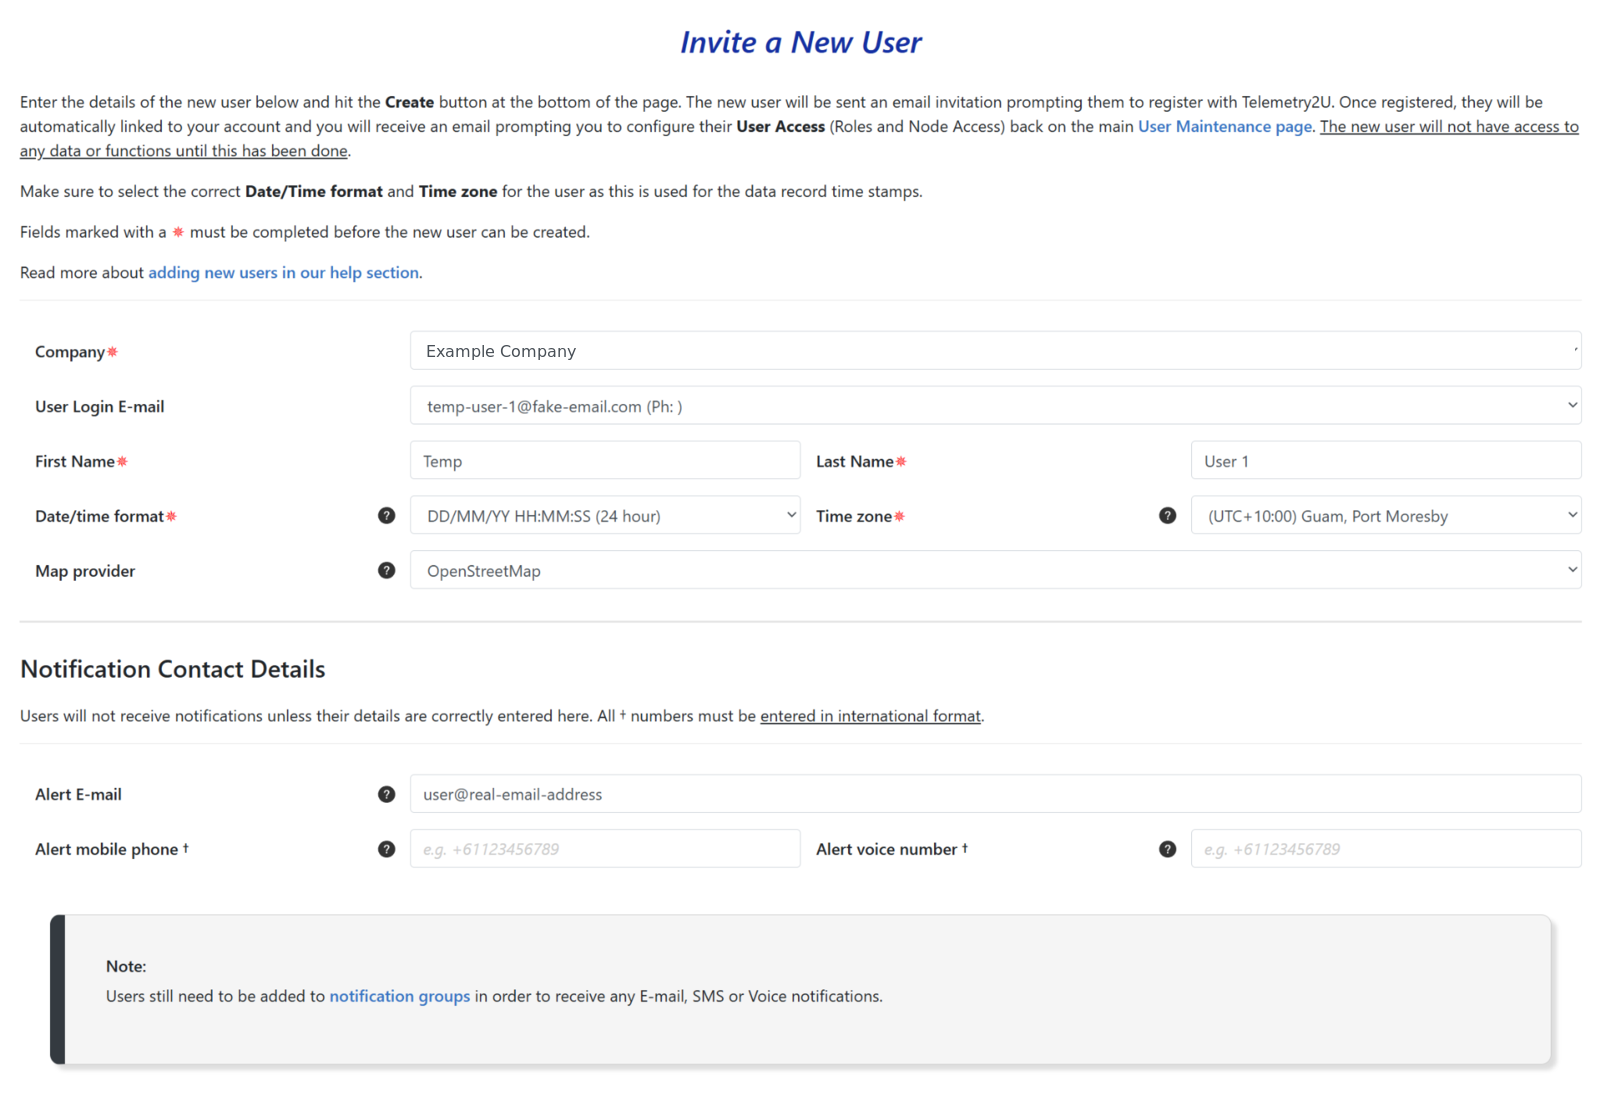
Return to your administrator session and add the newly registered login through User Maintenance. This links the account to the selected company without sending or relying on an invitation email.
- Open Admin, then select User Maintenance and Invite New User.
- Select the relevant company from the Company list.
- Select the placeholder account from User Login E-mail.
- Enter the user's first name and last name.
- Select the correct Date/time format, Time zone and Map provider.
- If the user needs notifications, enter a real address or phone number under Notification Contact Details. These details can be different from the login.
- Select Create at the bottom of the page.
The previously registered account is now confirmed and linked to the selected company. It will not have access to company data or functions until User Access has been configured.
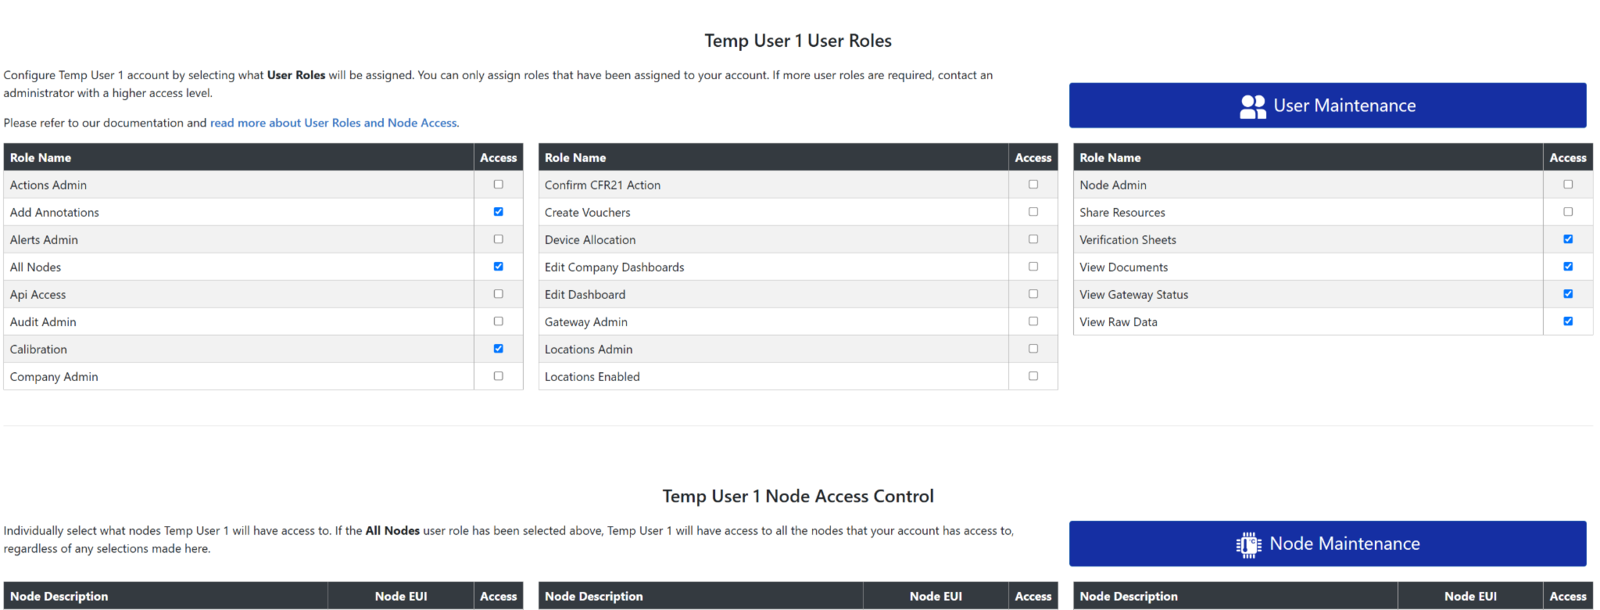
3. Configure User Roles and Node Access
Configure the account before giving the credentials to the temporary user. Assign only the roles and monitored nodes needed for the work being performed.
- Open the new user's User Access page from User Maintenance.
- Select the required roles under User Roles.
- Select the required devices under Node Access Control.
- Select Save to apply the access settings.
For a technician completing temperature verification, relevant roles may include Add Annotations, Calibration, Verification Sheets and View Documents, together with access to the specific nodes being serviced. Select only the permissions required by your organisation's procedure.
All Nodes: If this role is selected, the user can access every node available to the company account regardless of the individual selections under Node Access Control.
Notifications: Entering contact details does not subscribe the user to alerts. Add the user to the appropriate notification group if Email, SMS or voice notifications are required.